How To Build A Chicken Coop, Part 2
Welcome to Part 2 of my 3-part series detailing how we built our own chicken coop – and how you can, too! In Part 1 of the series, I went over the instructions for building the base and walls of your chicken coop. You can find that post here. In this post I will cover framing the nest box, putting on doors and windows, and probably the hardest part of building any structure: the roof.
When we were searching for directions to build our coop, I was so frustrated at the lack of information out there. Either you had to pay for plans that may or may not have what you needed, or there were no instructions at all to go with the photos I was finding. I knew that once our chicken coop was done, I wanted to share a very detailed post series to help others build their own coops, without charging anyone. That’s what I’ve tried to do here. That said, we are by no means experts! You will likely have to fill in some gaps on your own. Please feel free to comment with any questions you may have.
Let’s get started!
Framing Out Your Nest Box
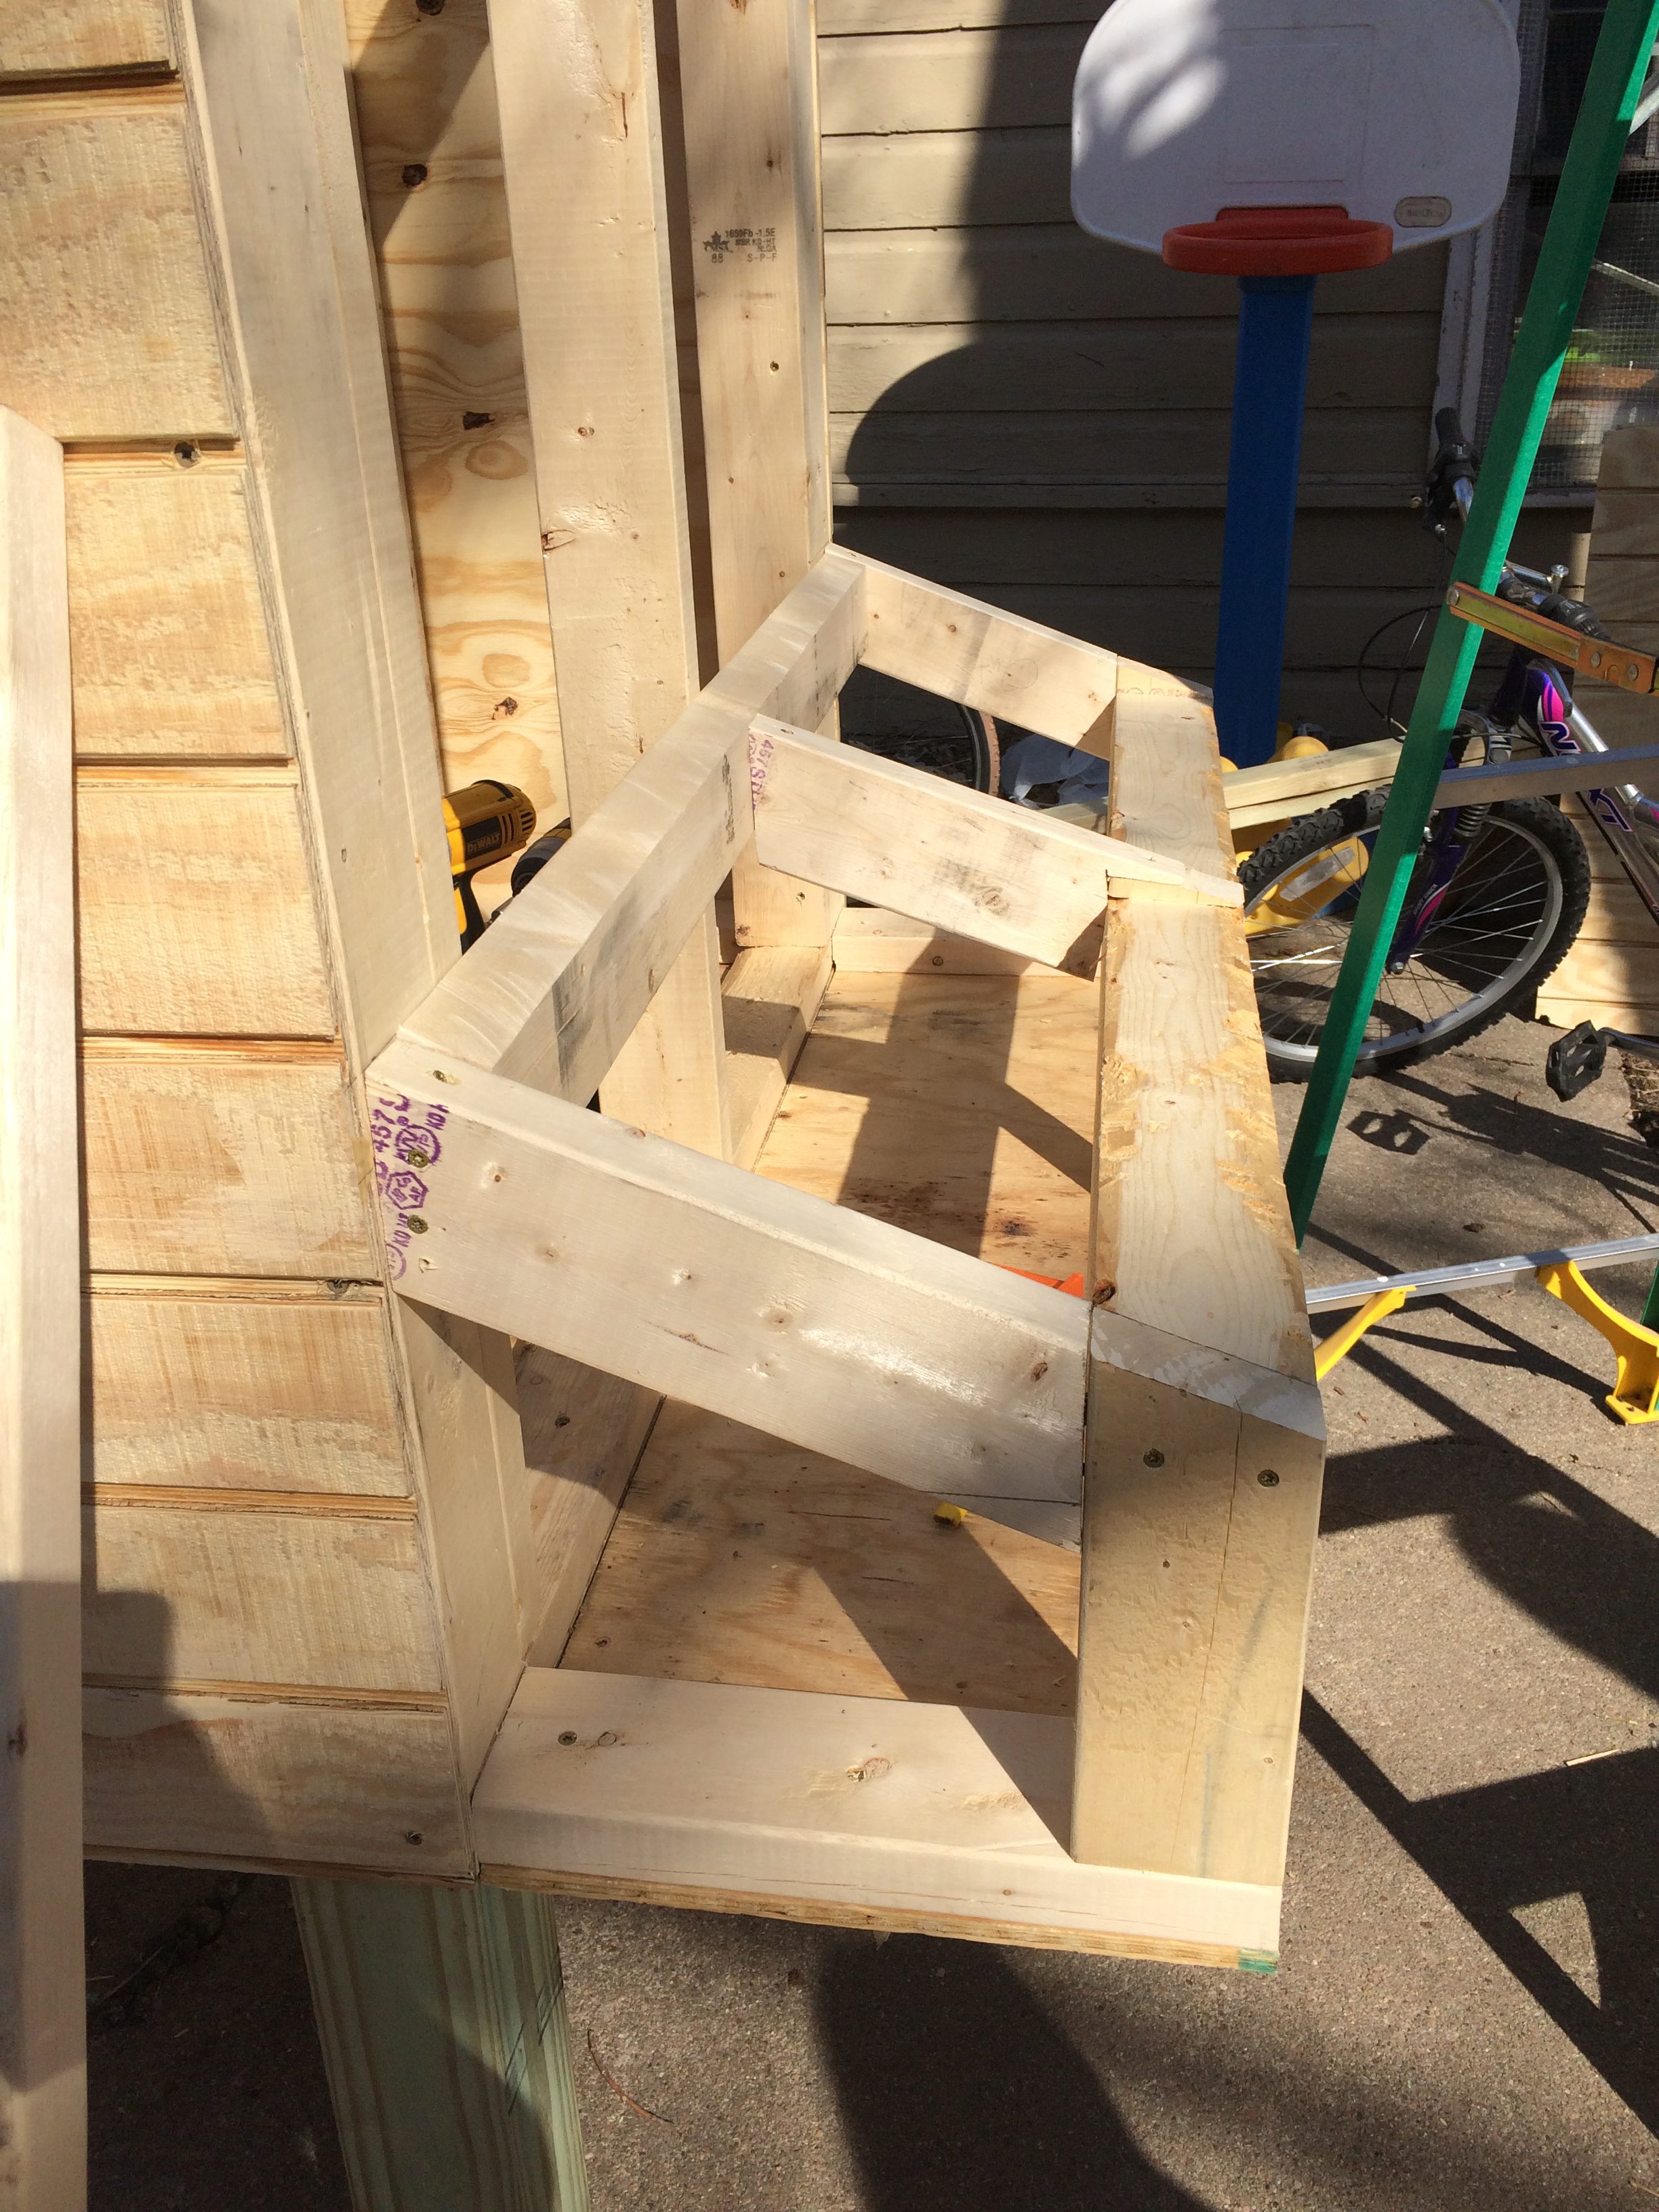
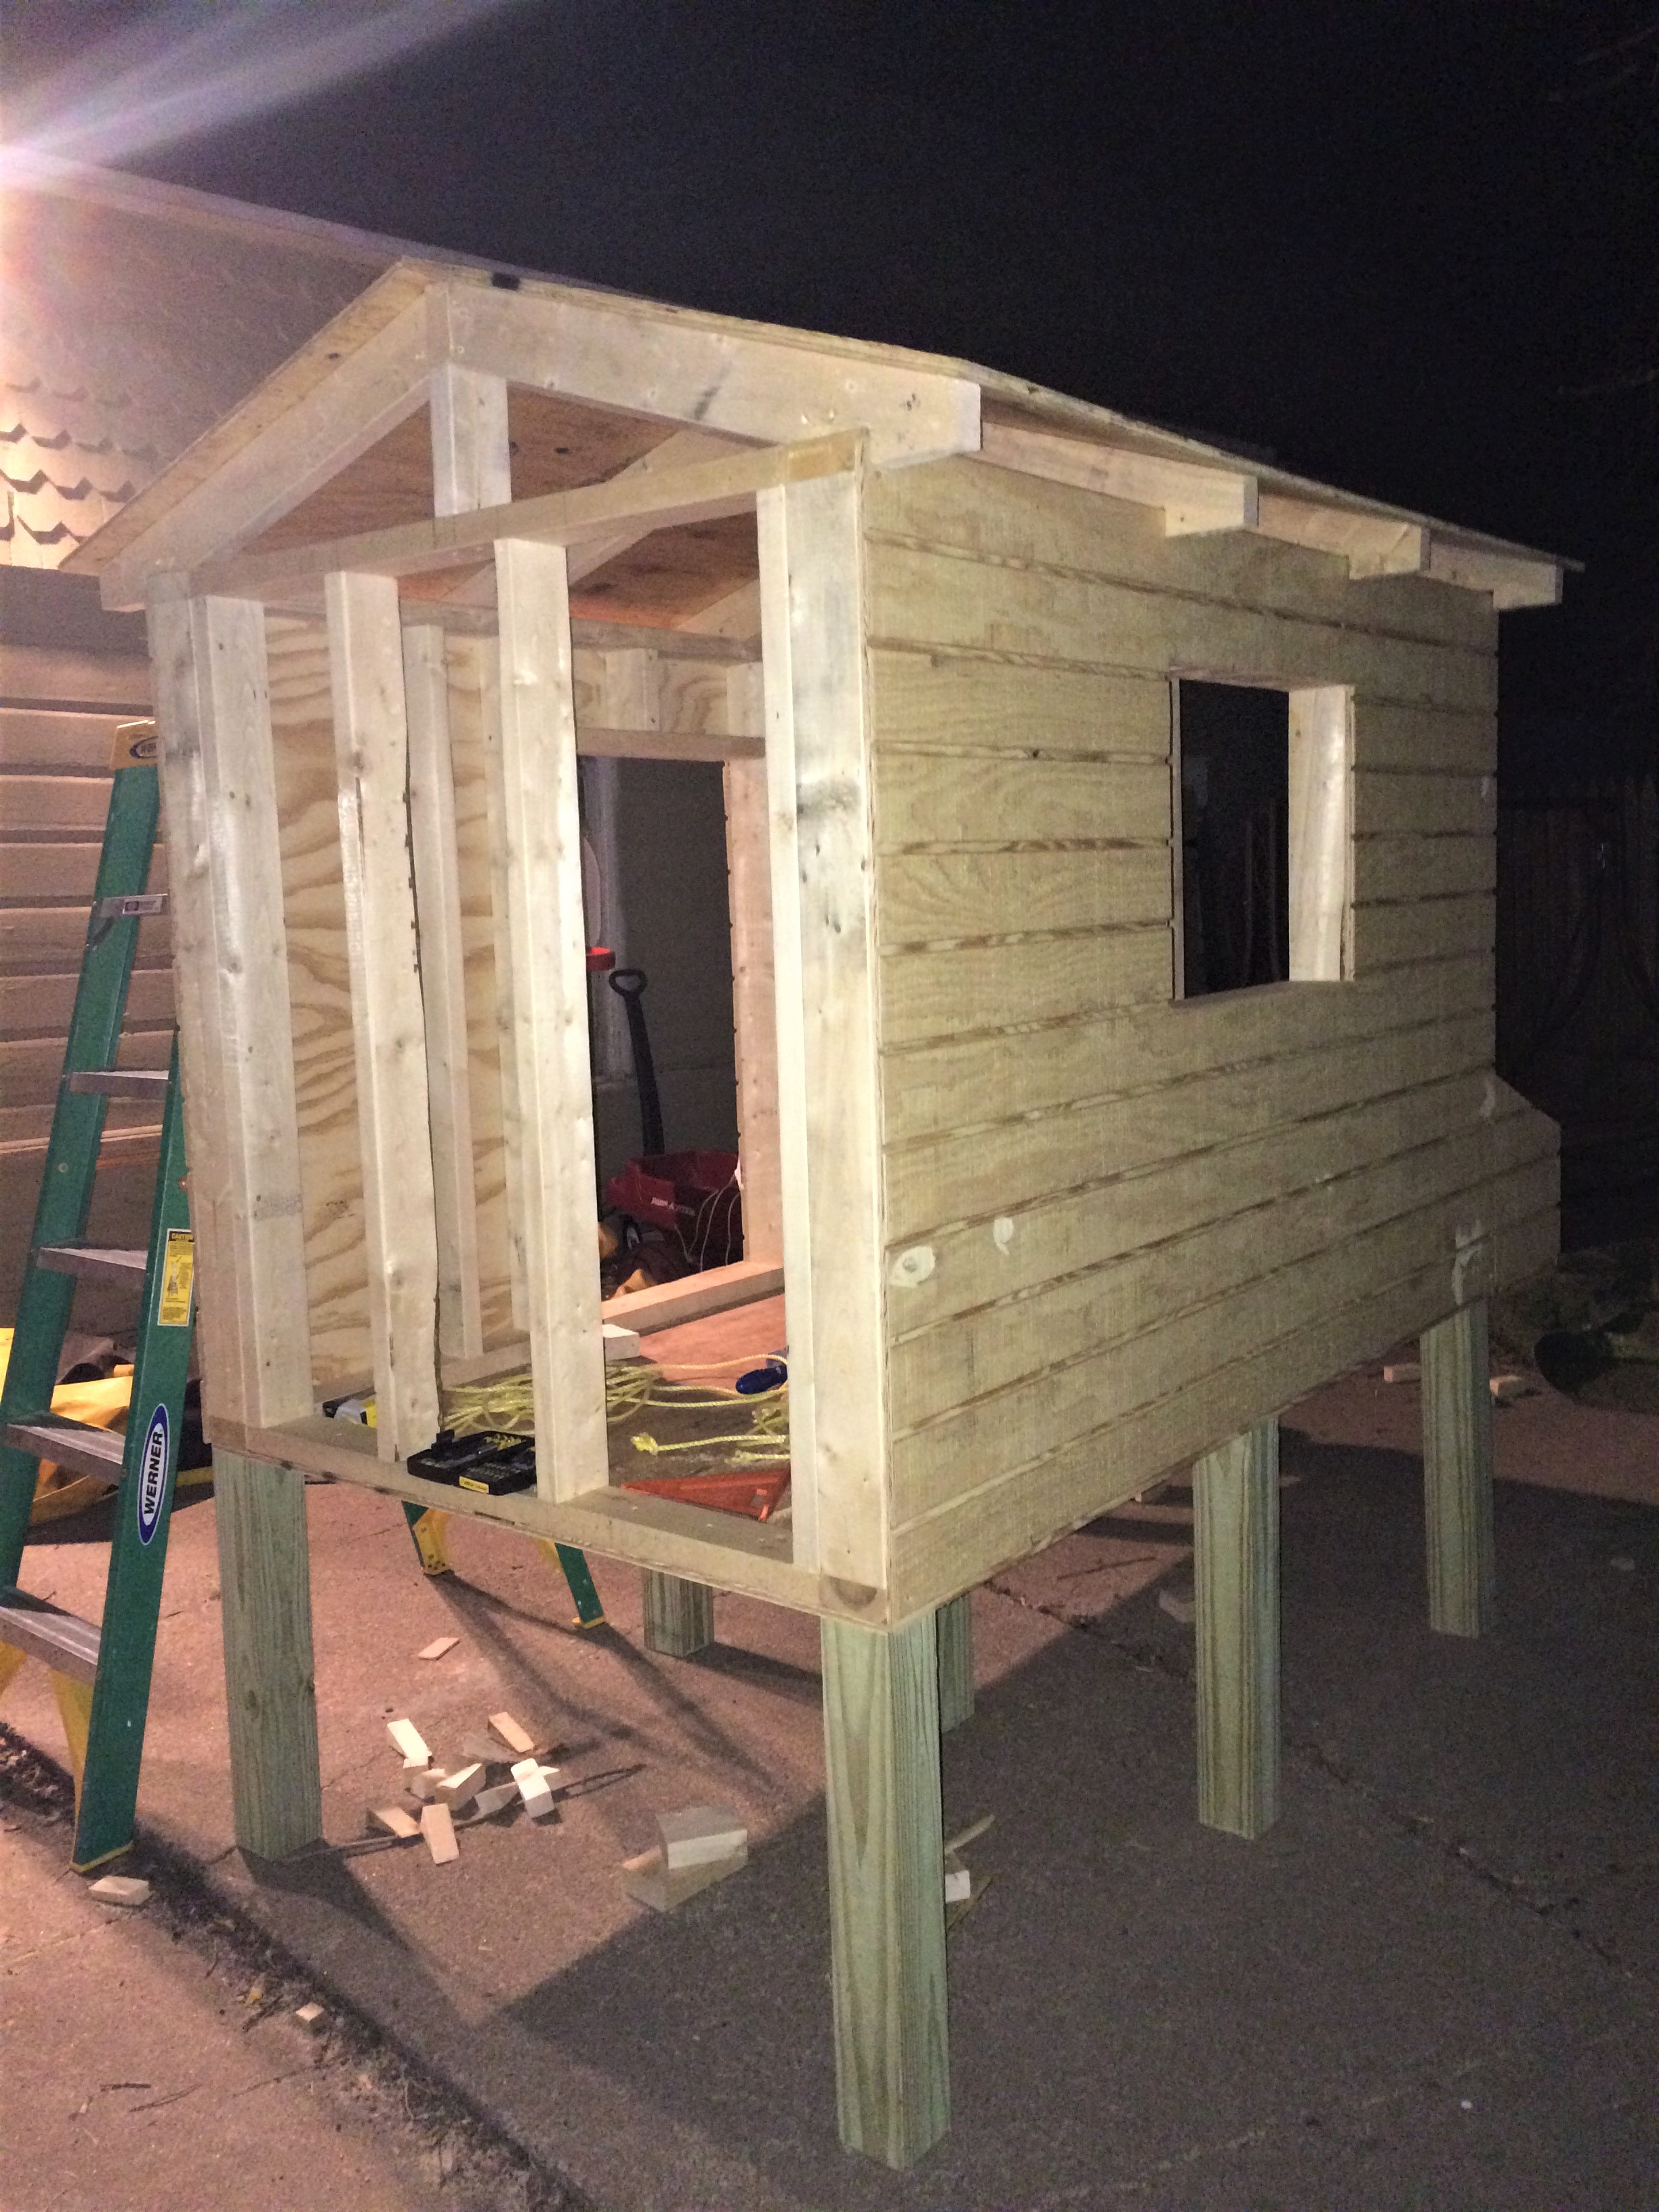
Part 1 of How To Build A Chicken Coop ended with our base and walls built, and the floor of the nest box ready for the walls to be added. Now you will need to frame the nest box out, which is somewhat complicated because of the angle of the top. Think of it as good practice for the roof! 🙂 First you will need to put up your vertical studs for either side. A nest box should be around 12-14 inches high. This is high enough for a hen to sit in comfortably, but not tall enough for them to stand. You don’t want them hanging out in the nest box unnecessarily and making a mess! Remember that your kickboard will add about an inch and a half, so your studs should be around 10.5 inches long. You will need 2 studs the same length, one for either side.
How to Determine Your Angles – The Easy Way
We figured out our angles without doing any math by simply using the stud and coop wall as guides. First you need to mark the coop wall 14 inches up; this will be your nest opening. Next mark your stud board at 10.5″ (the drawing says 12″ because you will have the kickboard underneath as well). This is plenty tall for the chickens, but allows a nice angled roof for rain to roll off. Placing your uncut stud in place, hold the rafter up against the stud and coop. The best way I can explain this is with the illustration below. The green rectangle is the chicken coop wall, the brown rectangle is the vertical stud, and the blue rectangle is your rafter.
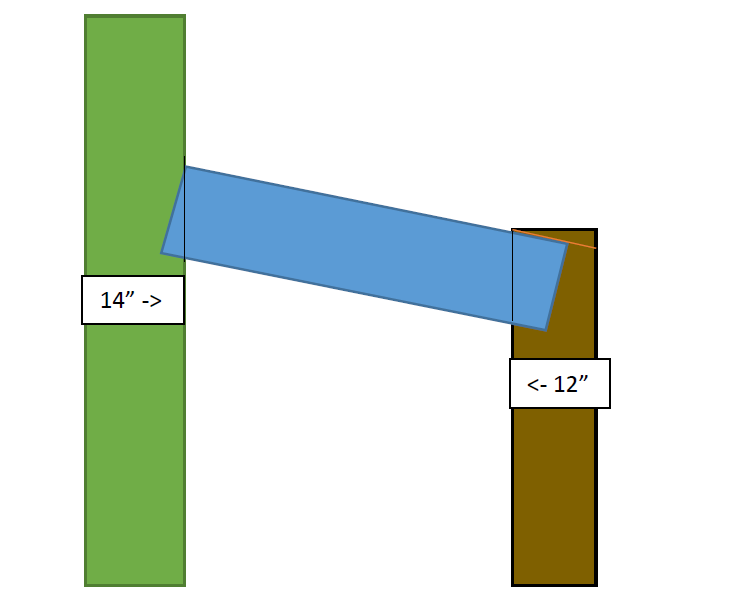
See how the rafter overlaps the coop wall and the stud when you hold it up? You will need to mark those overlap lines with a pencil. Then you can figure out your stud angle using the top of your rafter. Continue the angle line with a ruler or carpenter’s square, and mark it on the stud. This is the orange line in the illustration. Now you will need to cut the excess off the ends of the rafter, and the angled top off the stud, using the lines you made. This probably sounds very confusing now, but I promise it will make a lot more sense when you’re actually doing it! I swear this really is the easy way to do it.
Once you have your stud and rafter cut, use them as a template to make identical pieces. You will need one more stud and two more rafters. You will also need two 2×4’s to hold the nest box roof up. When you have all your pieces cut, screw them on, starting with the studs and working your way up.
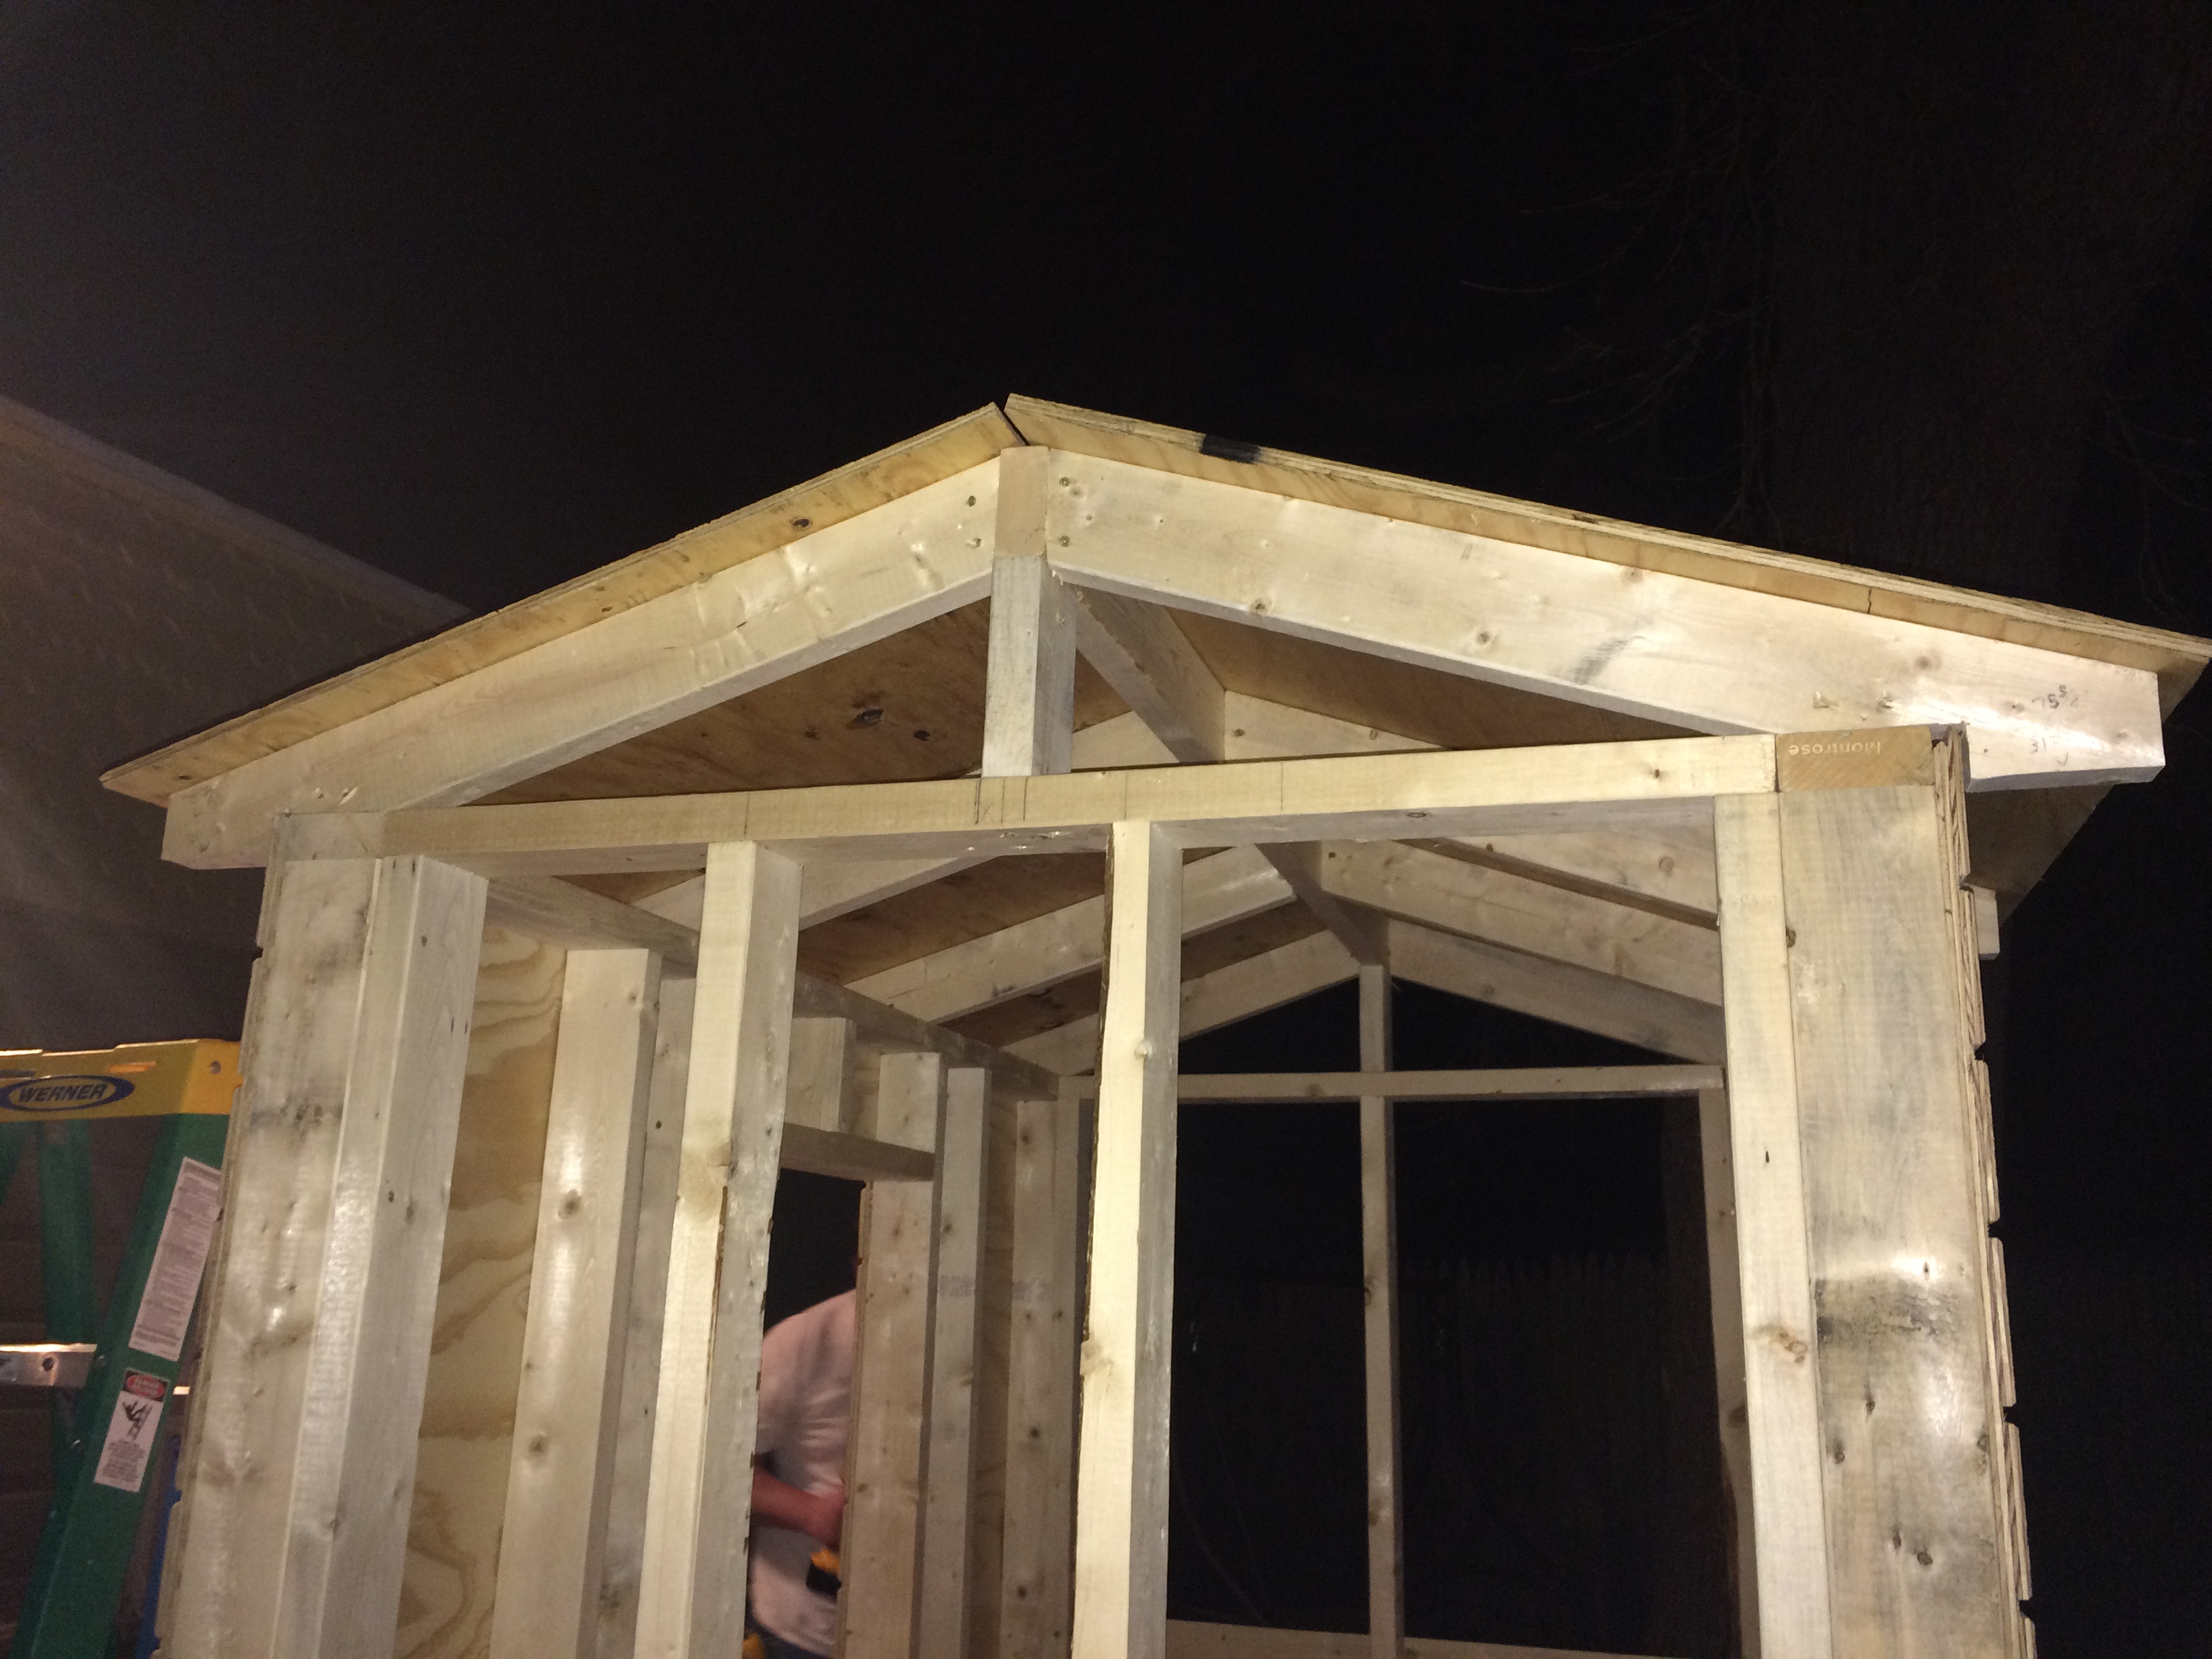
Building Your Chicken Coop Roof
If you thought the nest box was complicated, I won’t sugarcoat it – you’re really going to hate the roof. Our roof-building endeavor went like this: Spend half a day trying to figure out how to build a roof. Argue a lot about the best way to do it, despite your actual lack of knowledge on the matter. Use convincing phrases like “well we’re not professional constructioners!” to really prove your point. Finally, give up trying to help, and let your husband figure it out!
In the end, my husband relied heavily on a YouTube video to understand what he needed to do and how. You can watch the video below, or add the “Video Roofing Bible” to your playlist on YouTube. We had to figure out our pitch, place the ridge beam, and cut rafters. Thankfully, the video will walk you through ALL of this! You will also want to use a Construction Calculator. There are plenty of apps available for this; the one we used is called Carpenter’s Helper Lite.
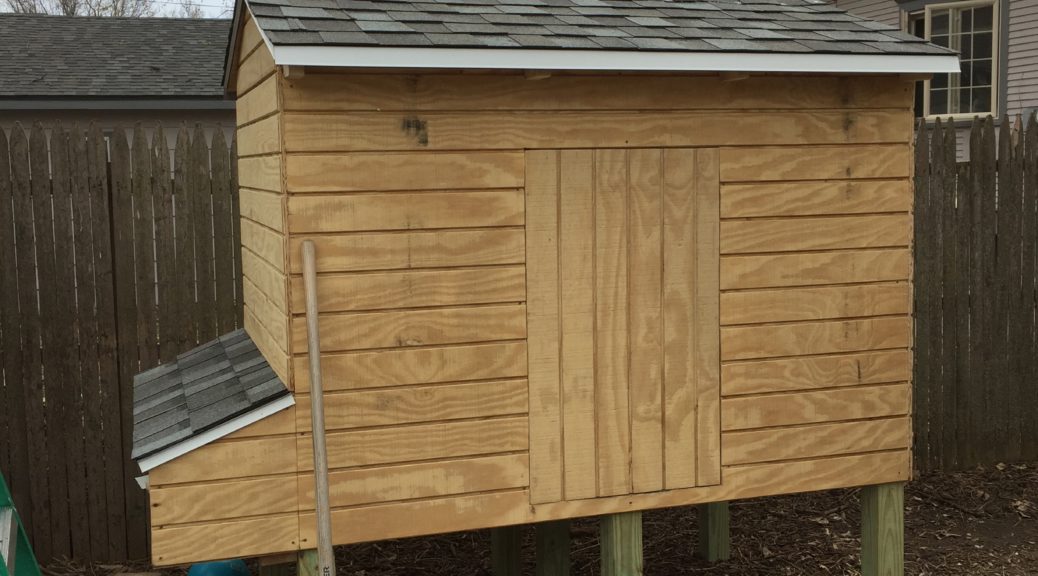
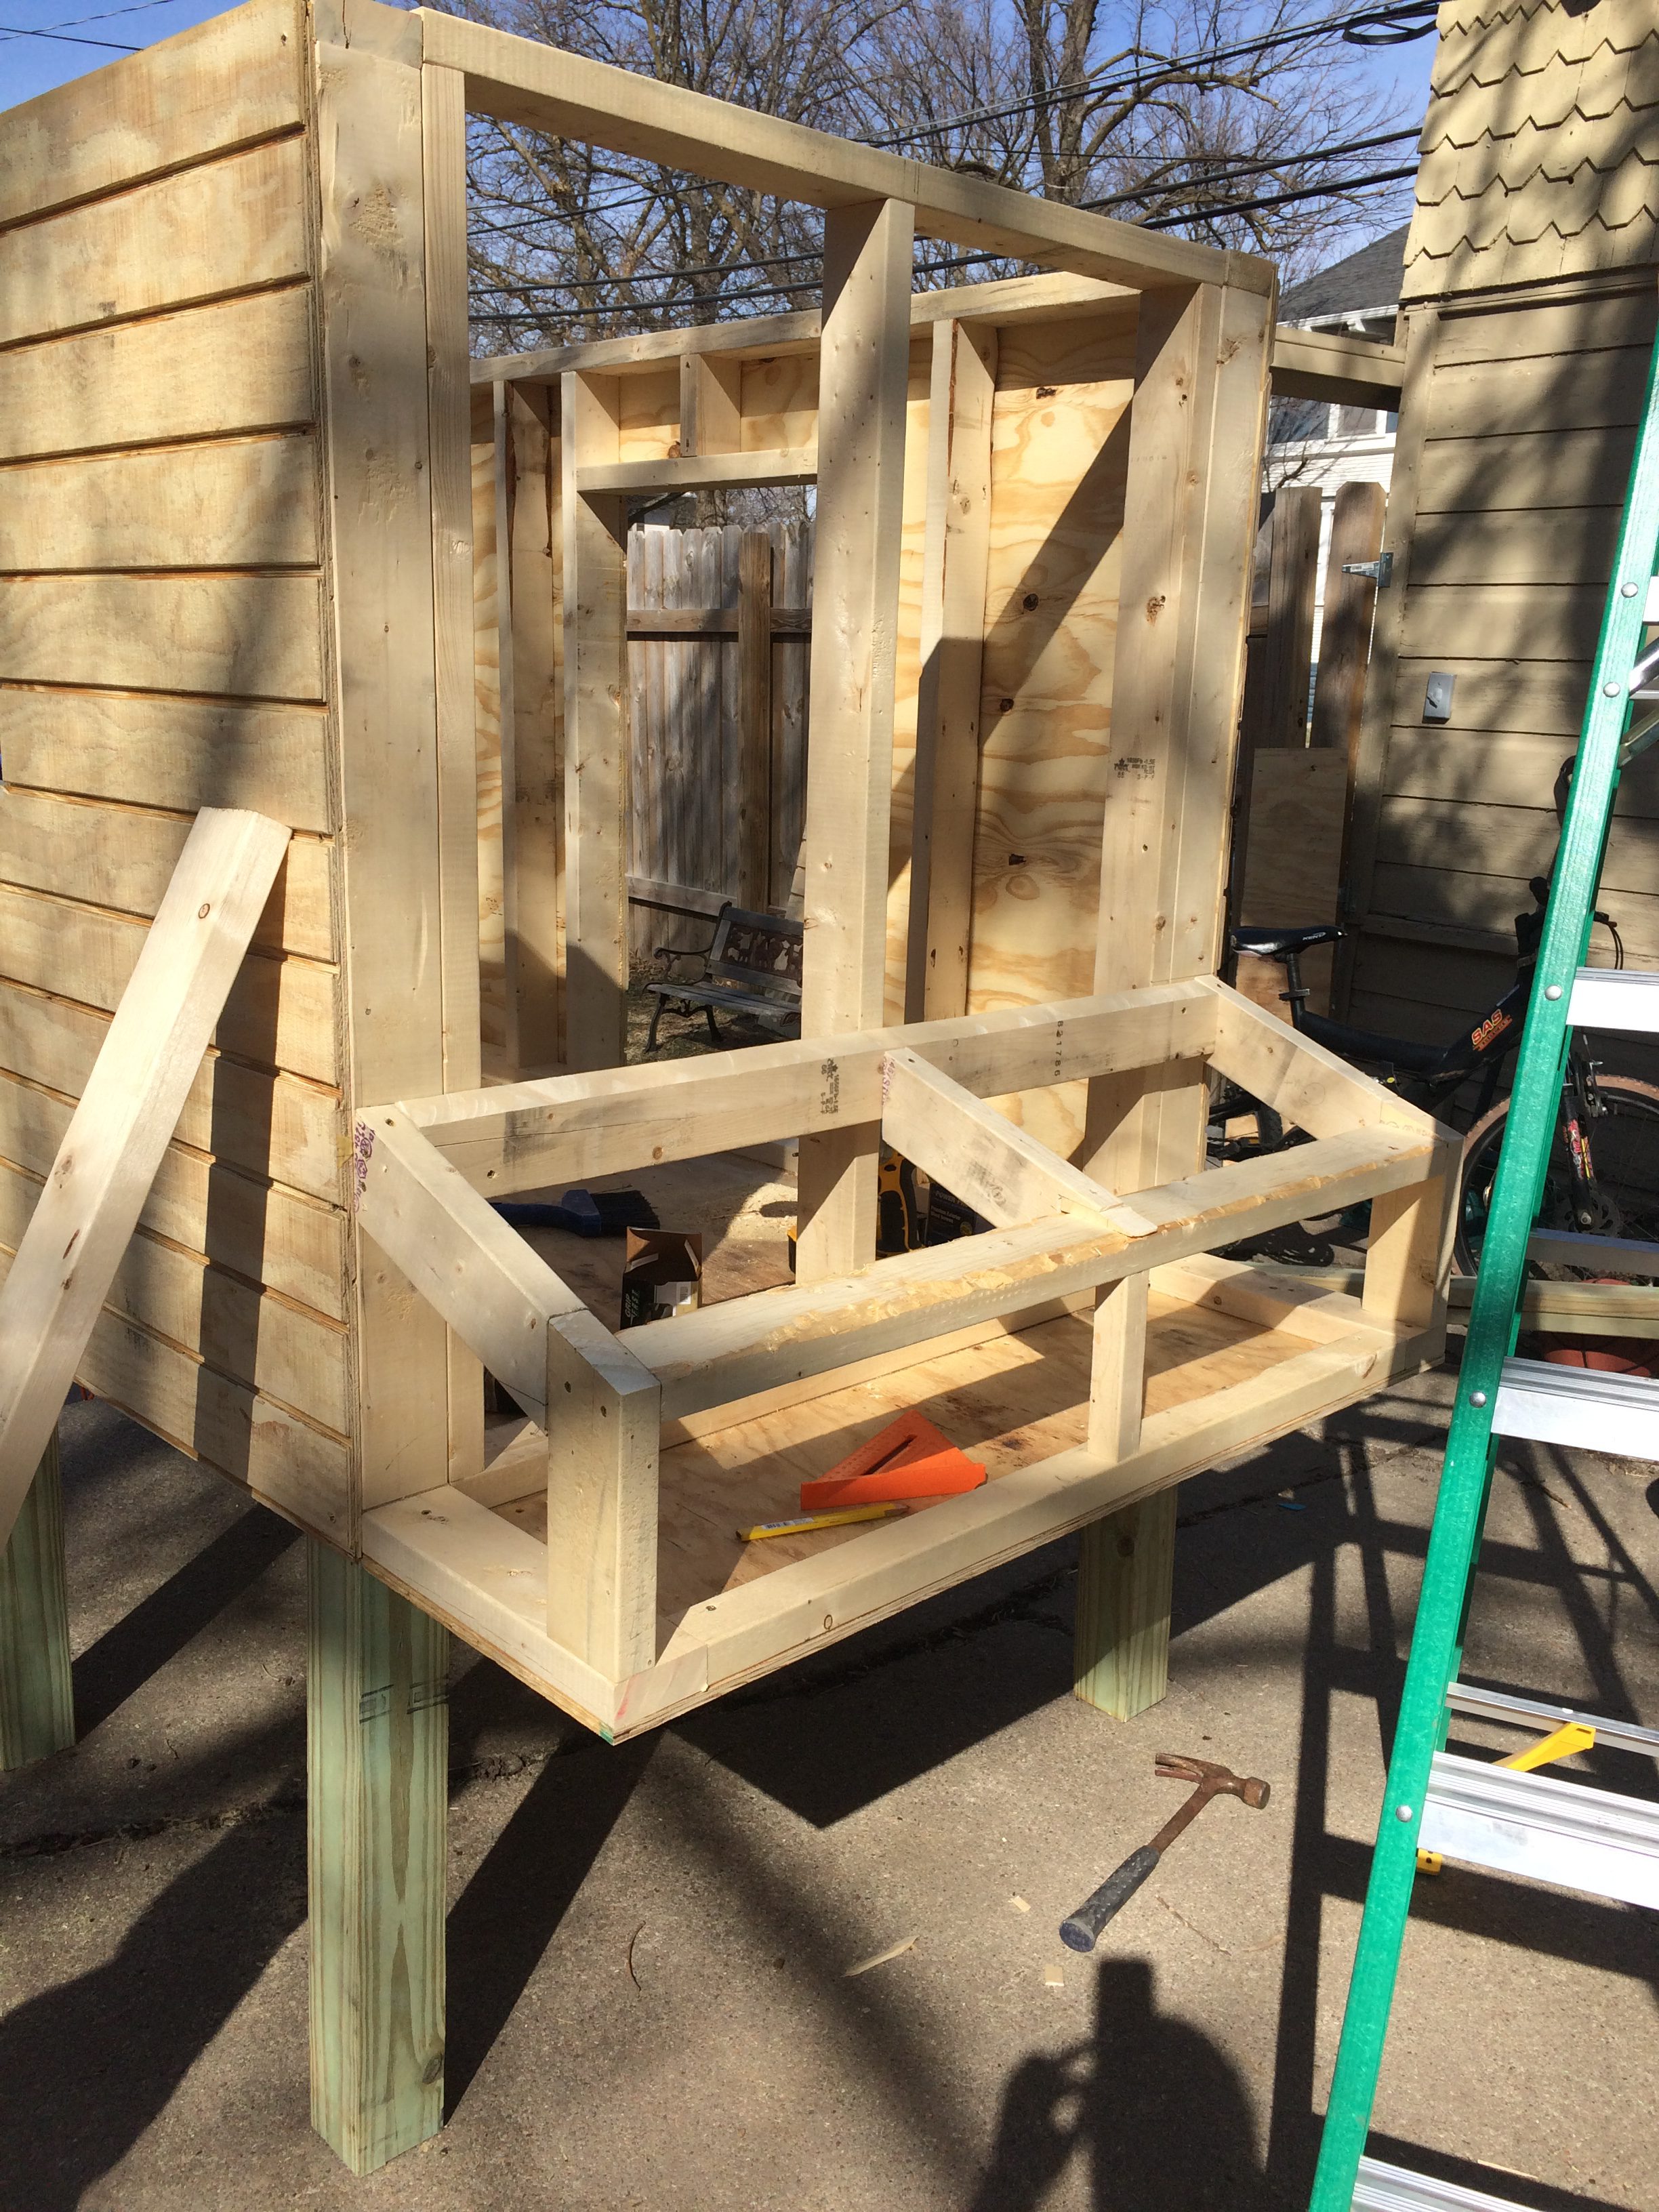
Here is what we ended up with. It was well into the night by the time he was done, and it took pretty much the entire day to do! It turned out amazing, though. We would have preferred a steeper pitch on our roof, but at over 6 feet tall, the chicken coop was already going to be above our privacy fence. Living in a rural neighborhood, we wanted our chicken coop to be as unobtrusive as possible! You can see that we also added our plywood roof on top of the rafters, overhanging them by a couple inches. We did not yet have the siding on our 4′ walls, but we added it before shingling began.
Here’s another view:
Tar Paper and Drip Edge
Once the roof was on, shingling it was the easy part! Unfortunately my dear aunt passed away during this time, and I traveled out of state to attend her funeral. Because of this we don’t have many pictures of the next few steps – it’s difficult to shingle a roof AND take photos at the same time! I had my husband explain the steps to me later, and it’s pretty straightforward. If you or your partner have any roofing experience, you should be fine! Here is another really helpful video on roofing to use as a guide: Install Asphalt Shingles On Shed Roof.
First you will cut your drip edge using tin snips, and place it on the 6′ sides and the nest box edges. Next you will put on the tar paper, which comes in huge rolls that you only need a small part of. We were lucky in that a friend gave us a roll that he had left over. You could probably find some in a local Buy, Sell, Trade group online. You can either nail or staple the tar paper down; we stapled ours. It needs to be almost the same size as your plywood roof, overlapping the drip edge by about 3/8 of an inch.
Shingling Your Roof
You can buy shingle starter strips, or make your own easily. Of course, we made our own. If you couldn’t tell by now, despite spending over $700 on our coop, we try to cut costs where we can! To make your own, cut the decorative half off of a shingle sheet, leaving the tar strip intact (see photo). Turn it upside down onto your roof, with the tar strip along the drip edge, and nail it on. You want your nails to be right up next to the tar strip, but not on it. Do this all the way around the edges of your roof.
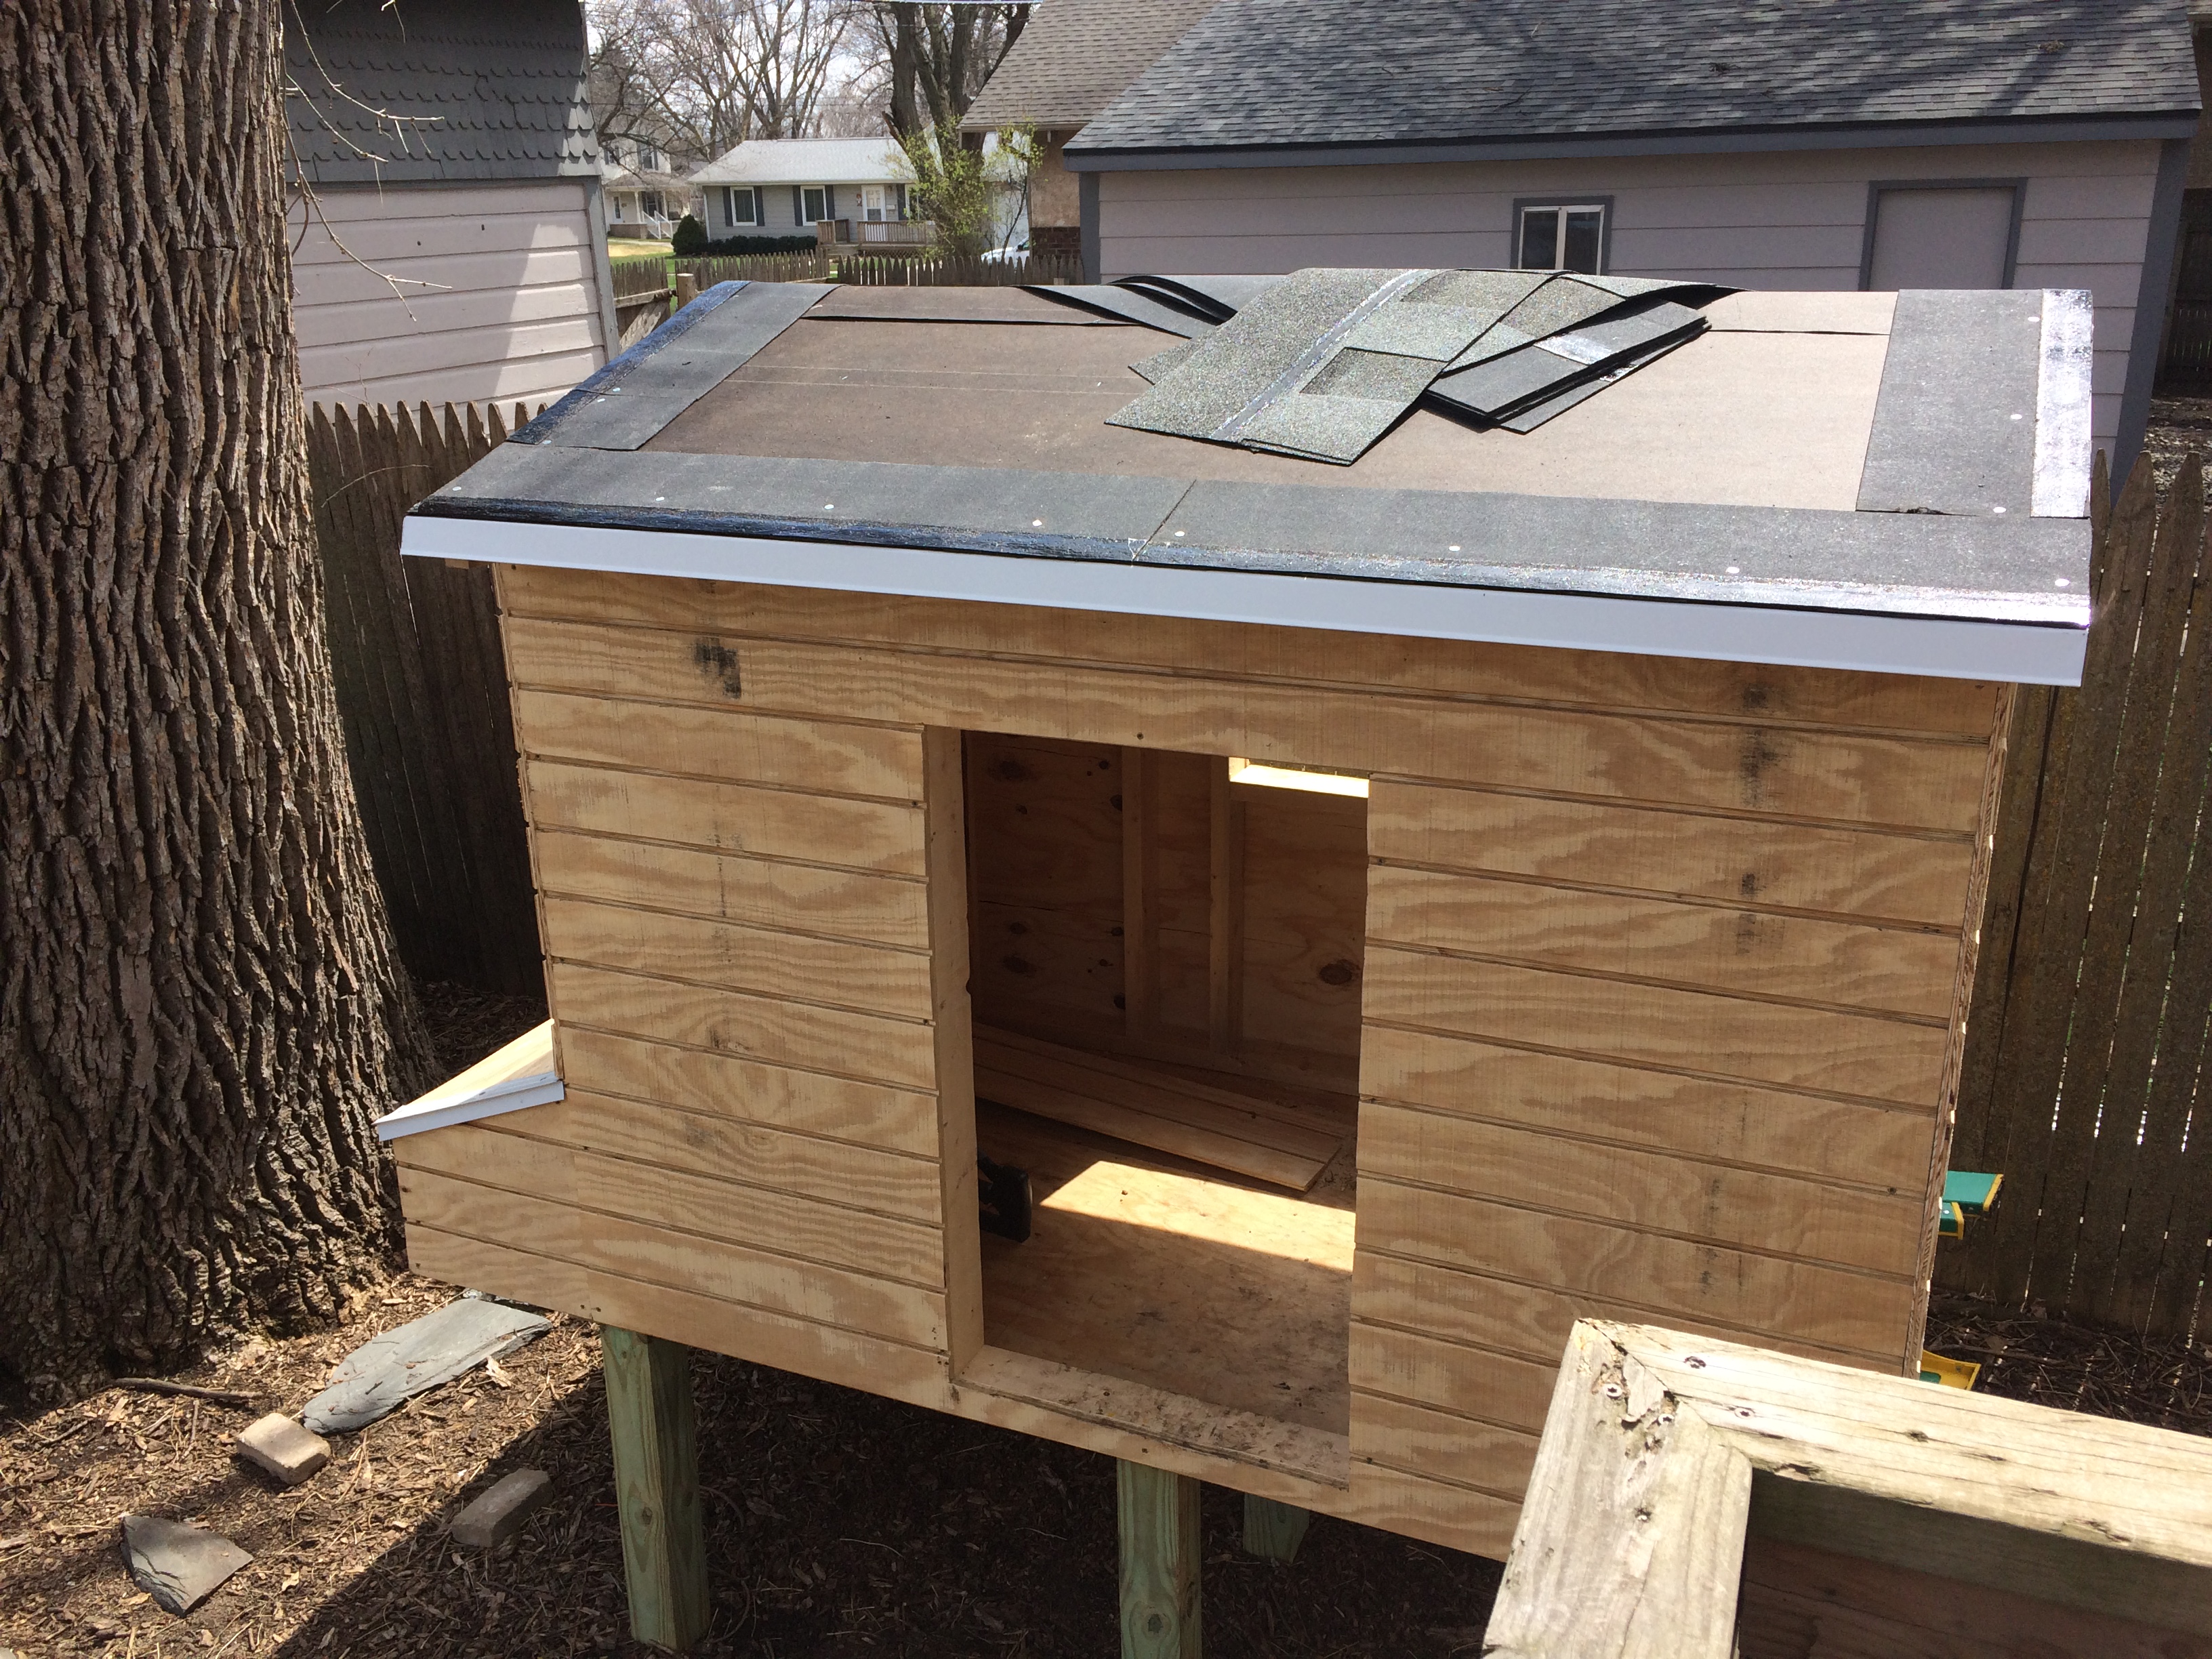
Now you will simply staple the shingles on according to the package directions. Most shingles have you start by cutting 6 inches off the first row, 12″ off the second, etc. This keeps your shingle seams from meeting up, which would look odd. You might want to do the entire left side of the roof first, then go back and finish each row. Once you’re done, roof the nest box in the same way.
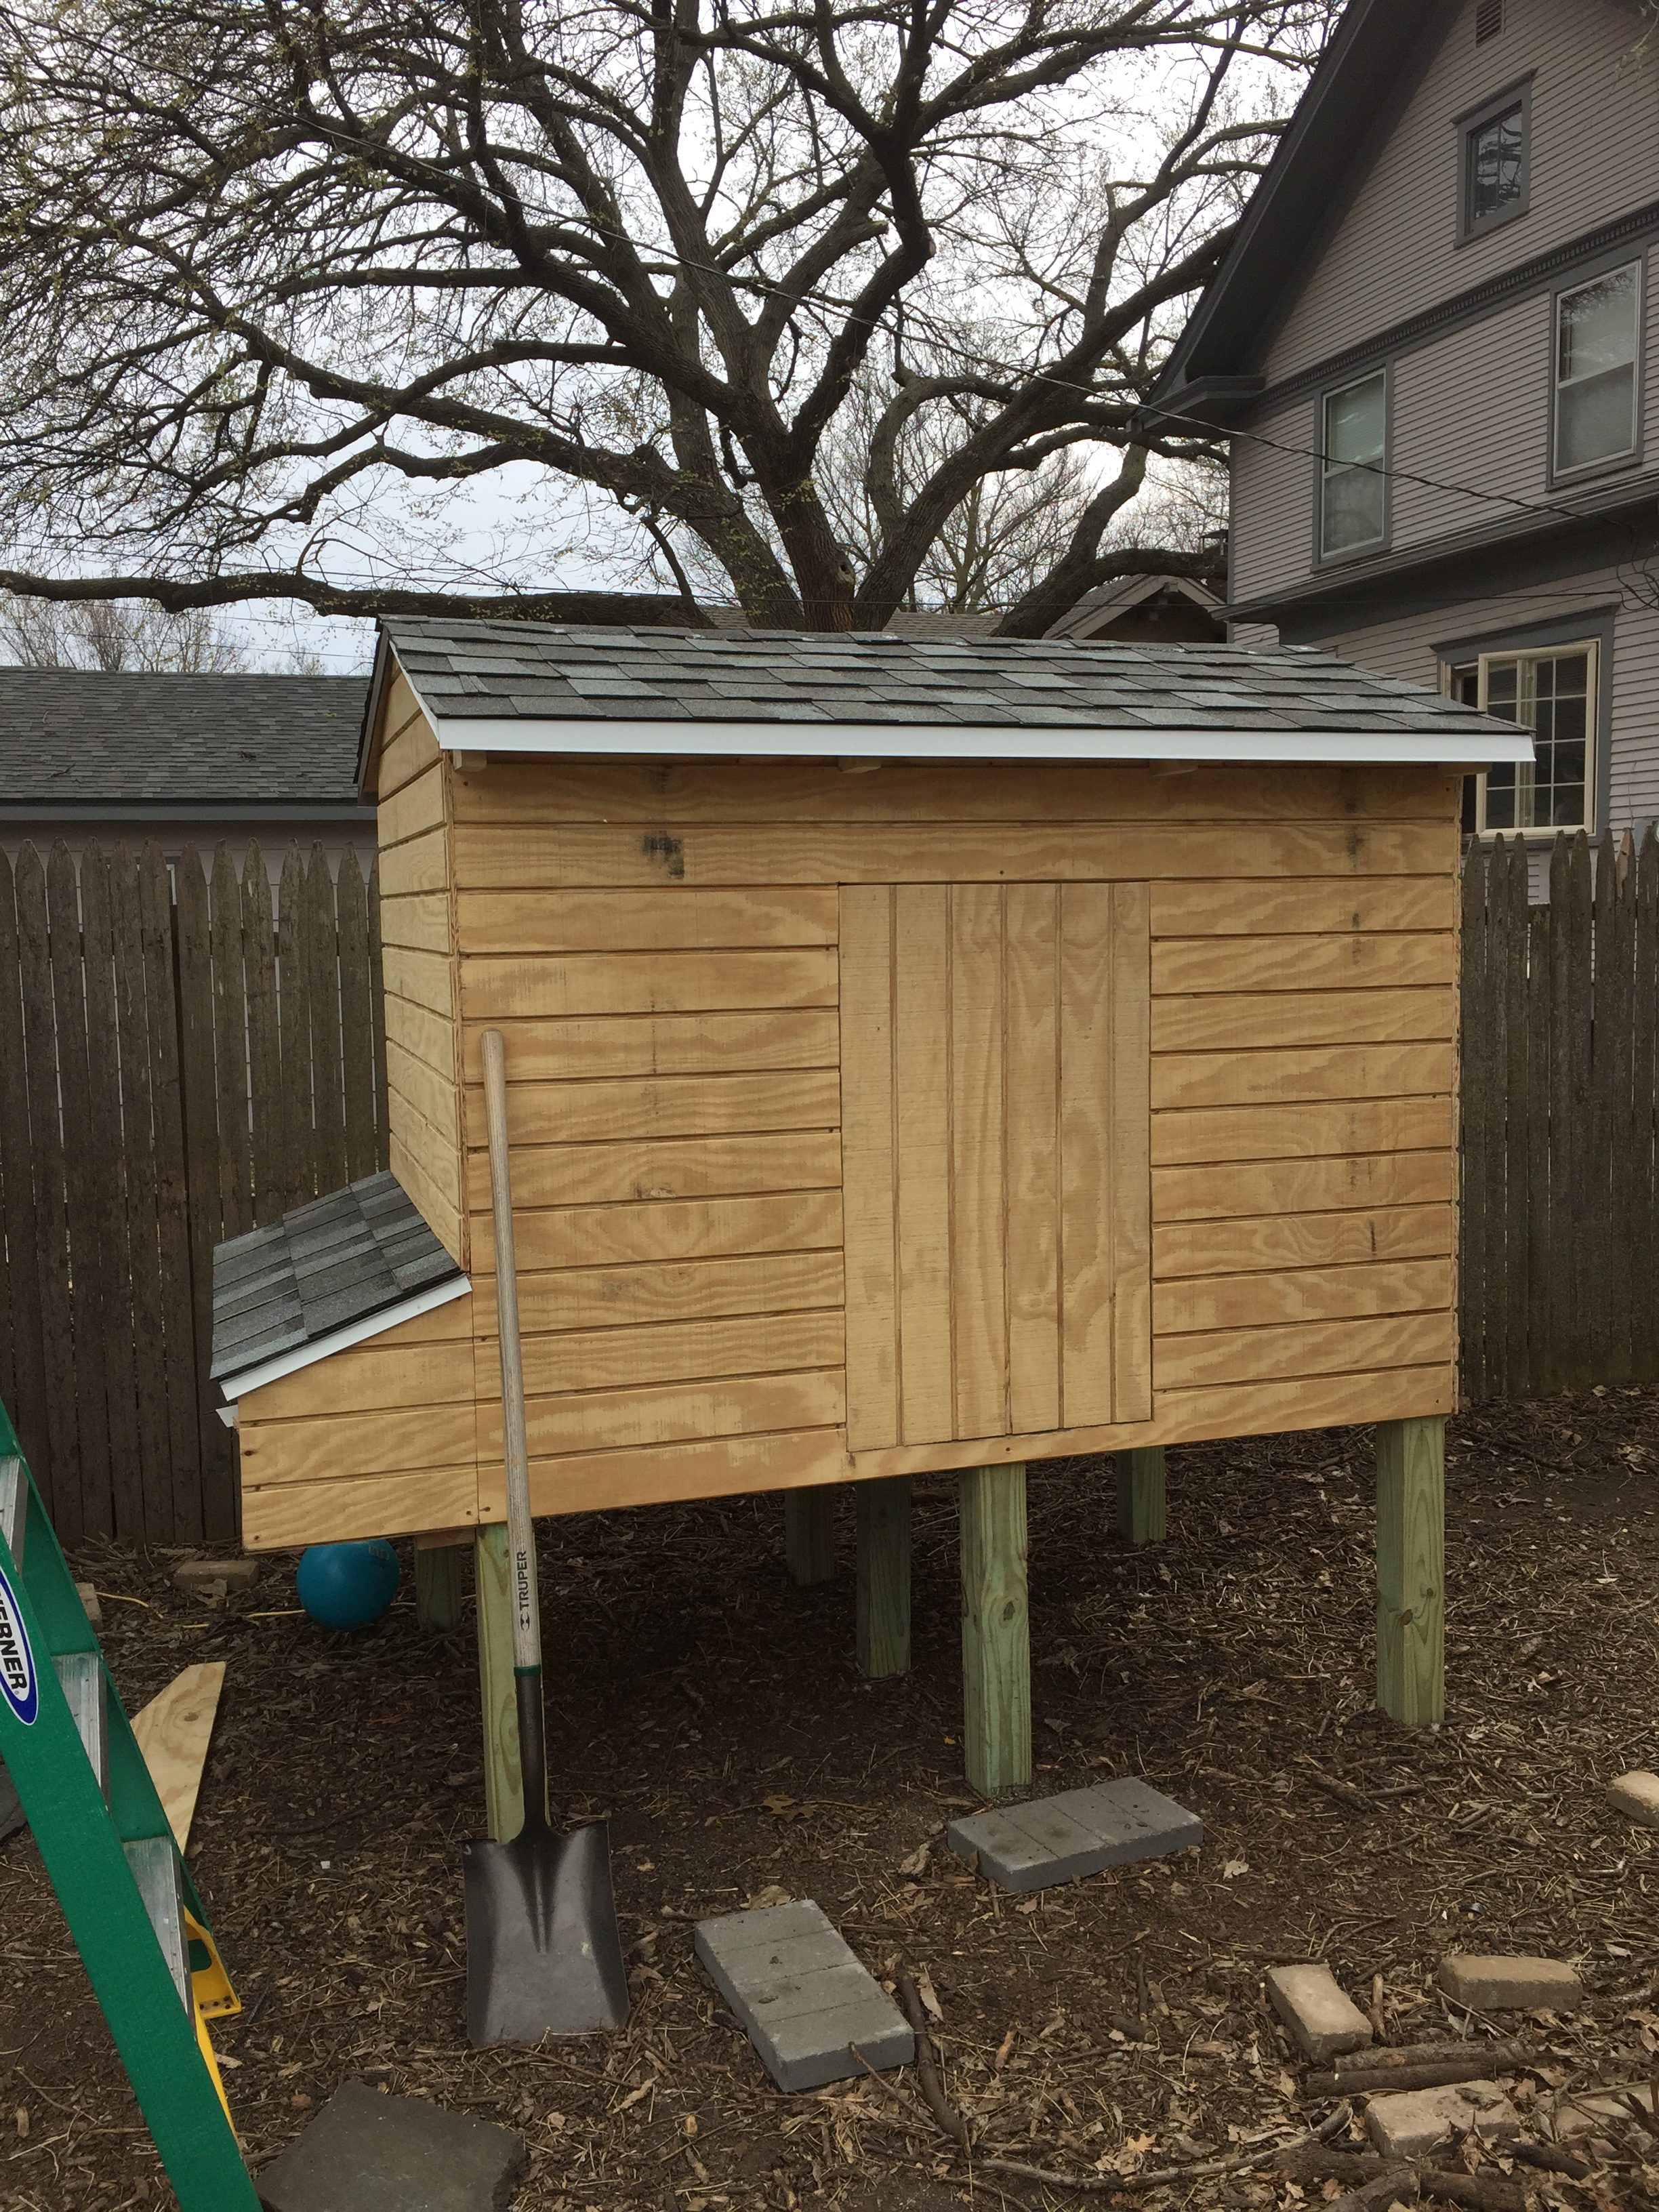
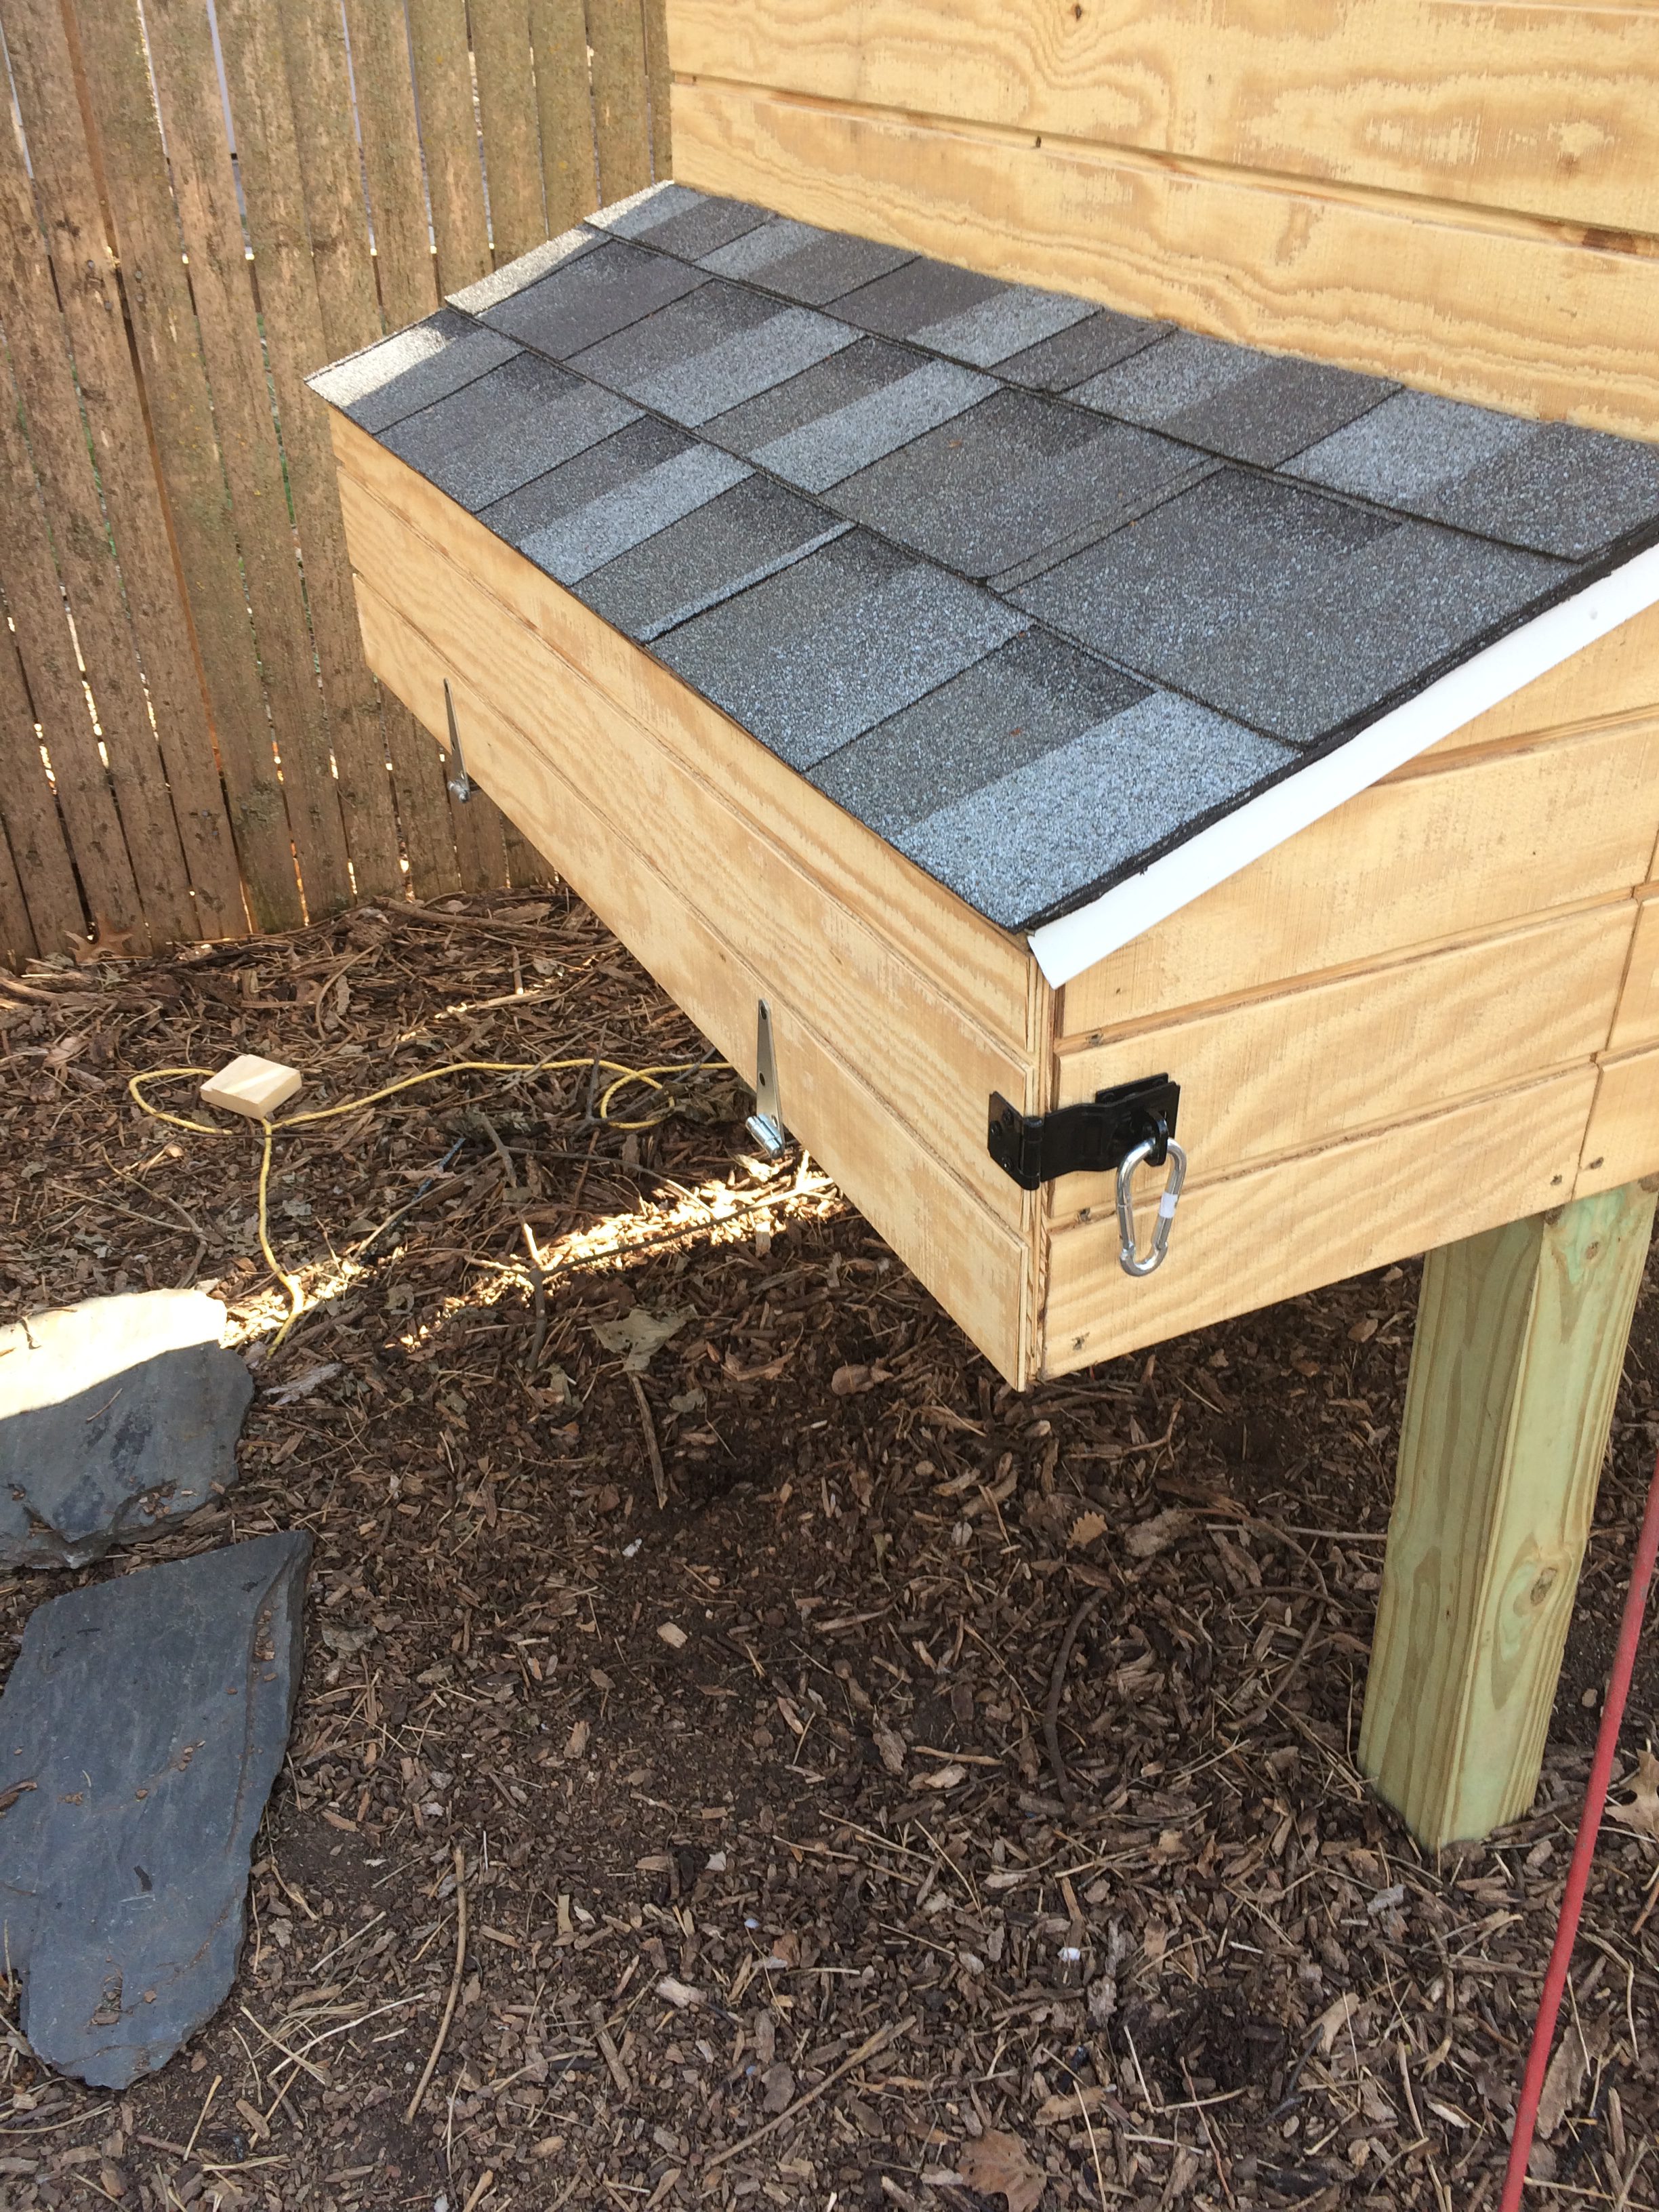
The last step for the roof is to add a ridge cap with roofing cement. Again, you can buy ridge caps or make your own. We made ours using the leftover shingles we had cut off of our starter strips. The most important thing here is to overlap them, because you want it to be waterproof. For that reason you will also want to add roofing cement on top of your nails, and along the edge of your nest box where it meets the chicken coop wall.
Adding A Window
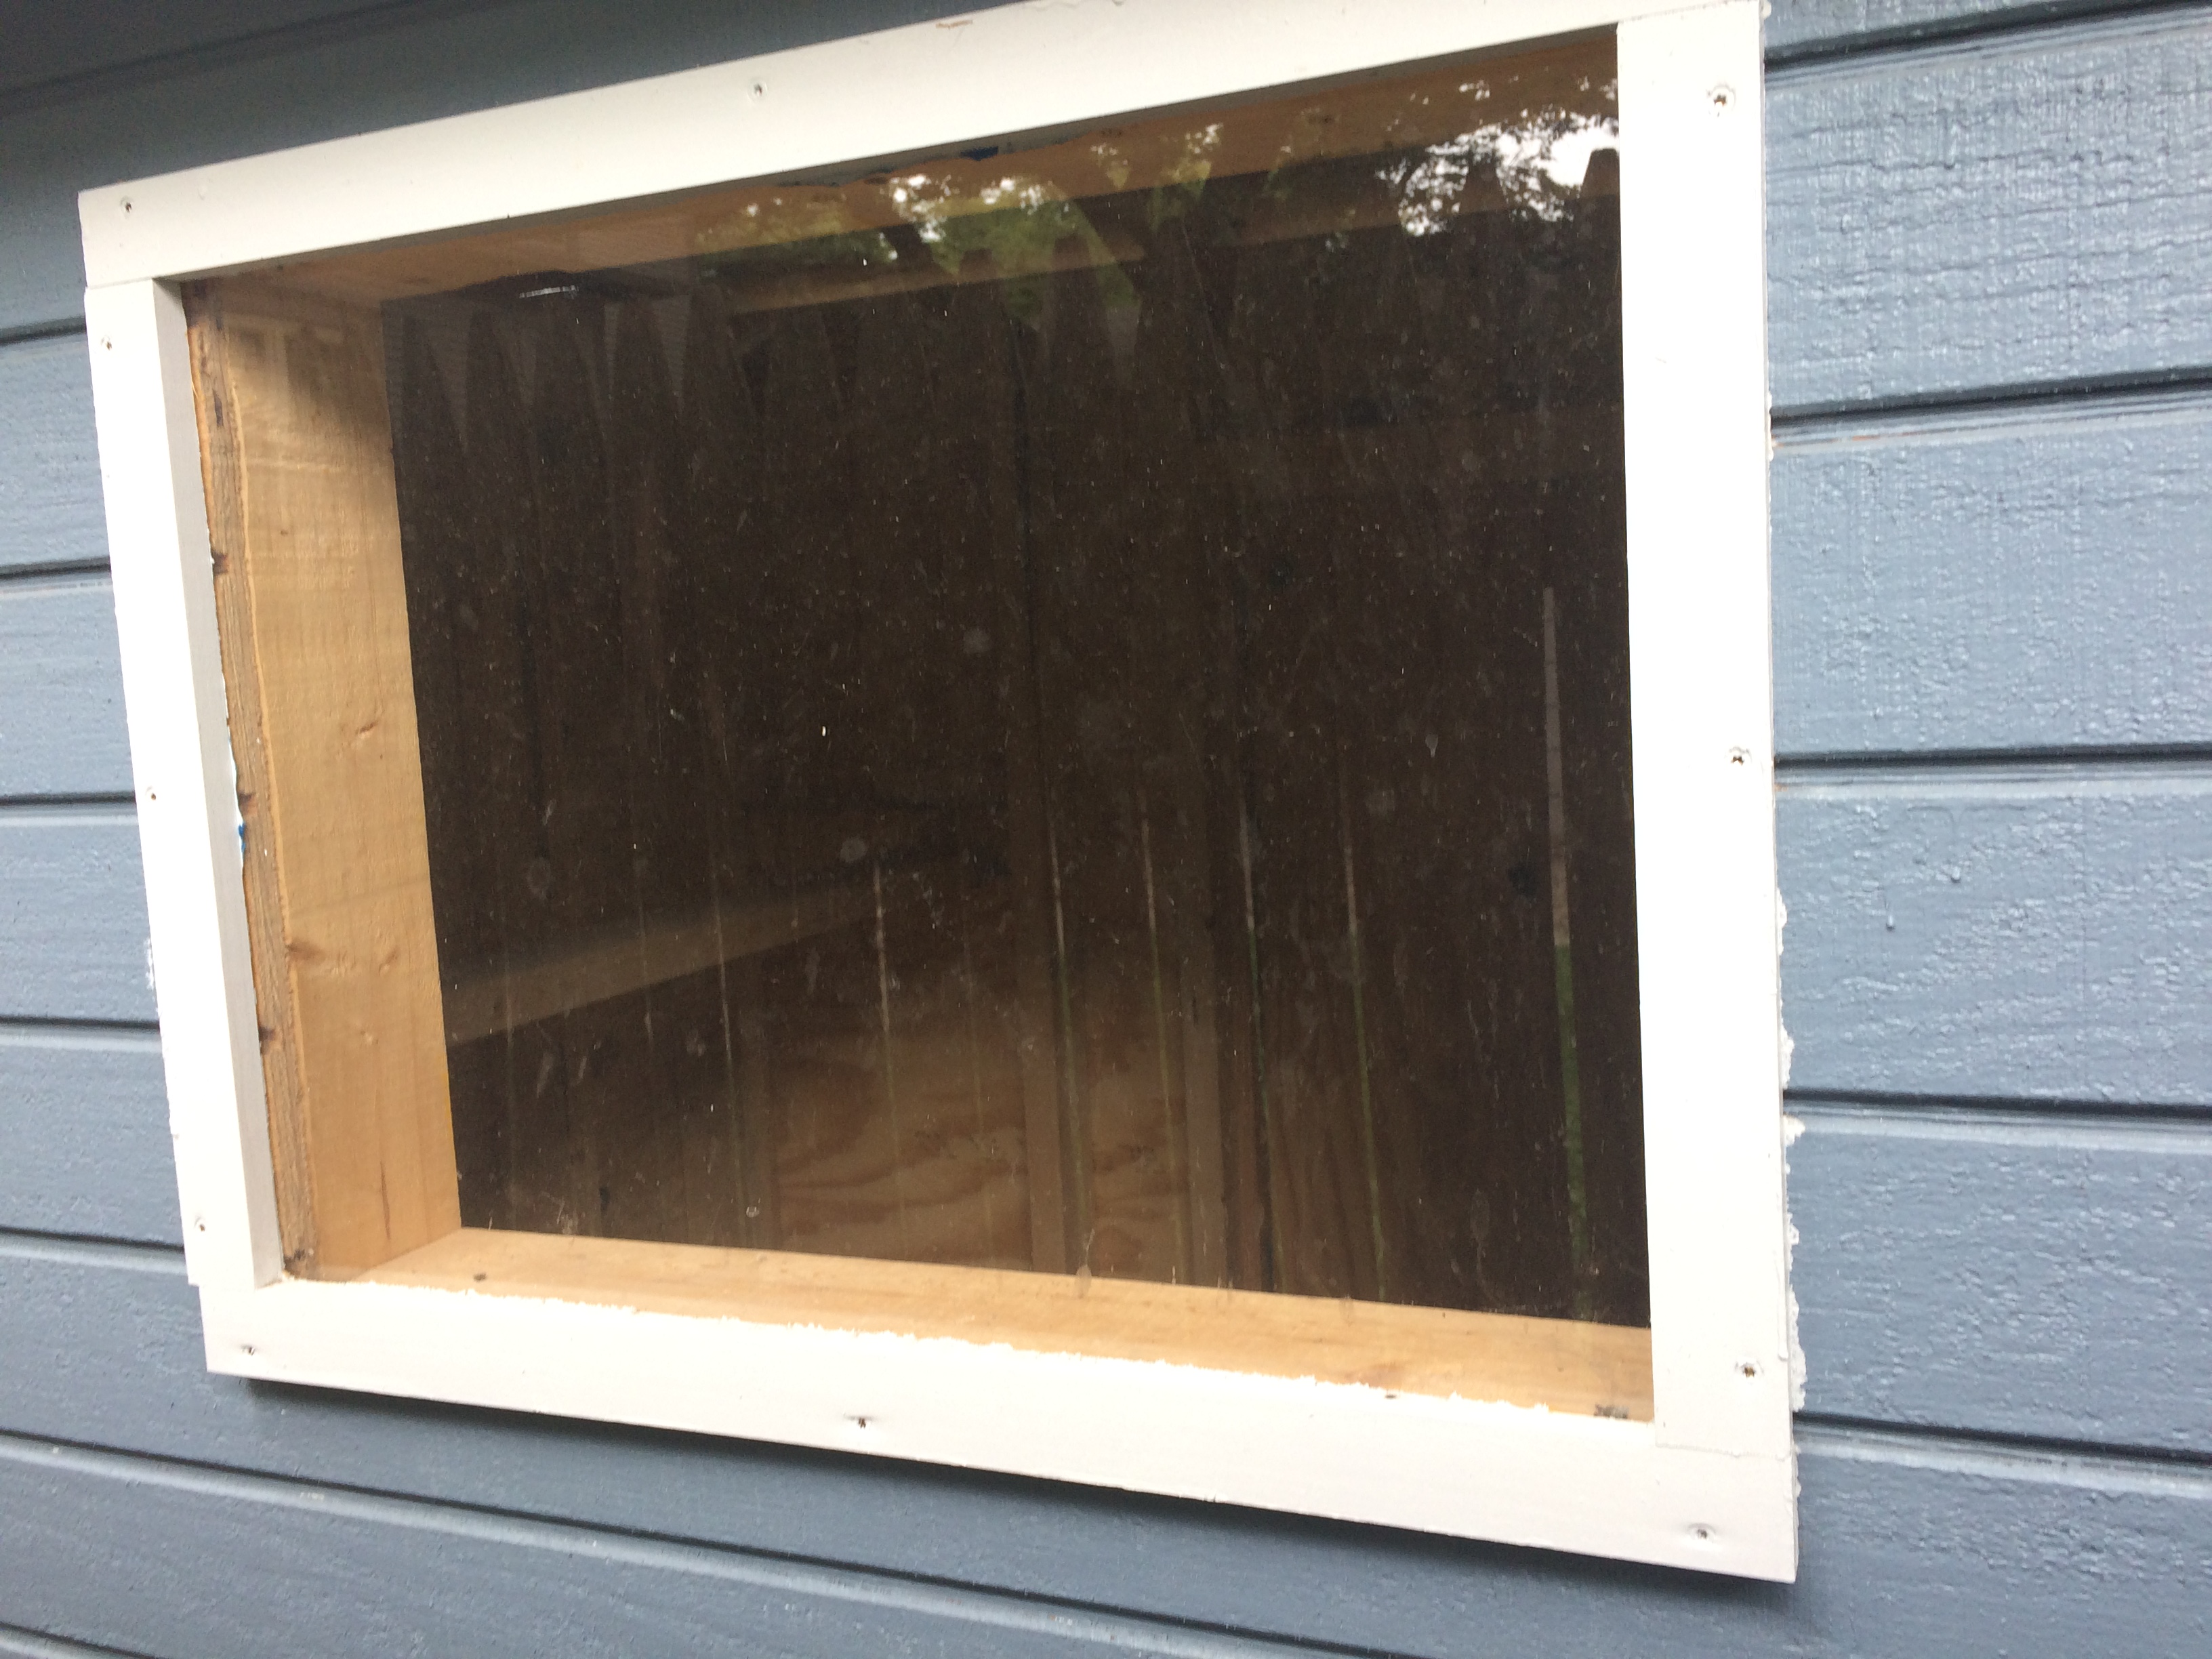
Again, I was out of state for this part, so I don’t have great photos. My apologies! My husband assures me that putting the window in was easy, though. First he cut 1×2’s to the length and width of our Plexiglass sheet to use as a frame. Be sure that your Plexiglass is larger than your window opening! (Plexiglass comes in many different sizes and thicknesses. Ours is 24″ by 18″.)
The wood would obviously need to hold the Plexiglass in place, so he had to “shave” off part of the 1×2’s to make a kind of gutter for it. His saw blade was the same width as the Plexiglass, which made it easy. The best way to know where to shave your wood is to semi-assemble your frame, lay the glass on top, and trace around it. Once the wood is shaved, simply put the Plexiglass in place and screw the frame on around it. Here are some pictures of the finished product:

Putting the Door Hardware and Locks On
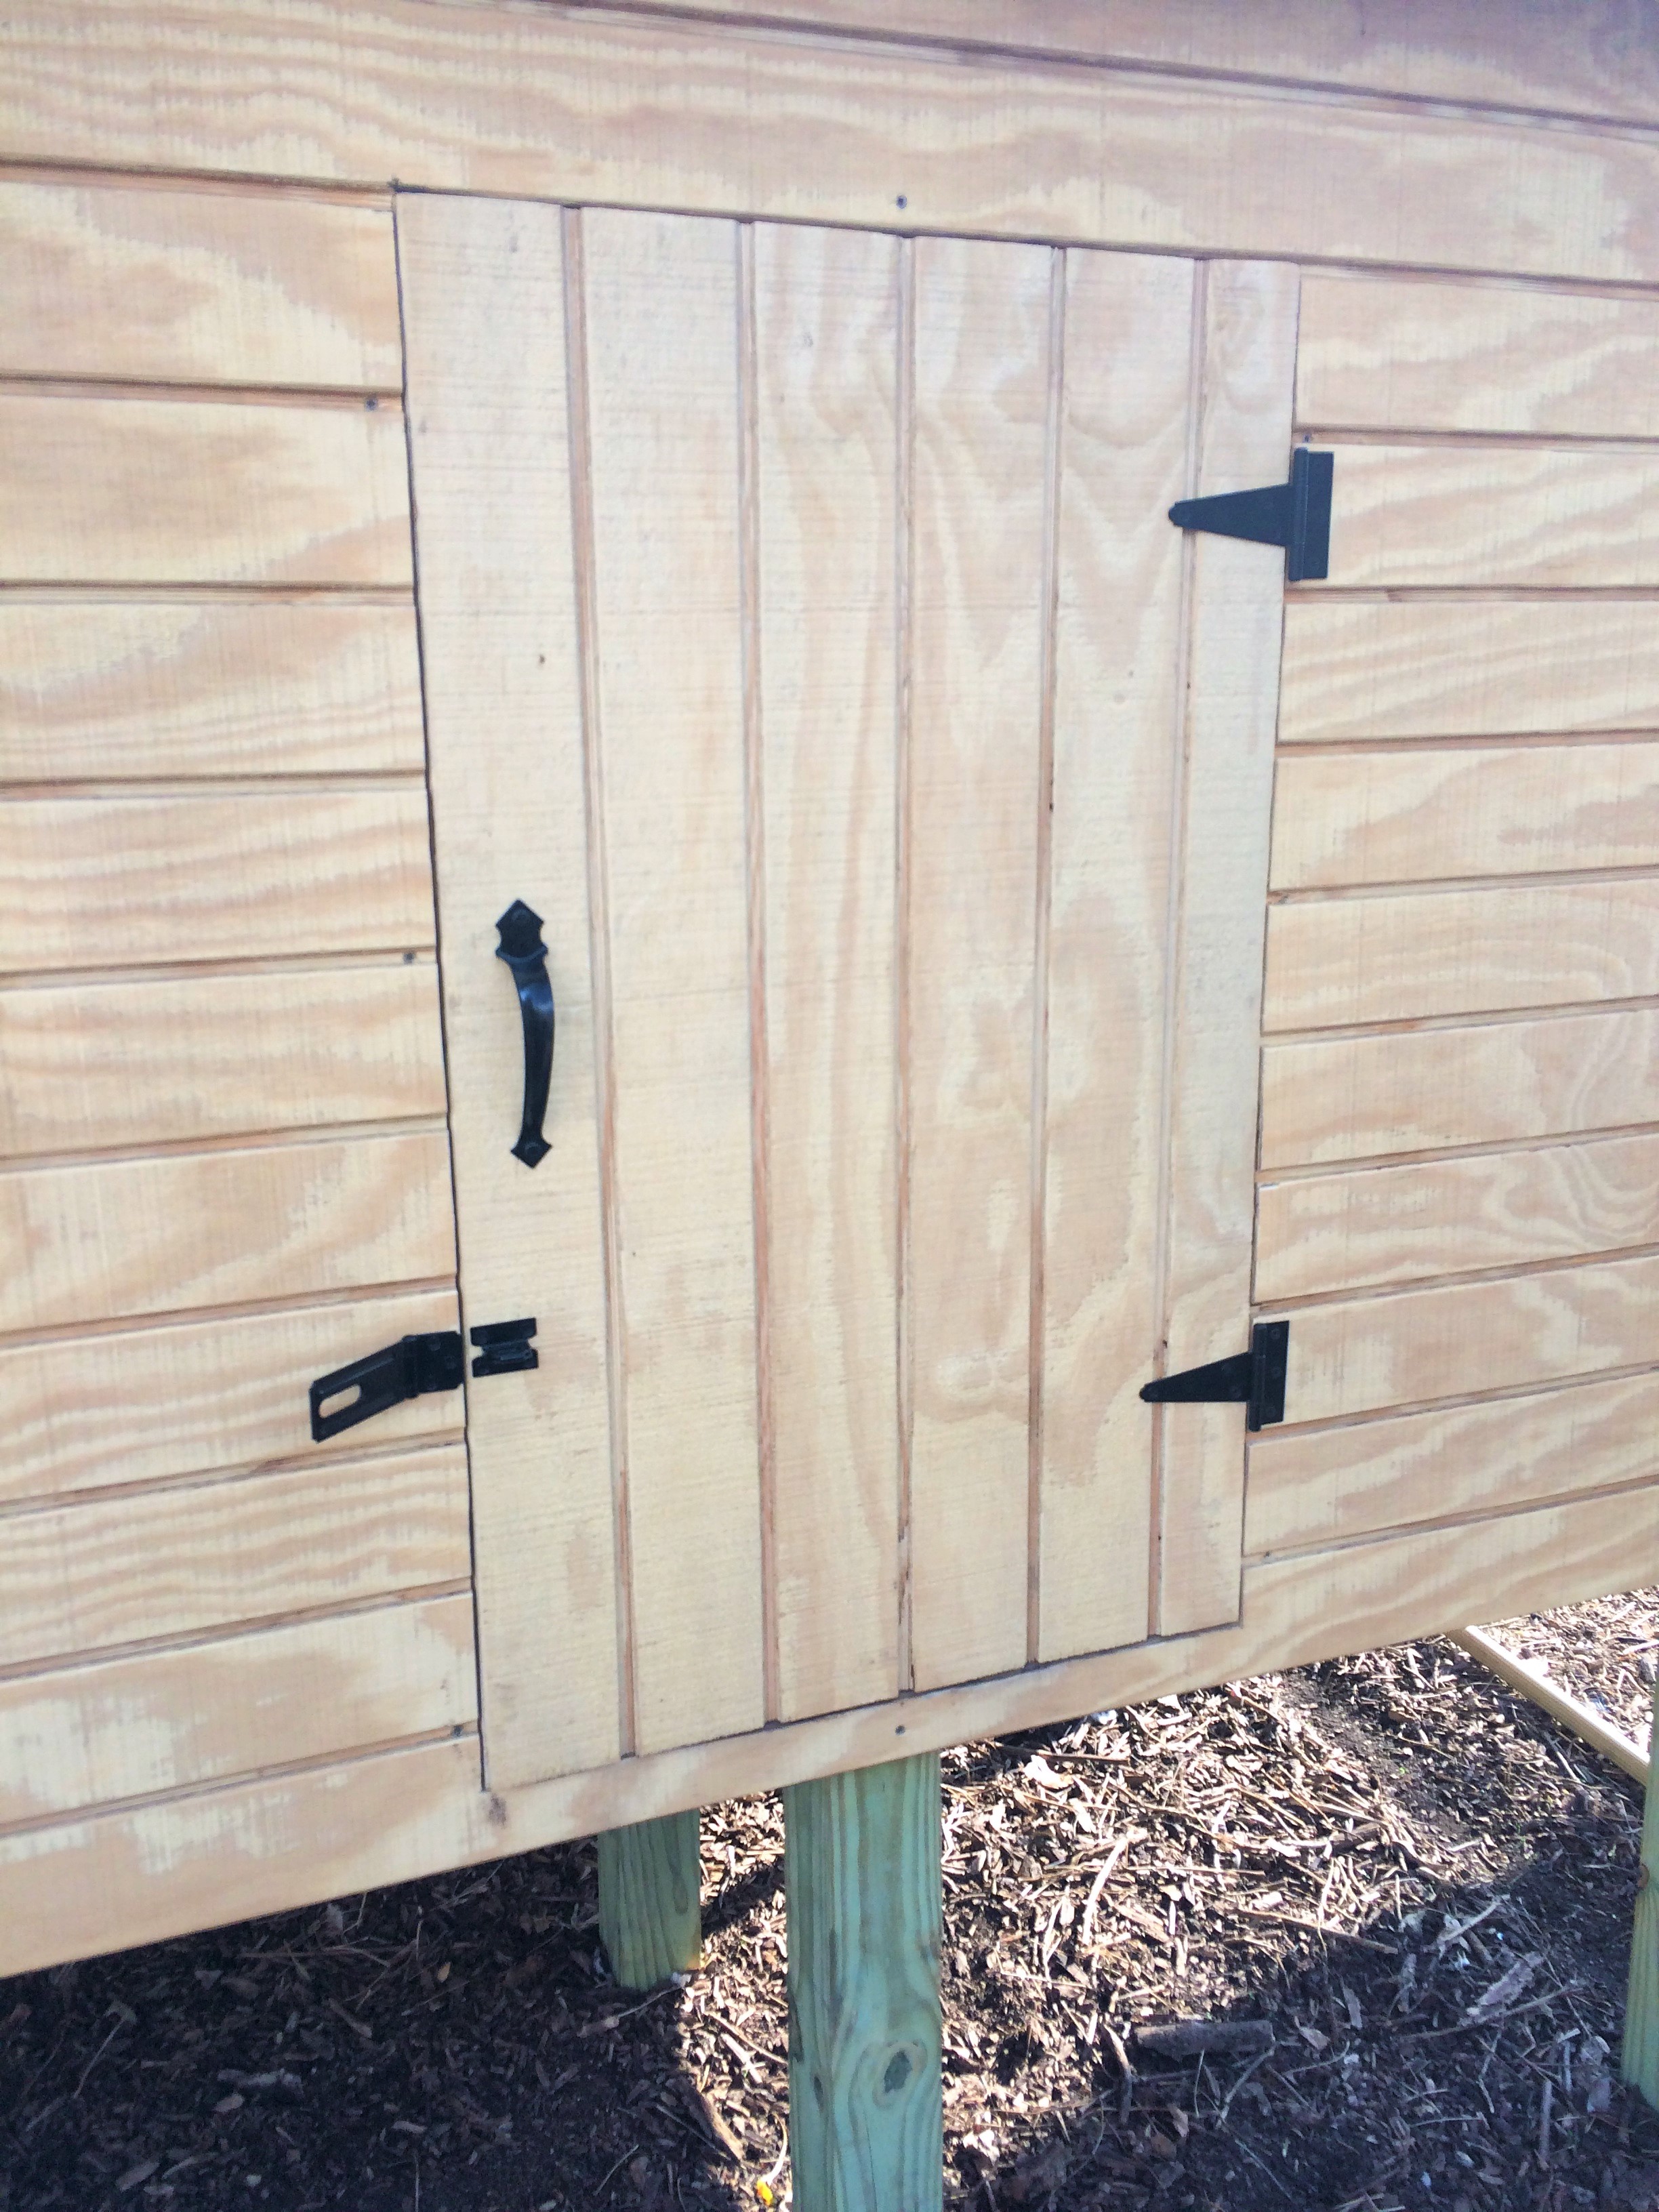
I know, you’re ready for something easy now! The last part of the “building” phase was to add doors and hardware. We used leftover siding to cut out the wood for our main door and our nest box. Then we added our hardware – handles, locks, and carabiner hooks. I have an irrational fear of raccoons getting into our coop, so we probably overdid it on the locks – but I wanted my girls to be safe! Carabiner hooks with strong springs are a good choice to deter raccoons and other predators.
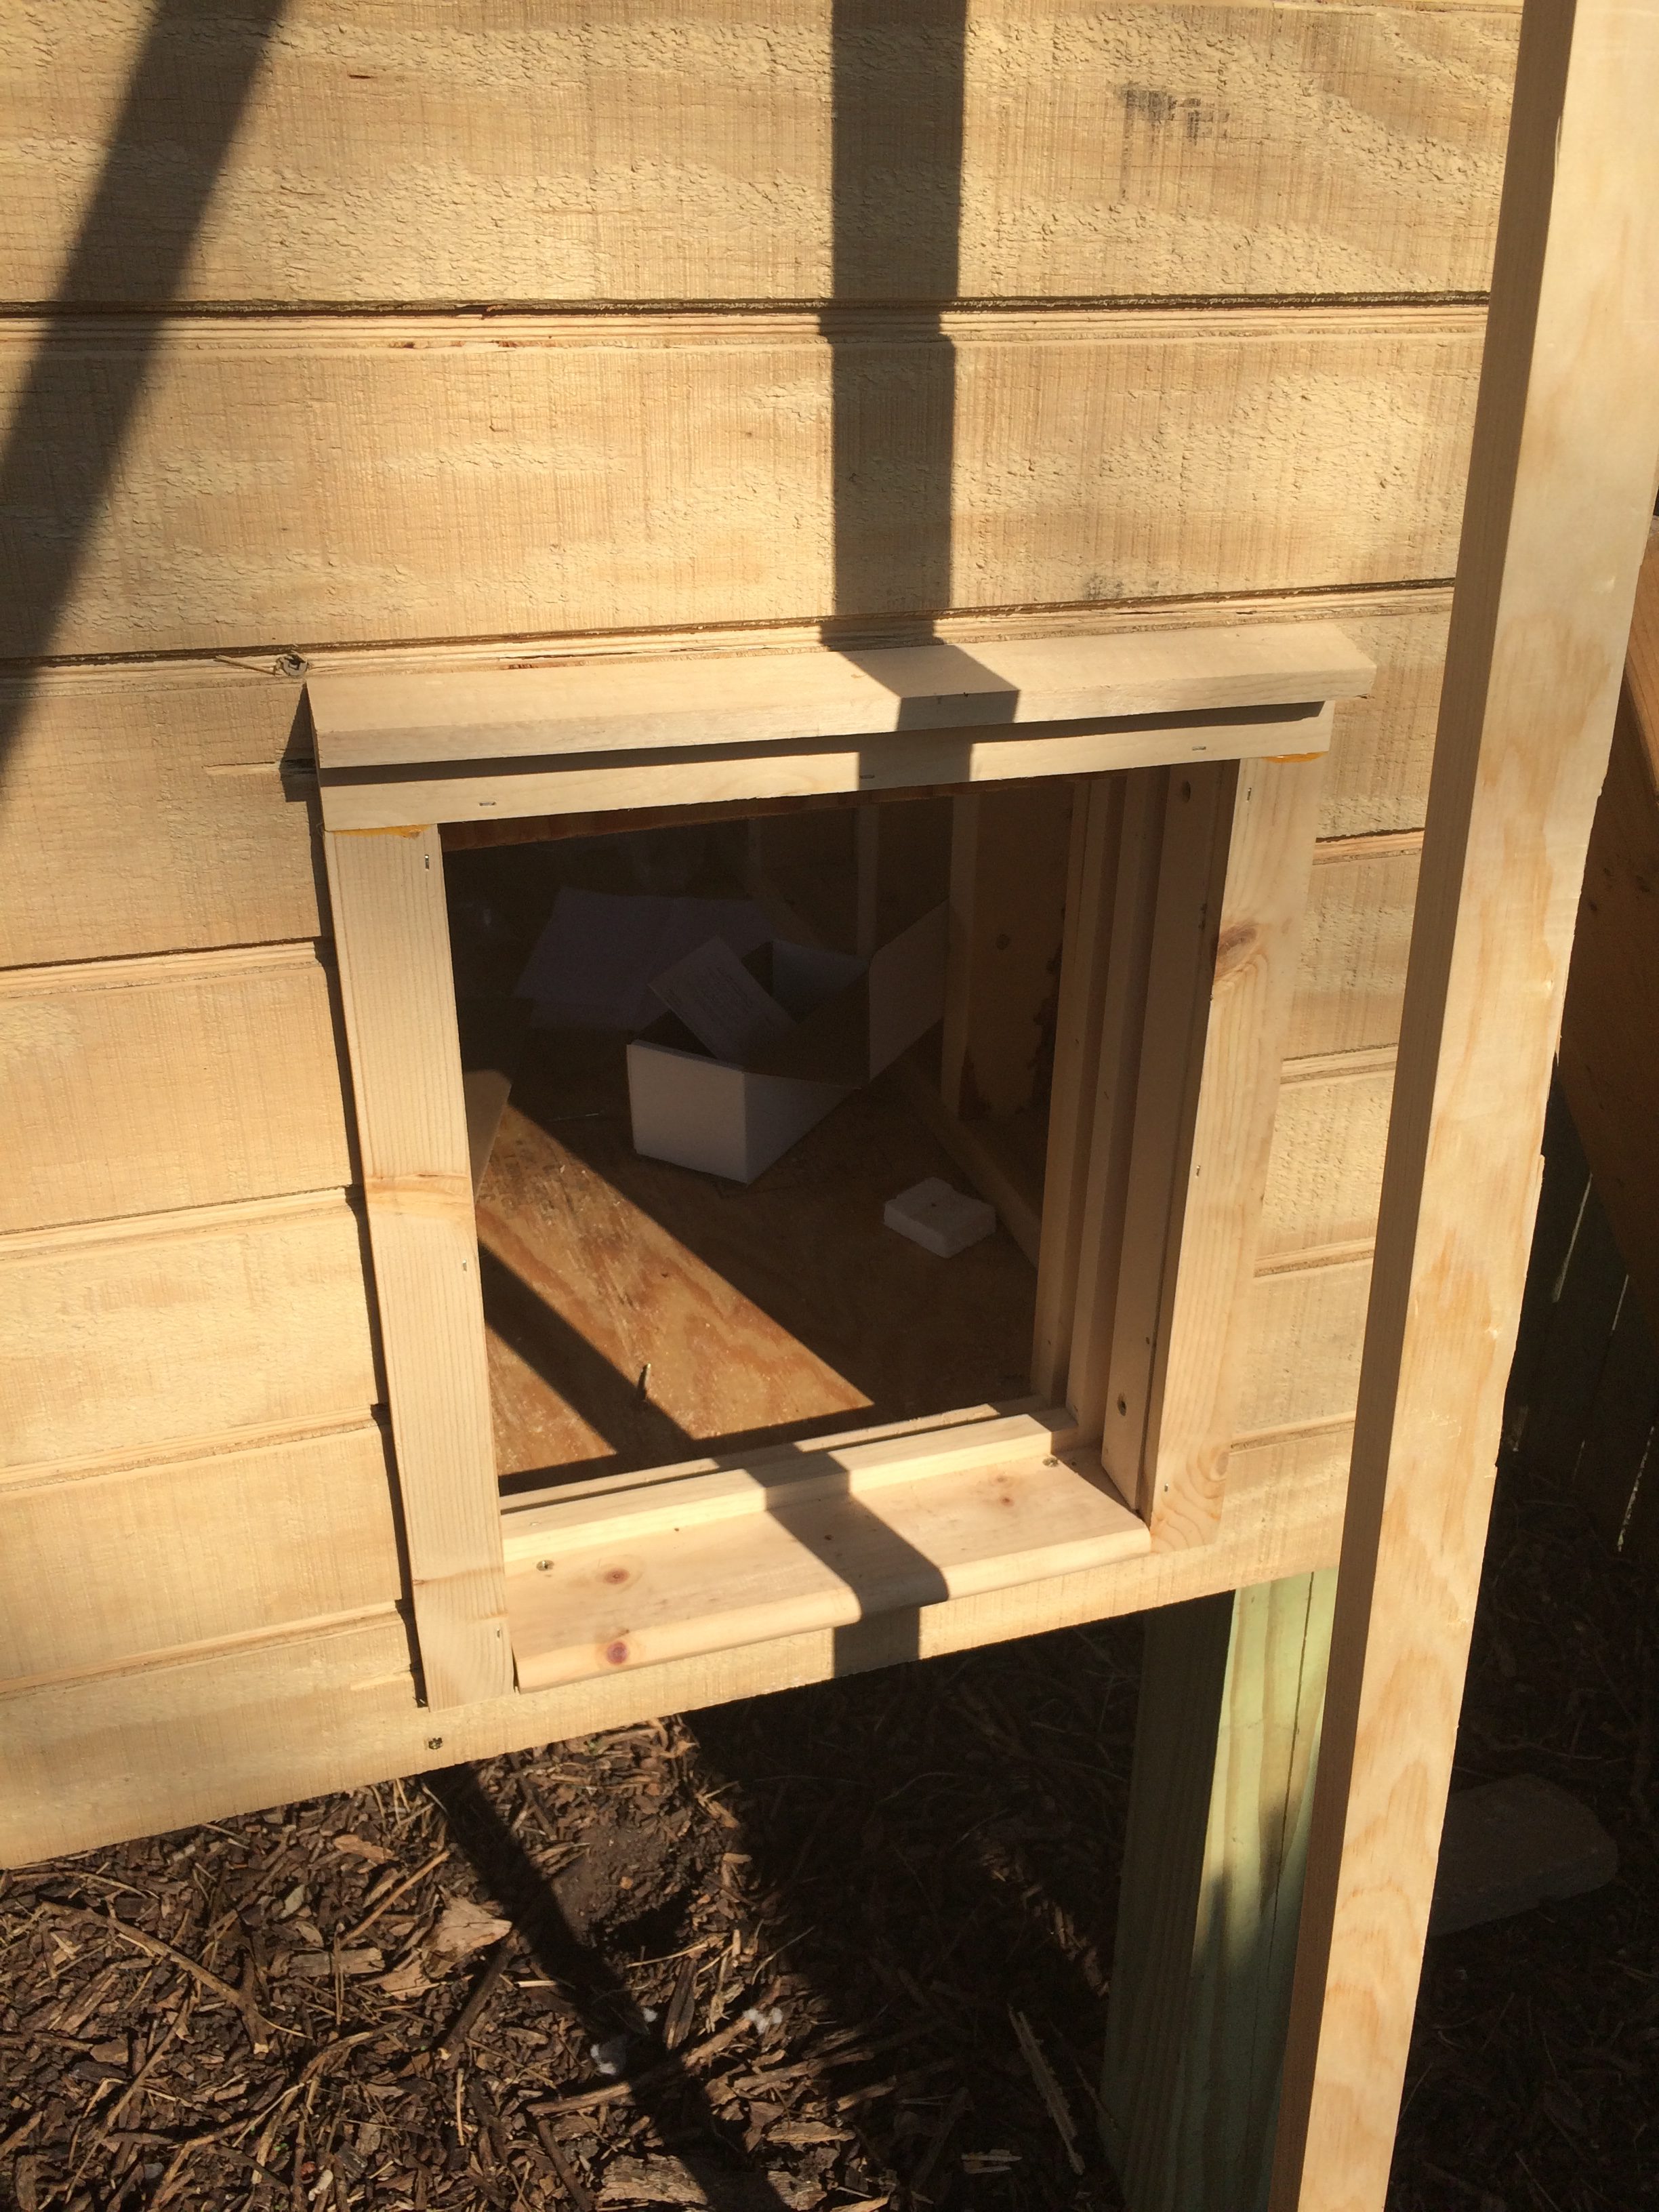
The automatic chicken coop door was a surprise gift from my hubby. He said the installation was quick and easy using their video, which can be found here. As I said in Part 1 of this series, the automatic door was by no means a necessary purchase. But it has made my life so much easier! I don’t have to let the chickens out into their run in the mornings, and the door closes automatically at night. We can go out of town for the weekend without having to worry about the chickens being let in or out. And best of all, they are always safe!
That’s all for Part 2! Phew! Are you exhausted yet? The good news is, all the hard parts are finally over! My next post will cover building the chicken coop run, and the easy finishing touches – flooring, painting, roost bars, and ventilation. Stay tuned!
~~~
6 thoughts on “How To Build A Chicken Coop, Part 2”
Hello, do you have a supply list, measurements, plans for this coop?
Hi Josh. I don’t have additional measurements or plans beyond what’s in the posts. There is a supply list, if you sign up for the emails (there is only one welcome email) a link to that list is at the bottom. Happy building!
What is the pitch of the roof? We are at the roof part 😳😫
Hi Peggy! The pitch on the roof is 5:12. I hope that helps and that your build is going well!
Thank you. We are finally finished. I’m so thrilled. Thank you for publishing your plans.
Wonderful! I hope you have many years of enjoyment ahead of you!