How To Build A Chicken Coop, Part 1
Early this year, we decided that we would get our first chicks in mid-April, after a couple family trips we had planned would be over. We made a timeline for building a chicken coop, found some ideas online, and had a solid plan in place. But then our local farm supply store got chicks in in February, and well… I couldn’t be expected to NOT get them, right?! Suddenly we had four chicks in our basement, and we needed to build a chicken coop – FAST! This is the first of 3 posts detailing how we built our coop. (Part 2 can be found here.) It will cover the supplies you need, cost, and how to build the base and walls of your very own chicken coop!
Pre-Made Chicken Coop Kits
I spent about a week seriously considering pre-made chicken coop kits. They were relatively cheap (around $200 on average), and certainly the fastest, easiest option. But I knew that they would not last long – maybe a year or two in our climate. Plus we were planning to place our coop under an ash tree that loves dropping branches, and I needed my girls to be safe in a sturdy structure. I could also tell that most kits advertised way too many chickens per coop; there is no way you can fit 6 chickens into two square feet! You should ideally have 4 square feet PER chicken in the coop, and 10 square feet per chicken in the run. We had four chickens already, with the possibility of more in the future, so we needed at least a 4×4 chicken coop.
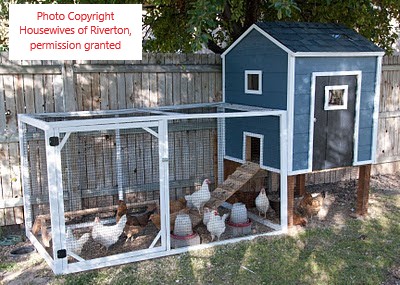
Our ‘Inspiration Chicken Coop’
We switched to looking for detailed chicken coop plans online (which are surprisingly difficult to find), and had a few ideas saved already. The one that kept sticking out to me, though, was from Housewives of Riverton. Every time I saw that adorable blue and white coop, I just fell more in love! There were enough building details and photos that we felt we had sufficient direction to get started. Prior to the chicken coop, the only thing my husband or I had ever built was a simple fence! We were nervous, but up for the challenge. And with the chicks growing fast, we needed to get started!
We made a few changes to their chicken coop to make it work better for us. I knew I wanted a nest box sticking out from the coop, and I needed a run that I could walk into standing up. I’m short, but not 4 feet short! 🙂 I also planned for a very large window on the south side, rather than several smaller windows. This would provide lots of sunlight all year, and extra warmth in the winter. Both sunlight and warmth are important for egg production, and for general chicken happiness!
Supplies Needed to Build A Chicken Coop
Once we had our plan, I drew a simple sketch and we started counting up supplies. The shopping list was a monster by the time it was done! We also bought some supplies for our garden and yard at the same time, which in hindsight was not a good idea. We ended up making two trips to Menards, with both trips being 3 hours each. Not fun.
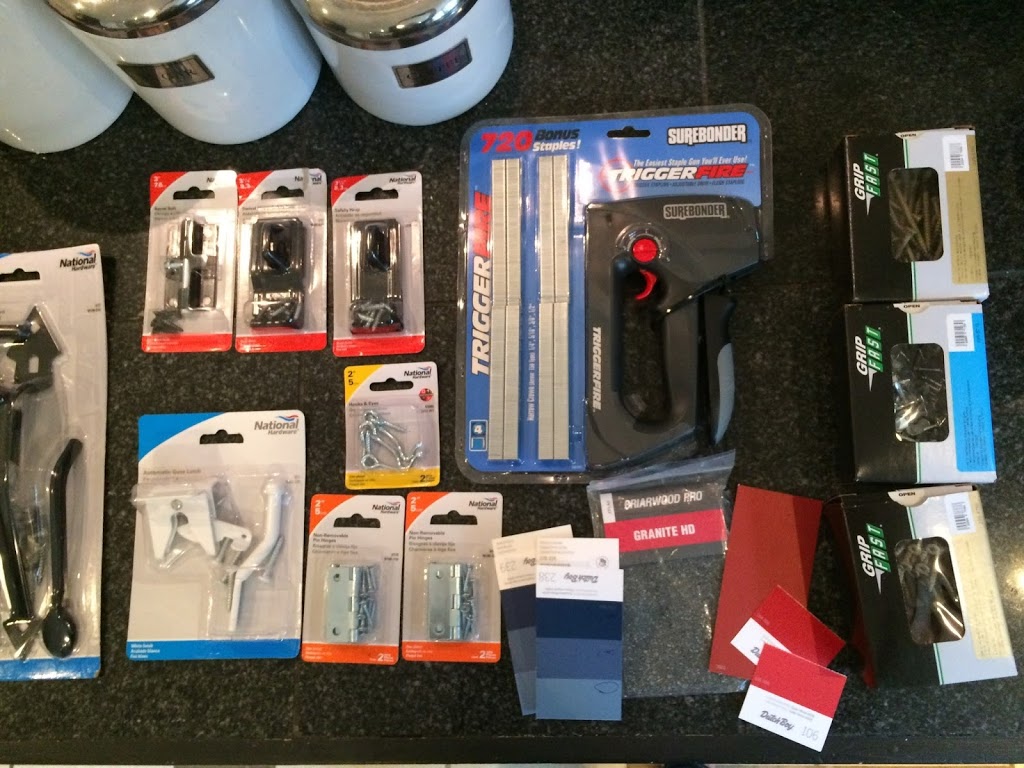
To make your life a million times easier, I’ve gone ahead and typed up our supply list to share with you here. There were maybe a few small things we needed here or there – another board or an extra box of screws – that are not included on the list, but it should have 99% of what you need to build a 4×6′ chicken coop. To get the supply list, you just need to click here to sign up for my emails. You will be sent the link for my chicken coop supply list automatically!
Cost of Our Chicken Coop
I don’t really want to admit this, because I don’t want to frighten you away, but the truth is we spent $775 building our coop. Now before you have a heart attack, let me say that that includes every single thing for the chicken coop AND run; we ended up making the coop 4×6′ plus the nest box; we bought special plywood siding to save time; it also includes an automatic chicken door that cost $220; and it is the strongest chicken coop I’ve ever seen and will last pretty much forever!
Was the automatic chicken door necessary? No. If it had been up to me I probably would have waited and saved that money, but my husband bought it as an anniversary gift for me (we’re super romantic). It has been worth its weight in gold, though. I do not have to get up at the crack of dawn to let my girls out, I can go on vacation without someone coming over every morning and evening, and I know they’re as safe as can be at night! Even if a predator got into the run, they would not be able to break into the coop door. So while expensive, it was a worthwhile purchase and should last for years.
Building the Base of the Chicken Coop
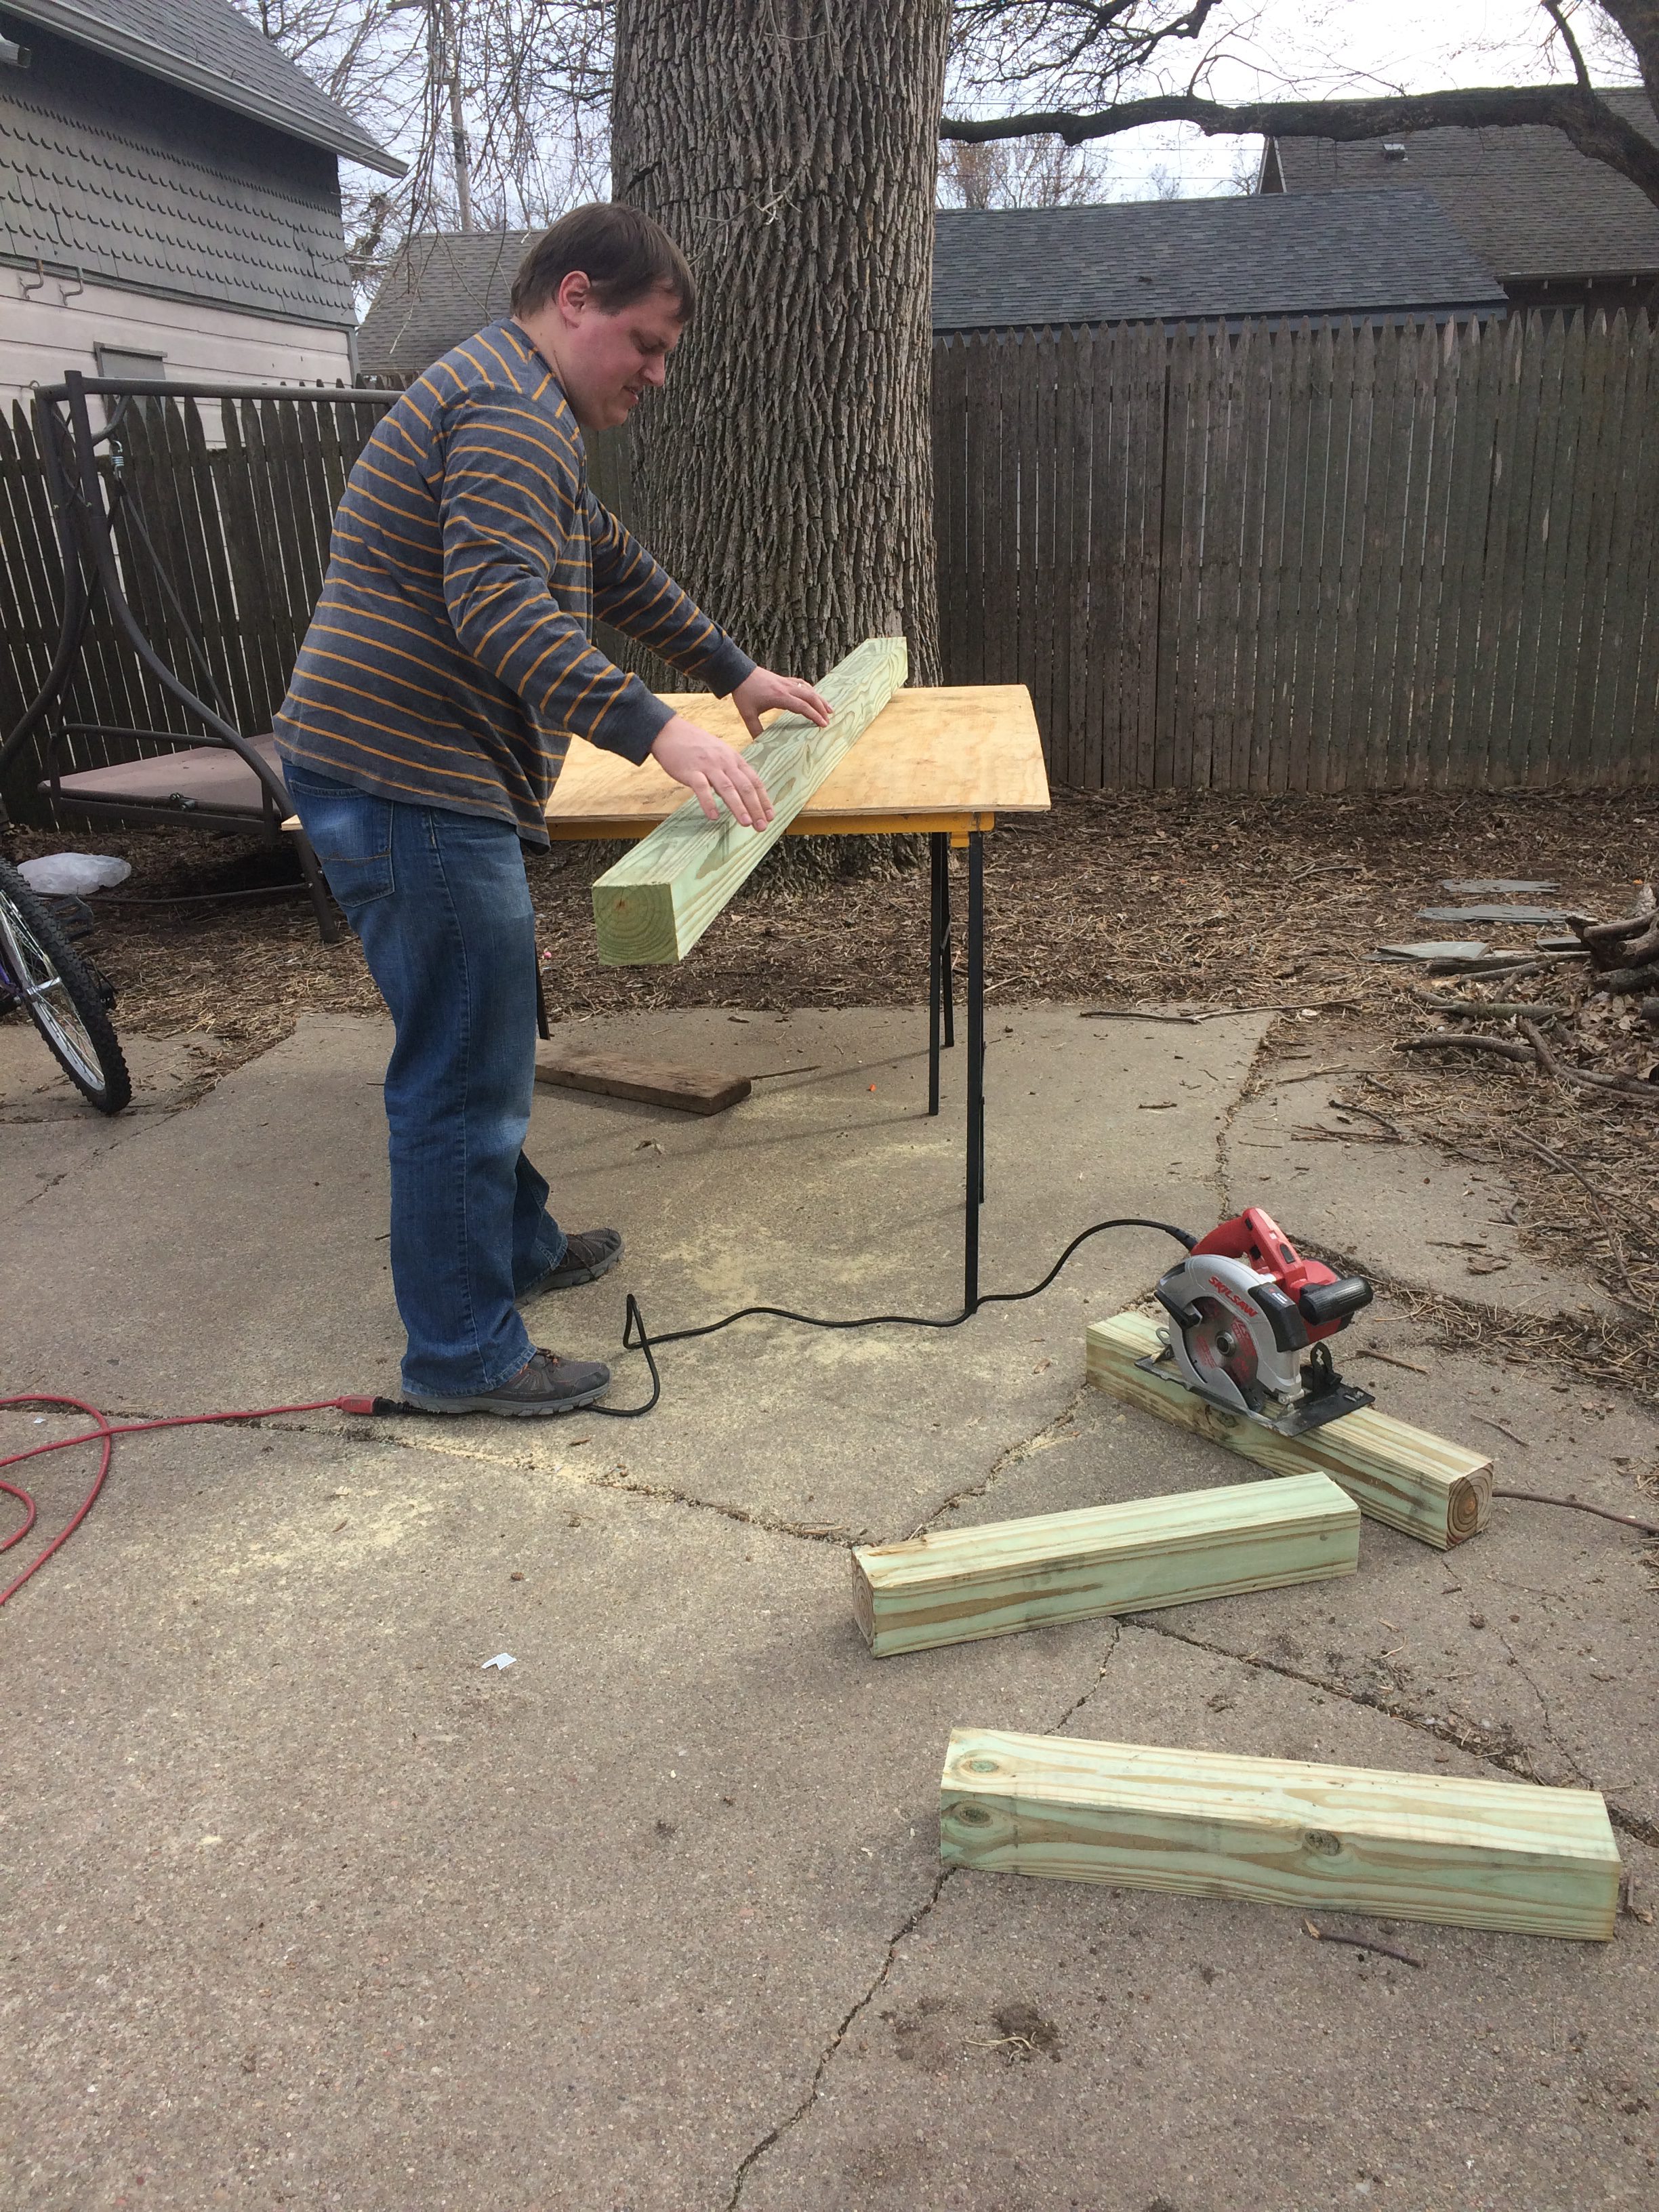
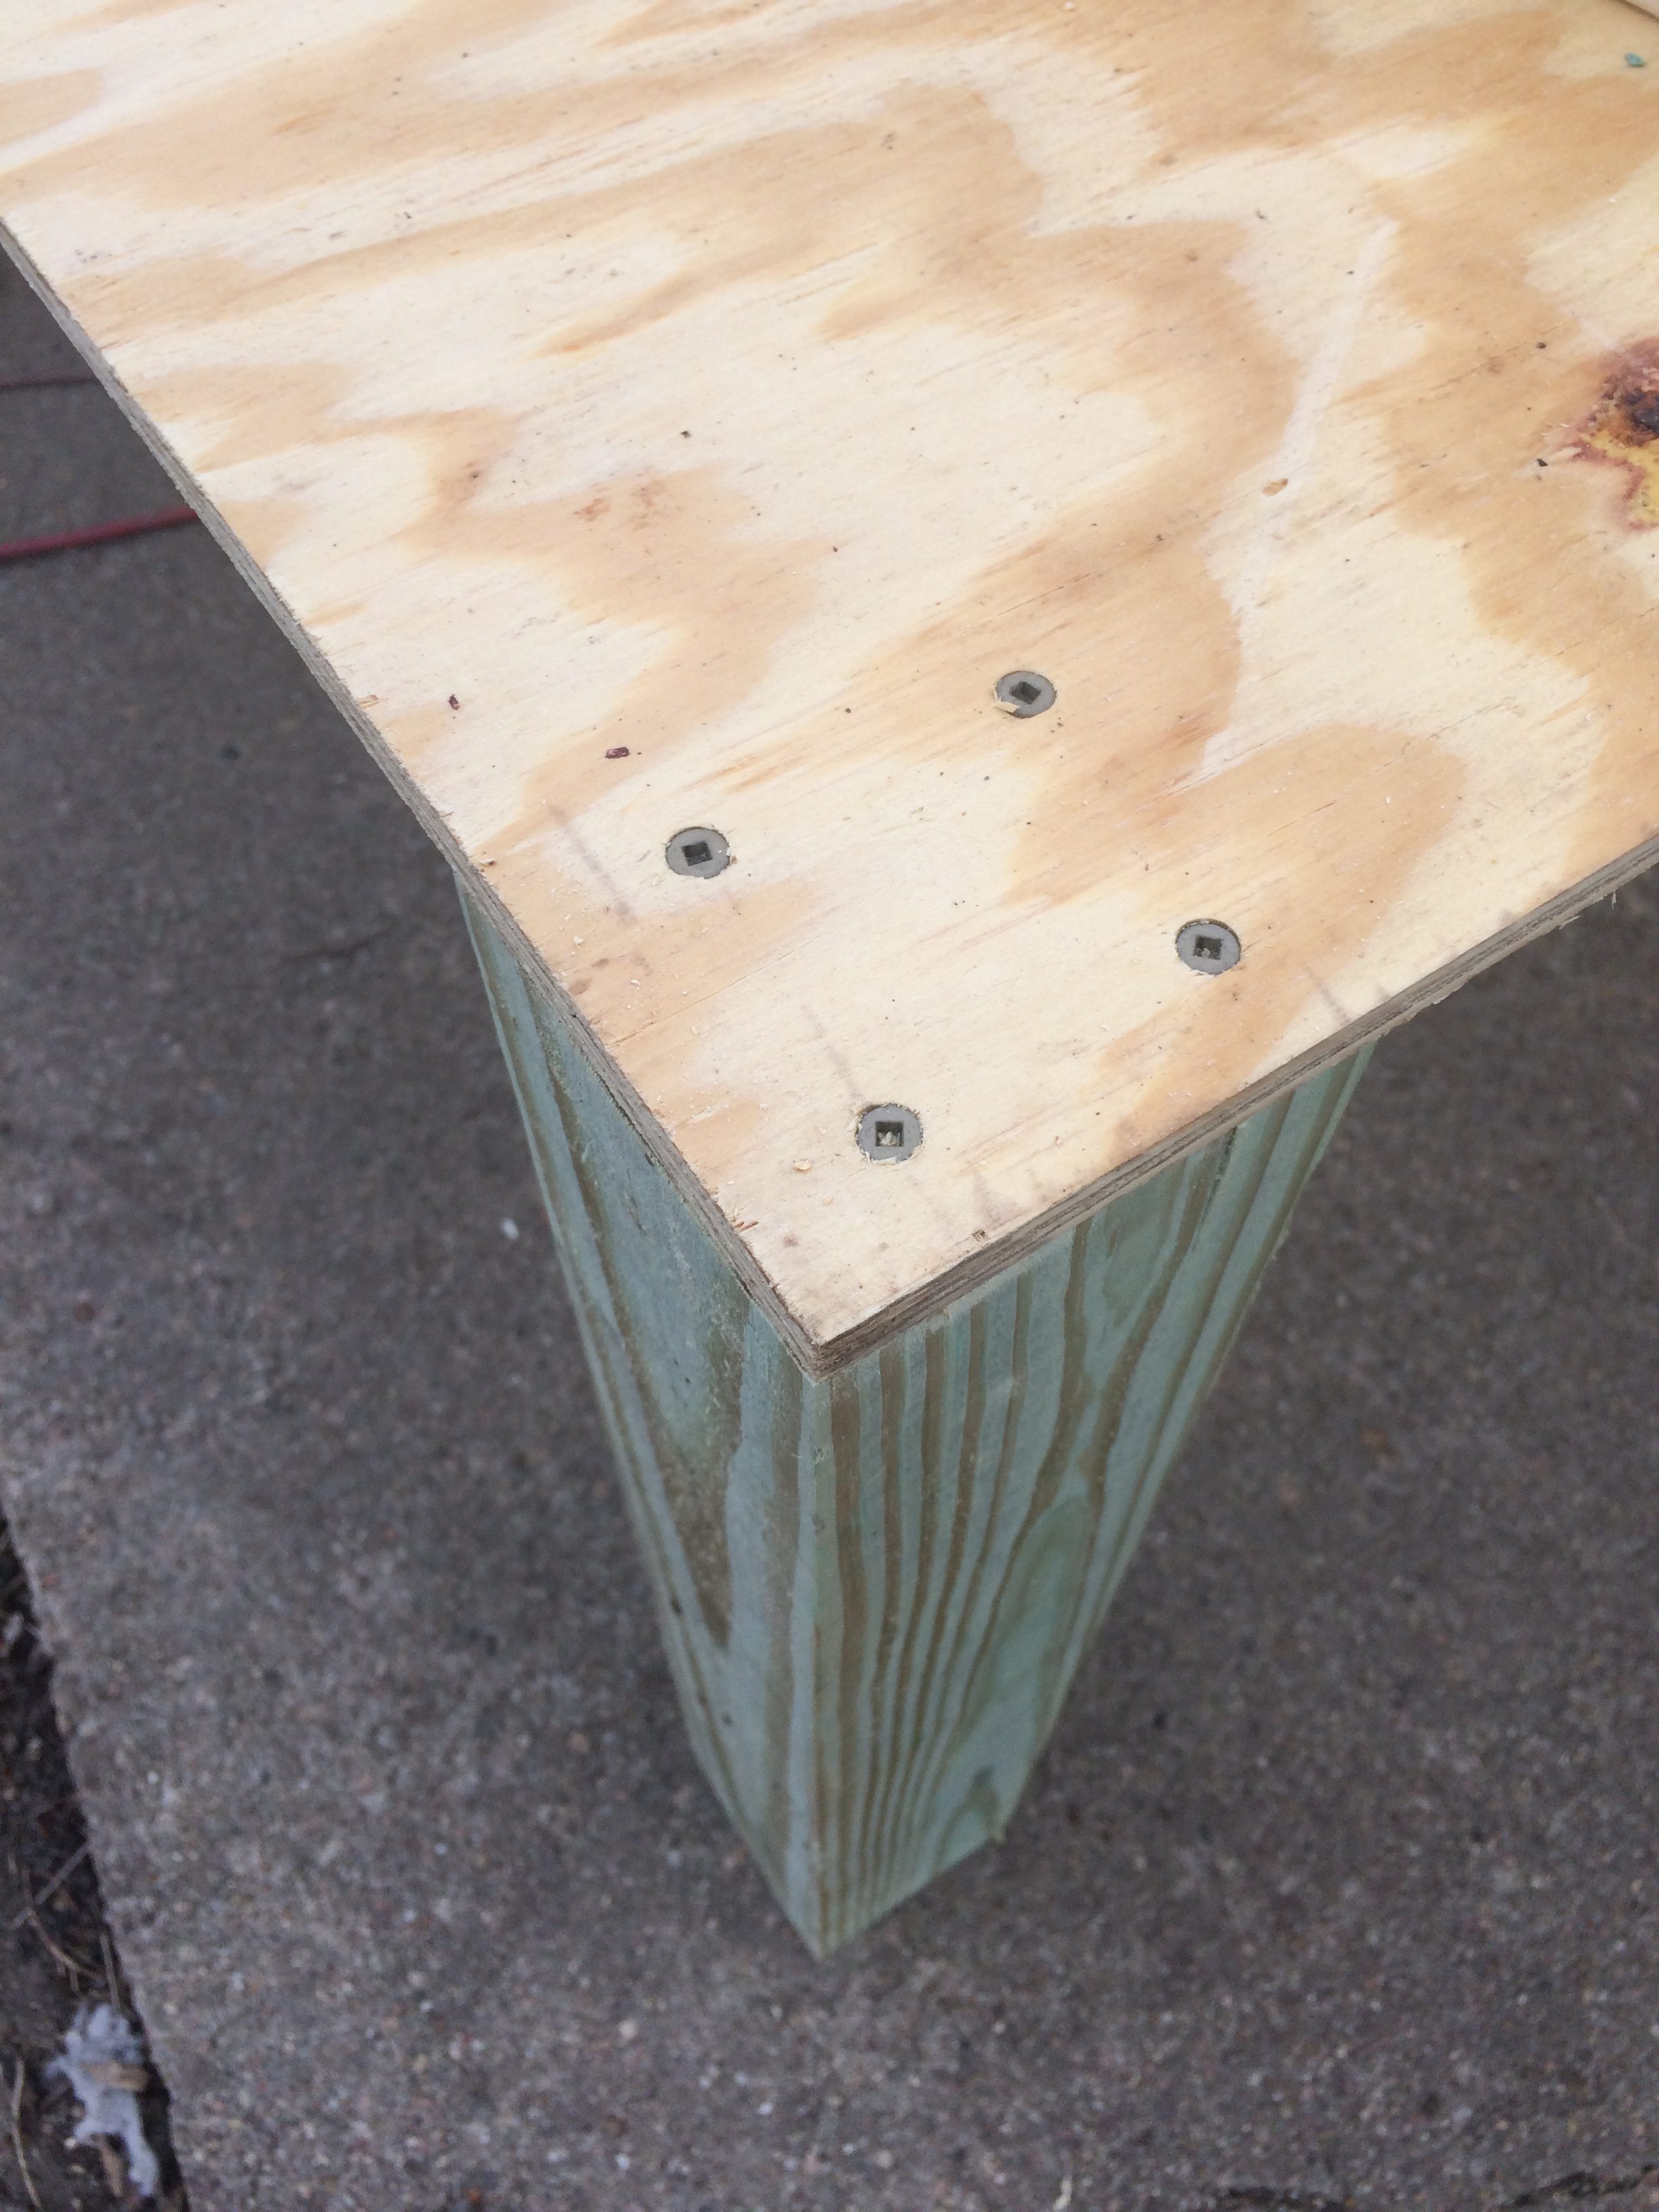
The first thing we had to do for the chicken coop was build the base out of plywood and 4×4″ posts. It was originally supposed to be a 4×4 foot coop, so we bought a 4×8′ piece of plywood to cut in half. As my husband was literally lowering the circular saw to make the first cut, I yelled “Wait!! … What if we made it 4×6 instead?” My husband is a very patient man. So he moved the board over, and we started again, making the base 4’x6′ instead. (In hindsight we should have left an extra foot on the end for the nest box floor. We ended up having to add it back on later!)
Then he cut the posts into 7 24″ pieces, and secured the plywood to the posts using 3″ coated screws (4 screws per post). We placed 3 posts on each side, and added one right in the middle for extra support. Did I mention this thing is STURDY?!

Kickboards and Top Plates
Next we had to add kickboards to our chicken coop – which is a fancy term for 2×4’s that you lay flat along the outer edges of the base. Two kickboards will be 6 feet long, and two will be about 3’5″, to fit between the long boards (measure between your long boards for exact measurements!). Don’t screw these in yet. You do not need to cut any spaces for the door or nest box; the extra wood will help keep drafts out, and bedding in!
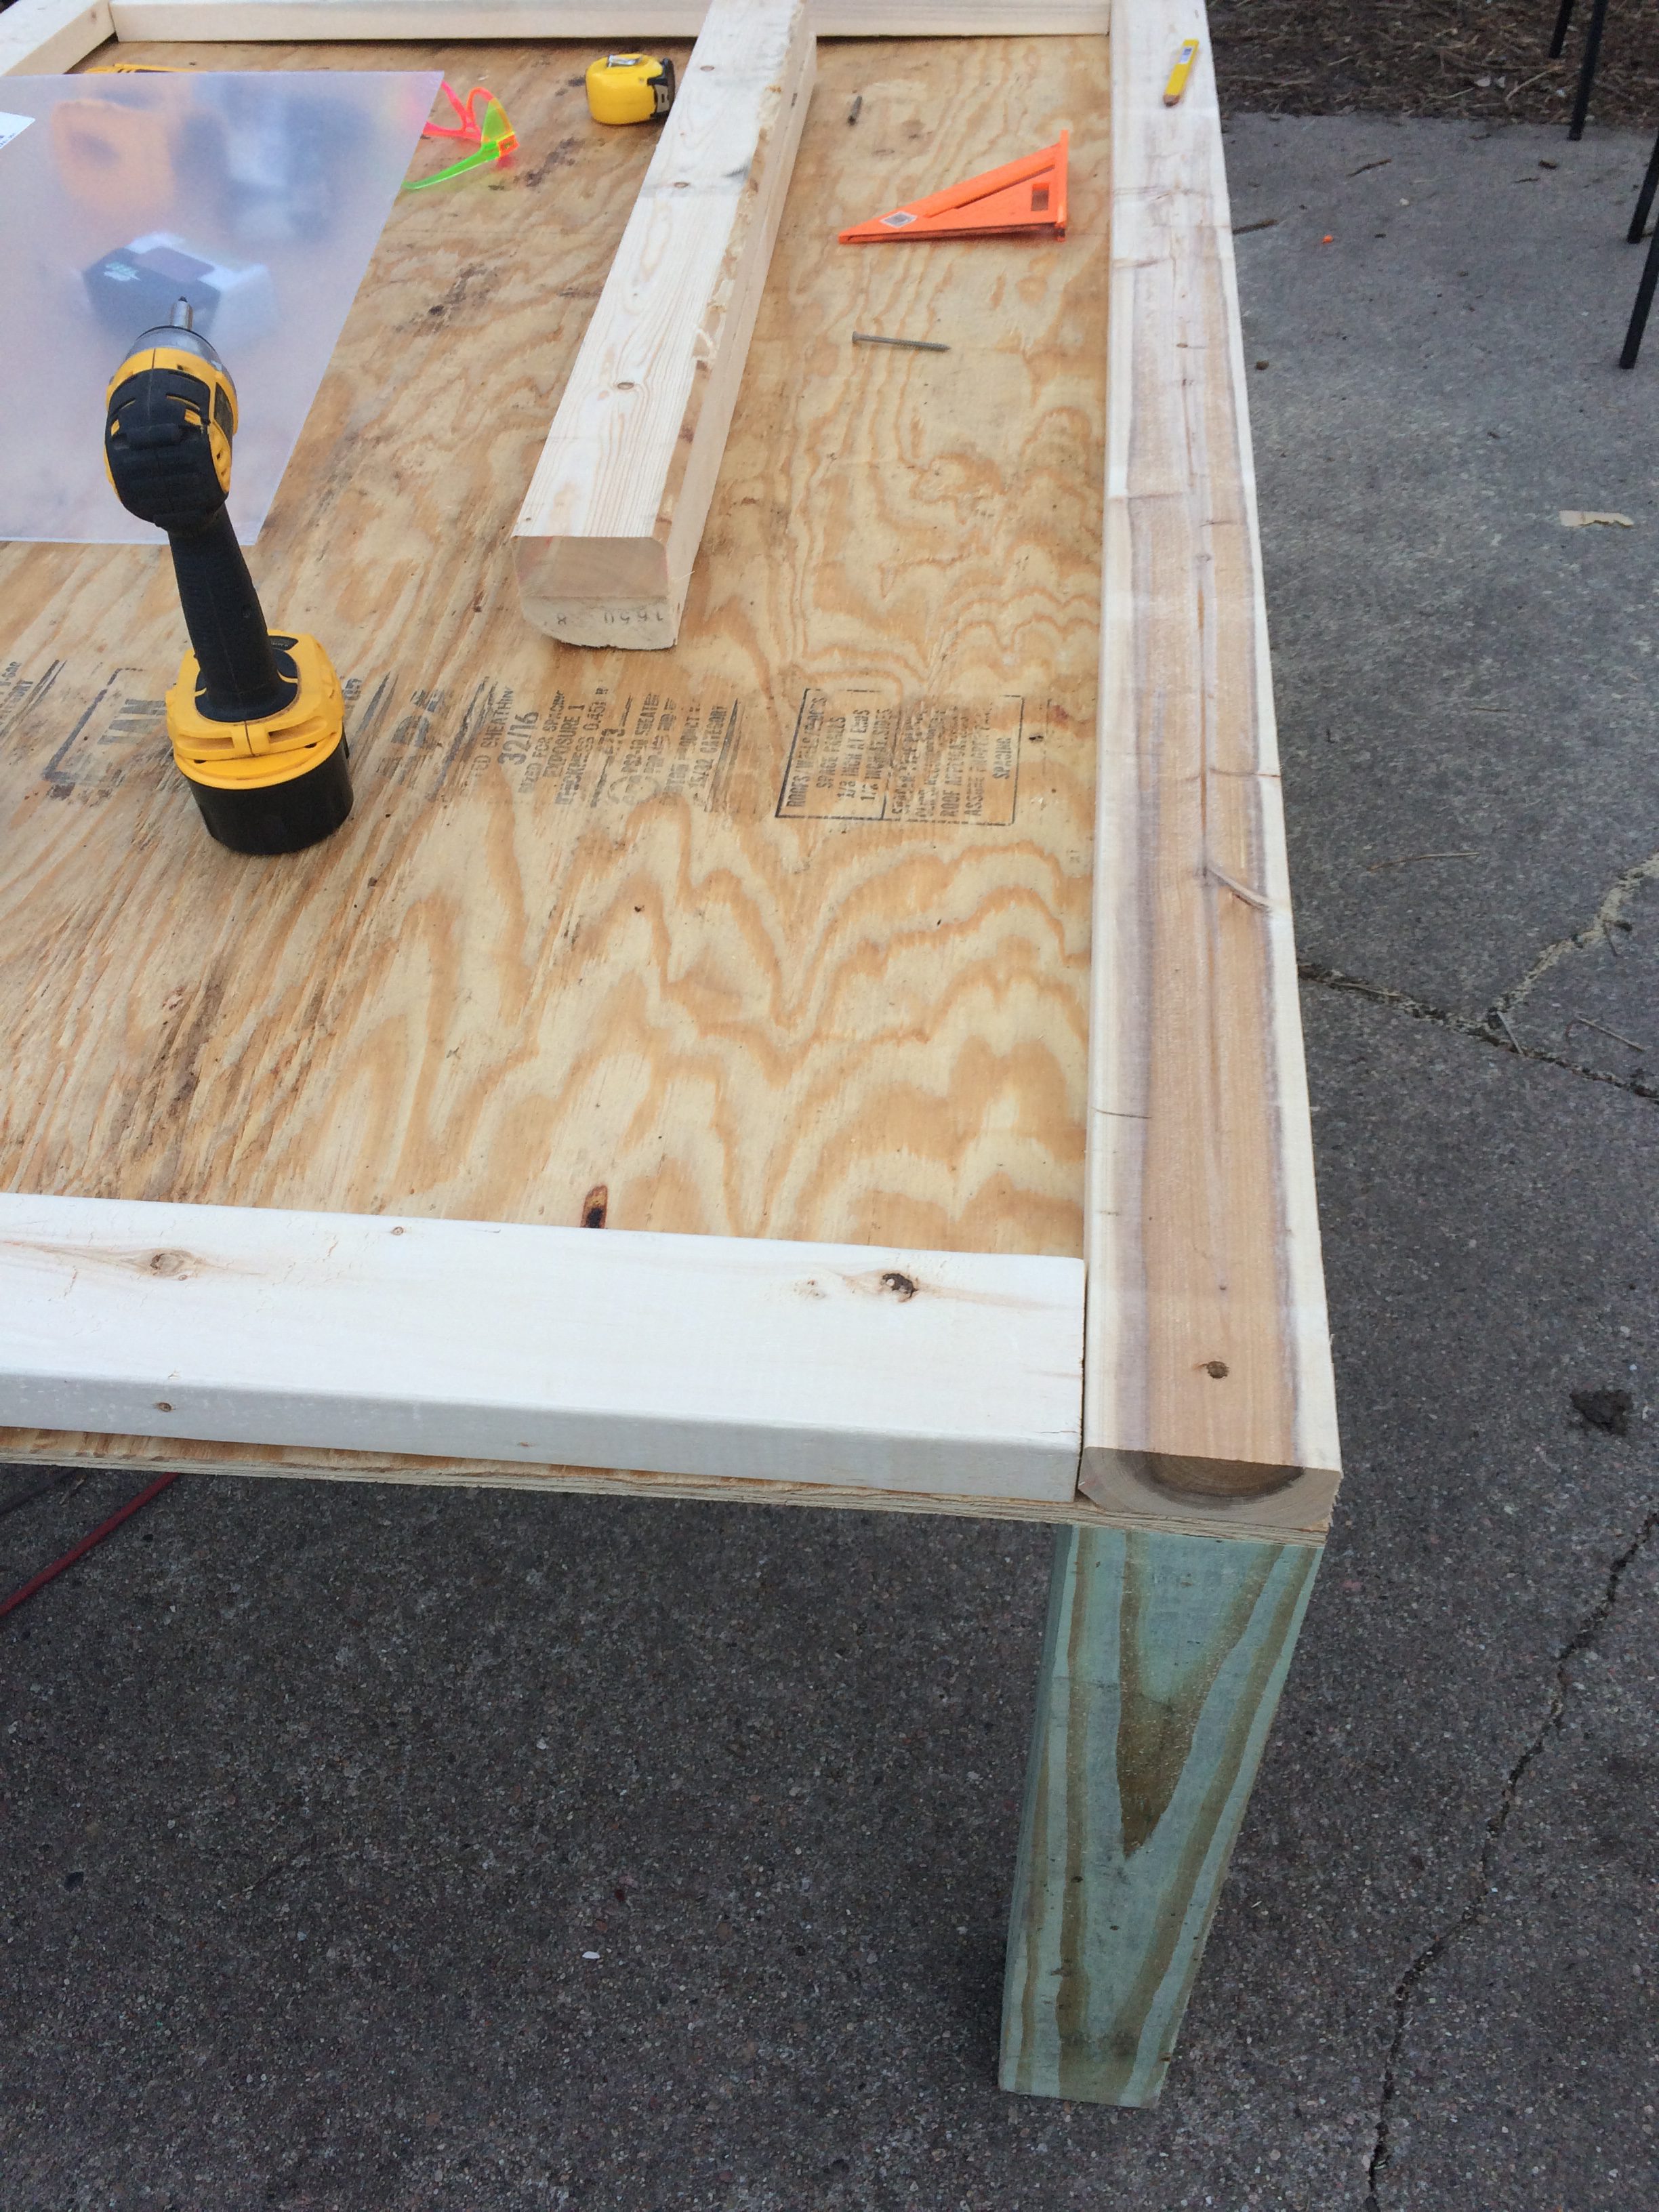
Using your kickboards as a guide, cut identical boards for the top of your coop walls. (These top pieces are called top plates, not doodlies, in case you are not as build-ish as I am and didn’t know.) Next you will cut your wall studs (vertical boards) for your 6′ sides. You will need 6 4-foot studs for each side, for a total of 12. Attach these to your 6′ headers and footers, leaving a space in the middle the width of your door and window. Bam! You now have a wall frame!
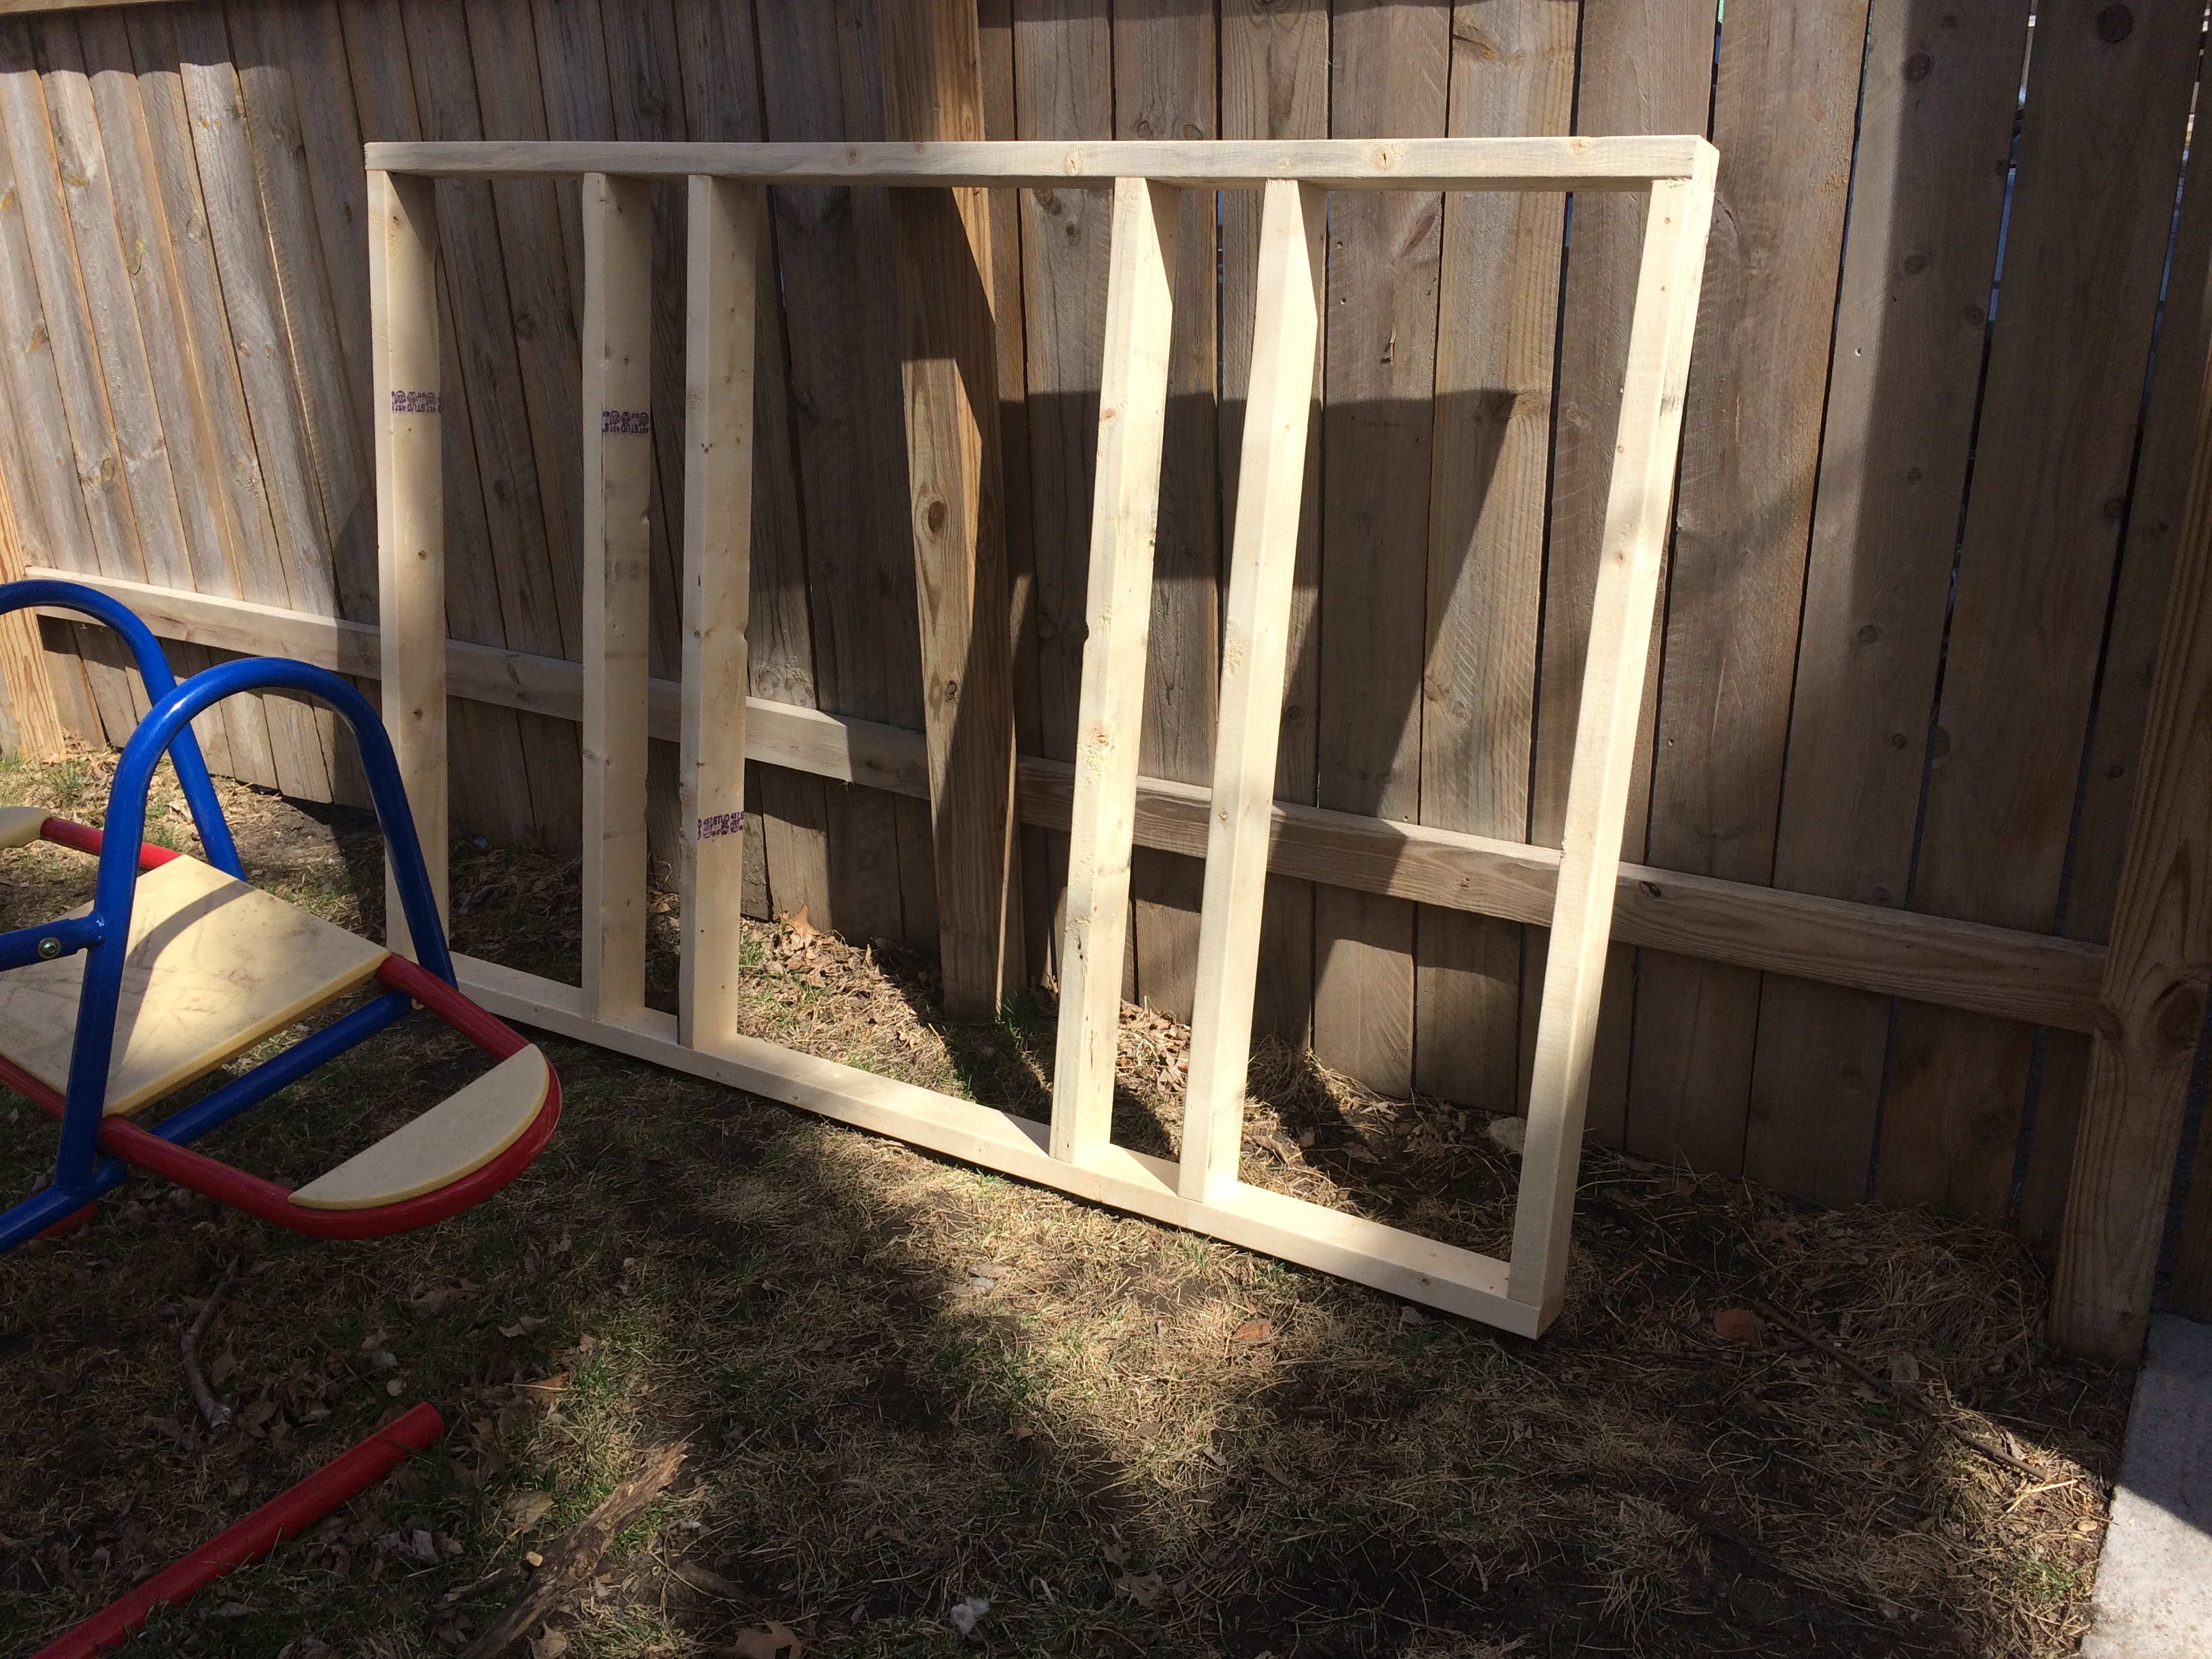
Putting Up the Walls
Now you will build your 4′ walls. One side will hold the chicken door, so if you purchased an automatic door or think you might in the future, check the size requirements now to make sure you’re spacing your studs correctly. Most automatic doors, sometimes called ‘pop’ doors, are made for 16″ on center stud spacing.

The opposite wall will hold your nest box. Hopefully you learned from our mistake and left an extra foot on the end of your plywood! You won’t be framing that out yet, so the walls you just built will start 12″ in from the end of the base. You can see that we put only one stud up on the nest box side, so that we wouldn’t block it off for the chickens. When your 4′ wall frames are done, you can screw all the walls onto your base. Use 3″ screws at each post, and 2″ screws around all the edges. Notice how the short sides fit inside the longer sides.
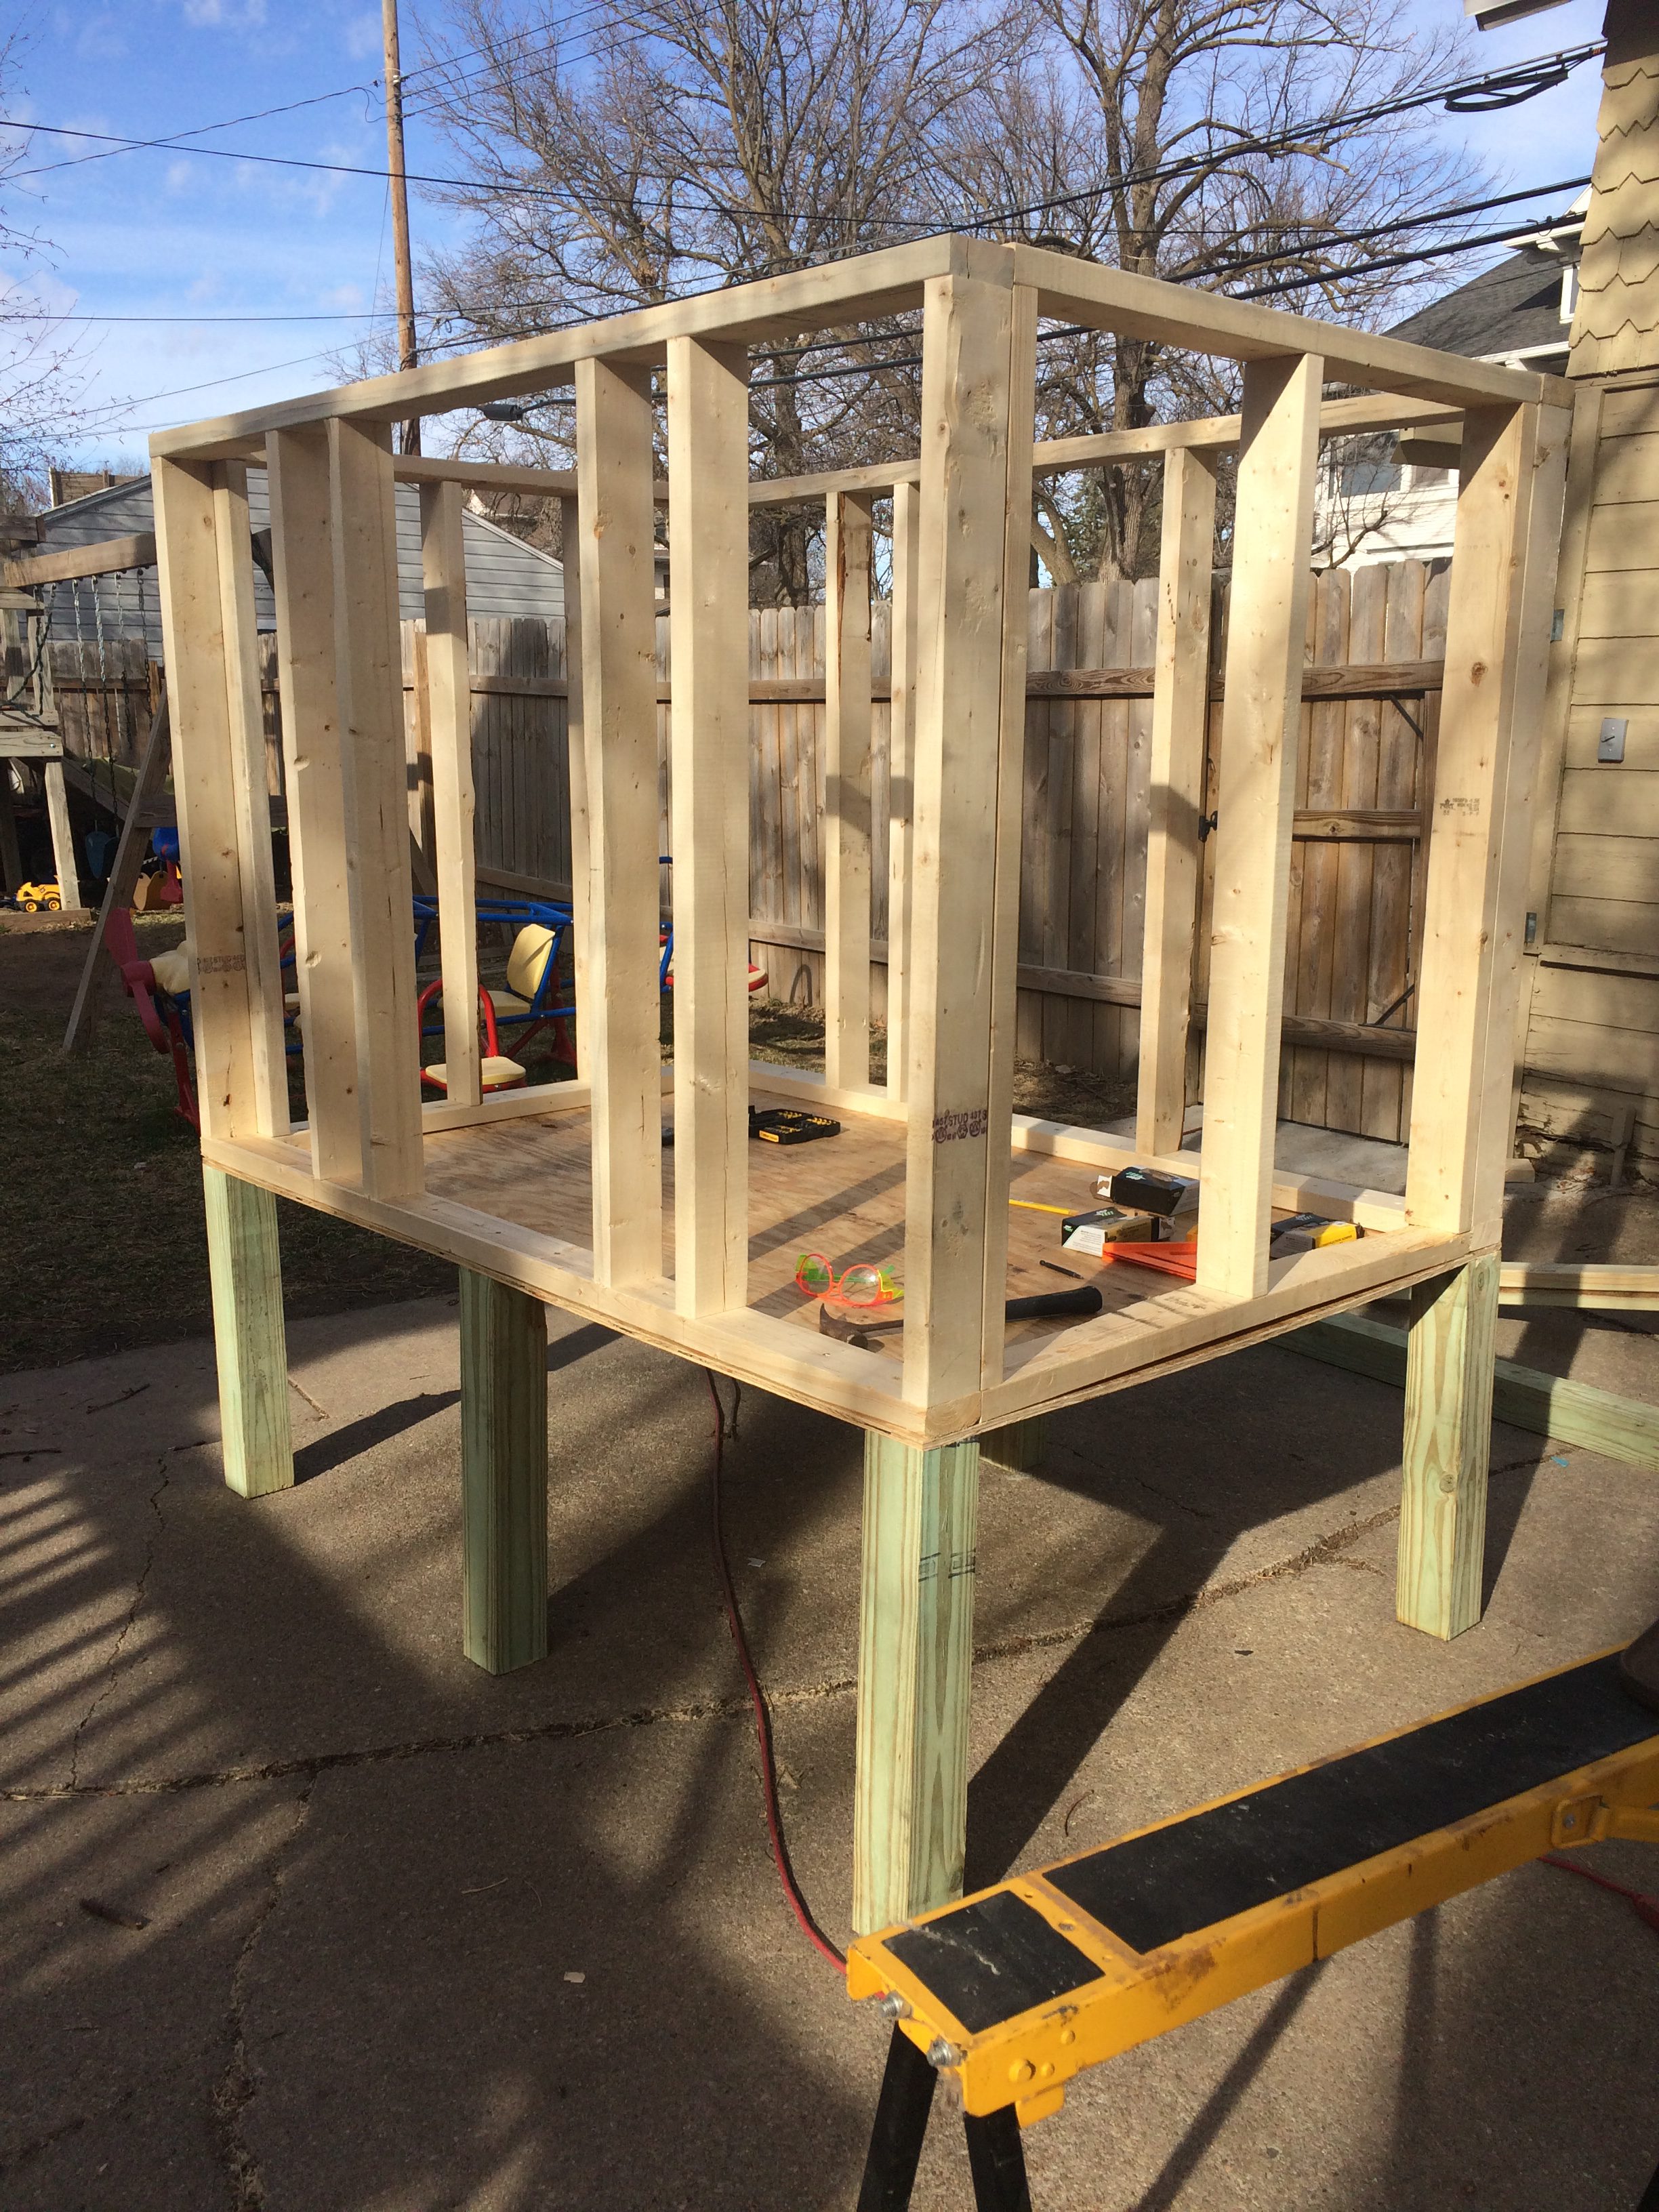
Finish framing out your walls with horizontal beams between the studs. Now is when you will make frames for your window and door (just place beams at the top and bottom of where they will go).

Siding Your Chicken Coop
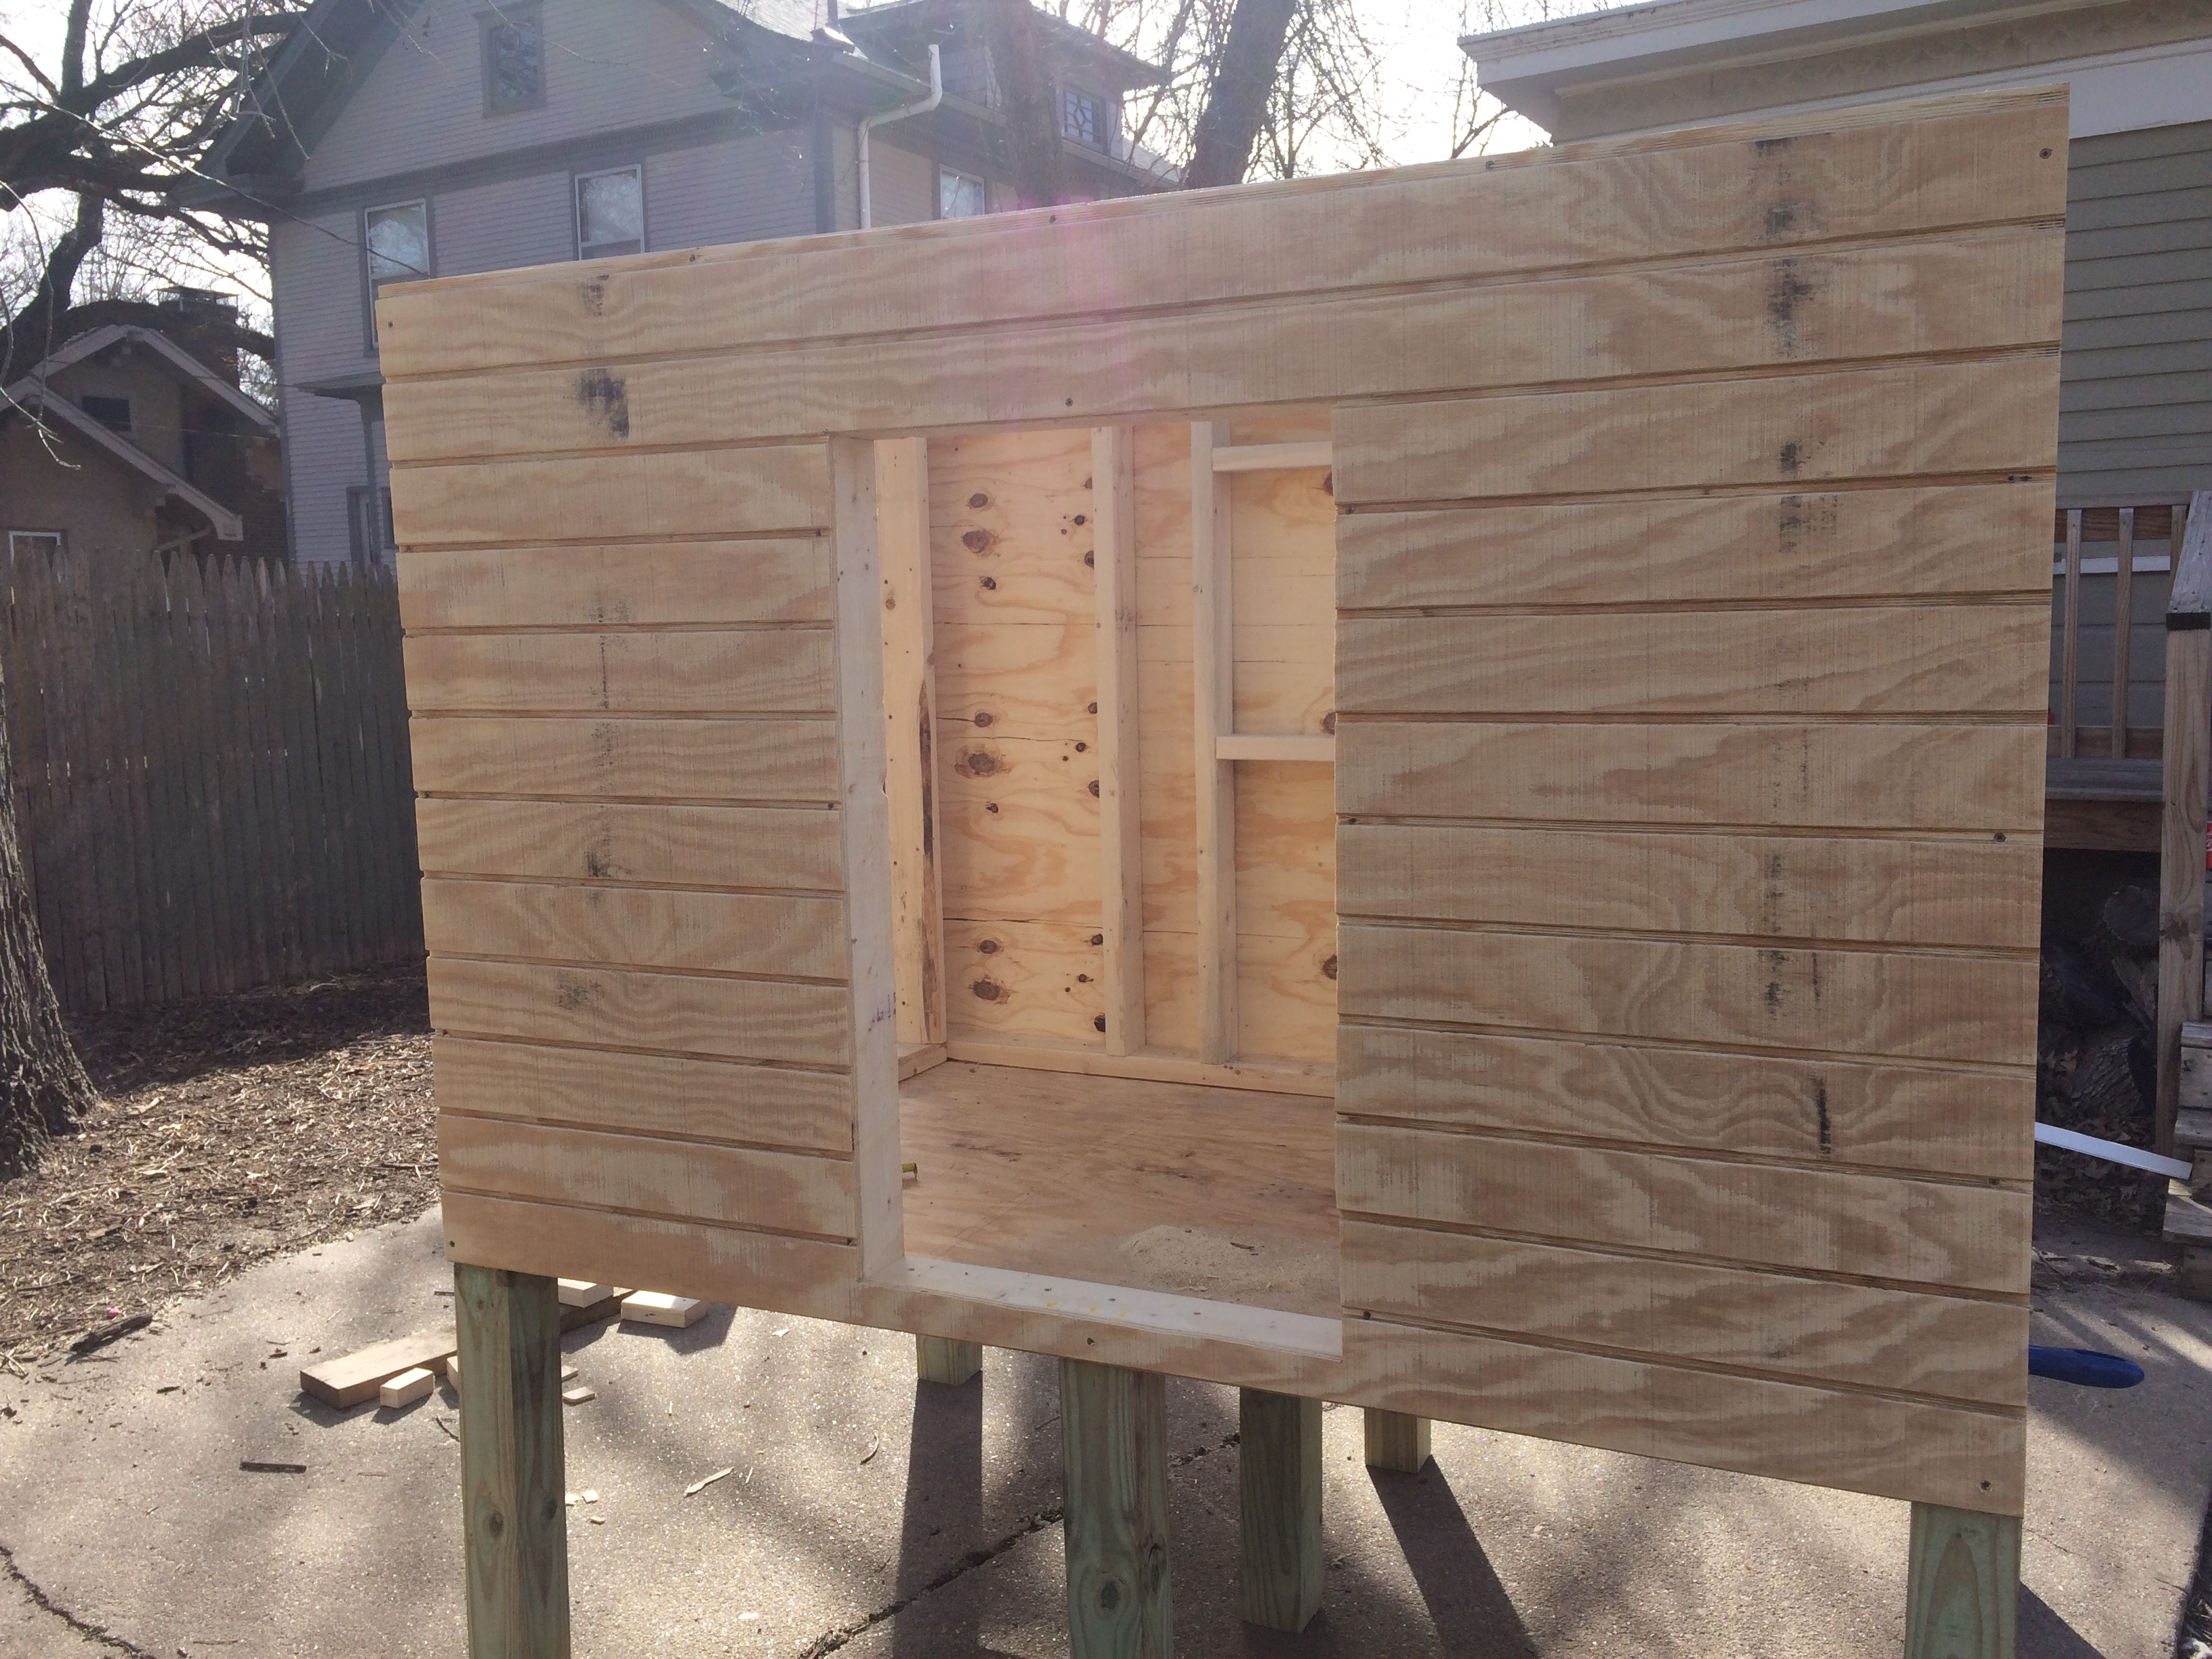
The last thing you will need to do for your walls is put up siding. We purchased decorative plywood for this, which was very expensive at almost $30 a piece. However, this saved us the step of putting up plywood and THEN adding siding. I’ve seen others just put up siding on their chicken coops, with no plywood underneath. This is certainly an option, but it won’t be very warm or draft-proof in winter. You are also supposed to use plastic wrapping under siding, to keep out moisture. Since we didn’t have any siding just laying around, it probably would have cost us the same amount anyway. Once our plywood siding was up, all we would have to do was prime and paint it. Plus I love the board and batten look it gave us!
We cut our siding to 4×6′, then screwed it into the corners and edges of our wall frames. Once the two long sides were up, my husband climbed inside and used a reciprocating saw to cut out the holes for the door and window.
One Last Thing
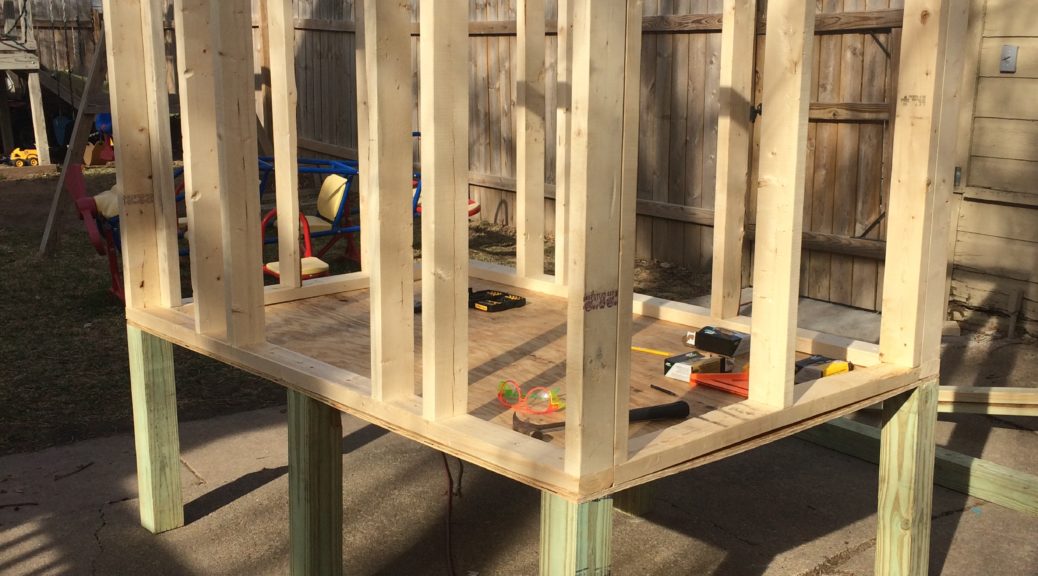
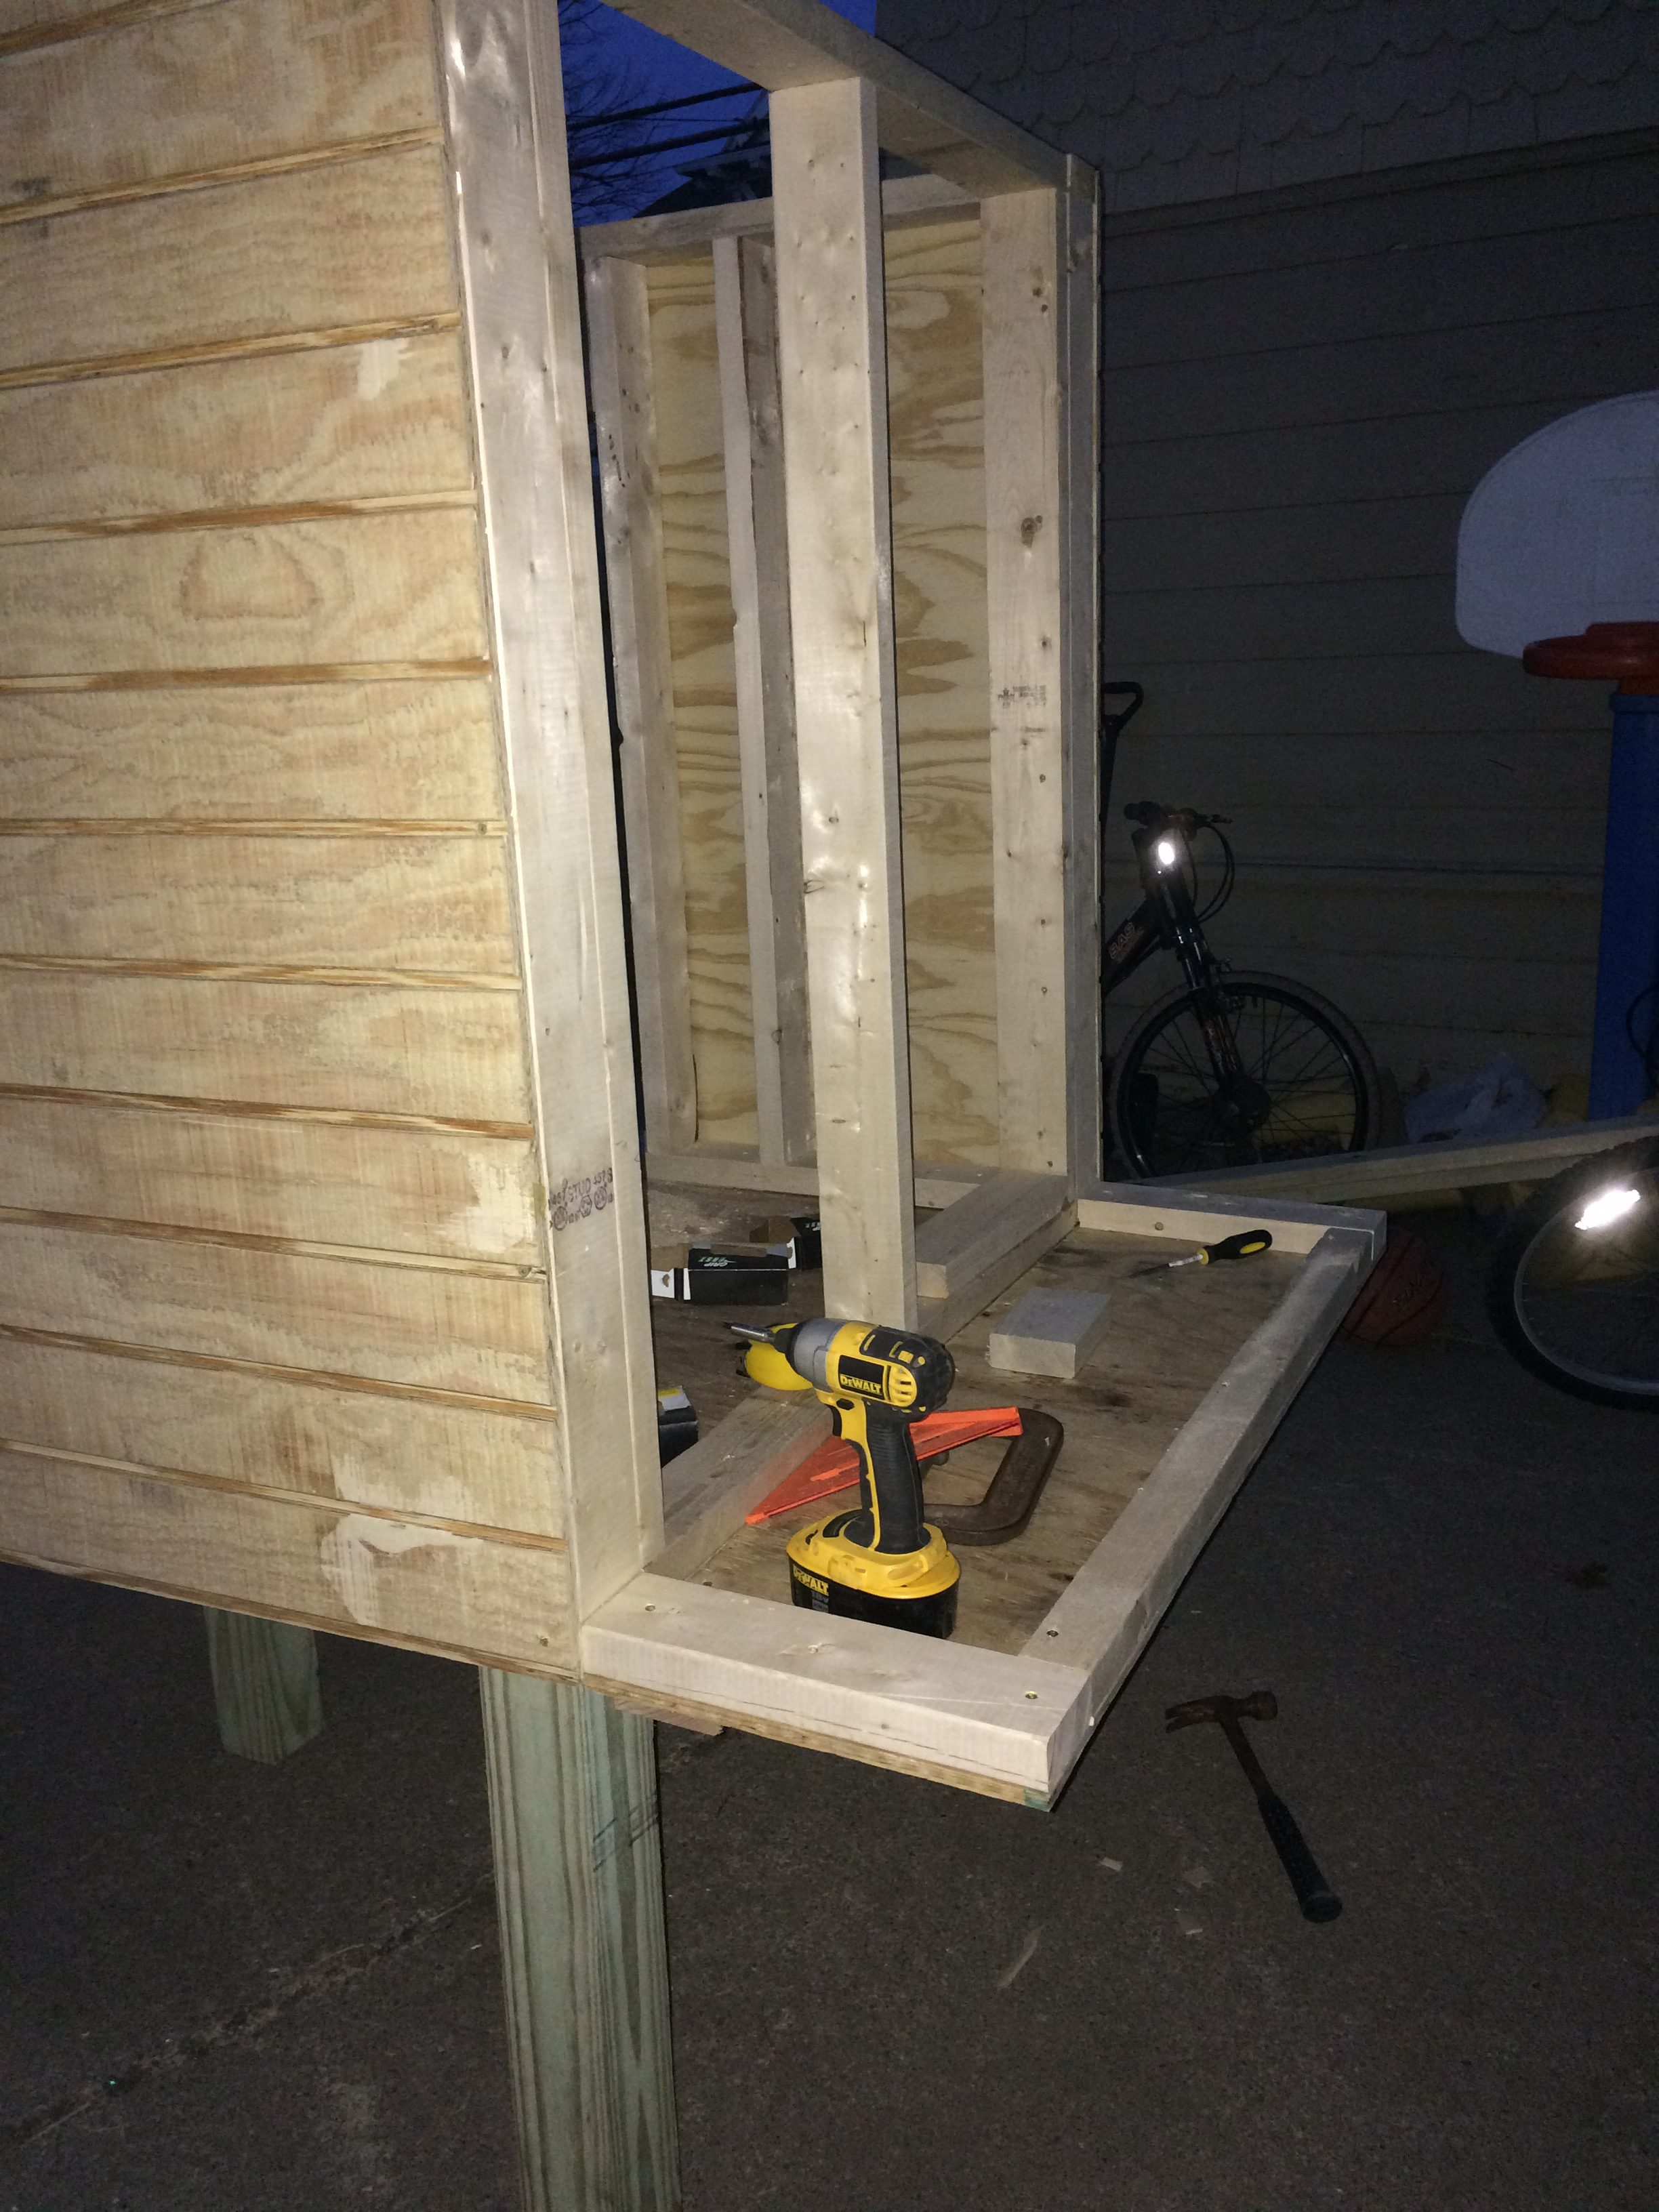
Remember how I said the siding was the last thing you had to do? Well I forgot that we still had to add our nest box base back on. What a bummer! We cut out our plywood and secured it using 2×4 pieces underneath. You can see that it was dark at that point, but we were determined to get it done! Then we added the kickboards to finish framing out the base, and called it a night.
At this point the coop looked very impressive. Our neighbors could contain their curiosity no longer, and began to ask what we were building. Most people thought it was a playhouse! We have great neighbors who aren’t at all bothered by us having chickens… but if you have an urban homestead with unfriendly neighbors and a good privacy fence, there’s no need for them to know it’s not a playhouse. 😉
As close as it looked to being done though, this was just the easy part. It gets a lot more complicated going forward! Be sure to come back for Part 2 of How To Build A Chicken Coop, which will cover the window, doors, nest box, and… horror of all horrors… the roof!!
~~~