How To Make Spaghetti Sauce From Scratch
Have you ever wanted to make spaghetti sauce from scratch? Maybe you have a garden overflowing with tomatoes, a friend gifted you a barrel of them, or you got ambitious and bought a box from your food co-op. Now what?! While processing tomatoes is fairly easy, like most things it can be very daunting if you’re just starting out!
I’ve been making my own spaghetti sauce for years now. When I was 27, I quite suddenly developed a severe allergy to soy. It took me a few months to figure out exactly what was causing my symptoms, and much longer to grasp all the ways that soy sneaks itself in to my diet. I spent years learning which foods were safe for me to eat, and I was able to find a few brands that I could have. But for some commercial products, like spaghetti sauce, I never found a store-bought option that didn’t make me sick. So I learned how to make spaghetti sauce from scratch!
To be honest, even if I could go back to store-bought, I probably wouldn’t. Homemade sauce tastes better, can be tailored to our preferences (hello garlic!), and has no yucky preservatives. It’s also very easy to make, whether you’re starting with canned ingredients or fresh. This year I’ve had a good harvest from my garden, so I’ve been making sauce using my own tomatoes. Using homegrown tomatoes takes a little more effort, but I think it’s well worth it!
How to Make Spaghetti Sauce From Scratch: The Absolute Beginner’s Guide
Step One: Prep Your Tomatoes
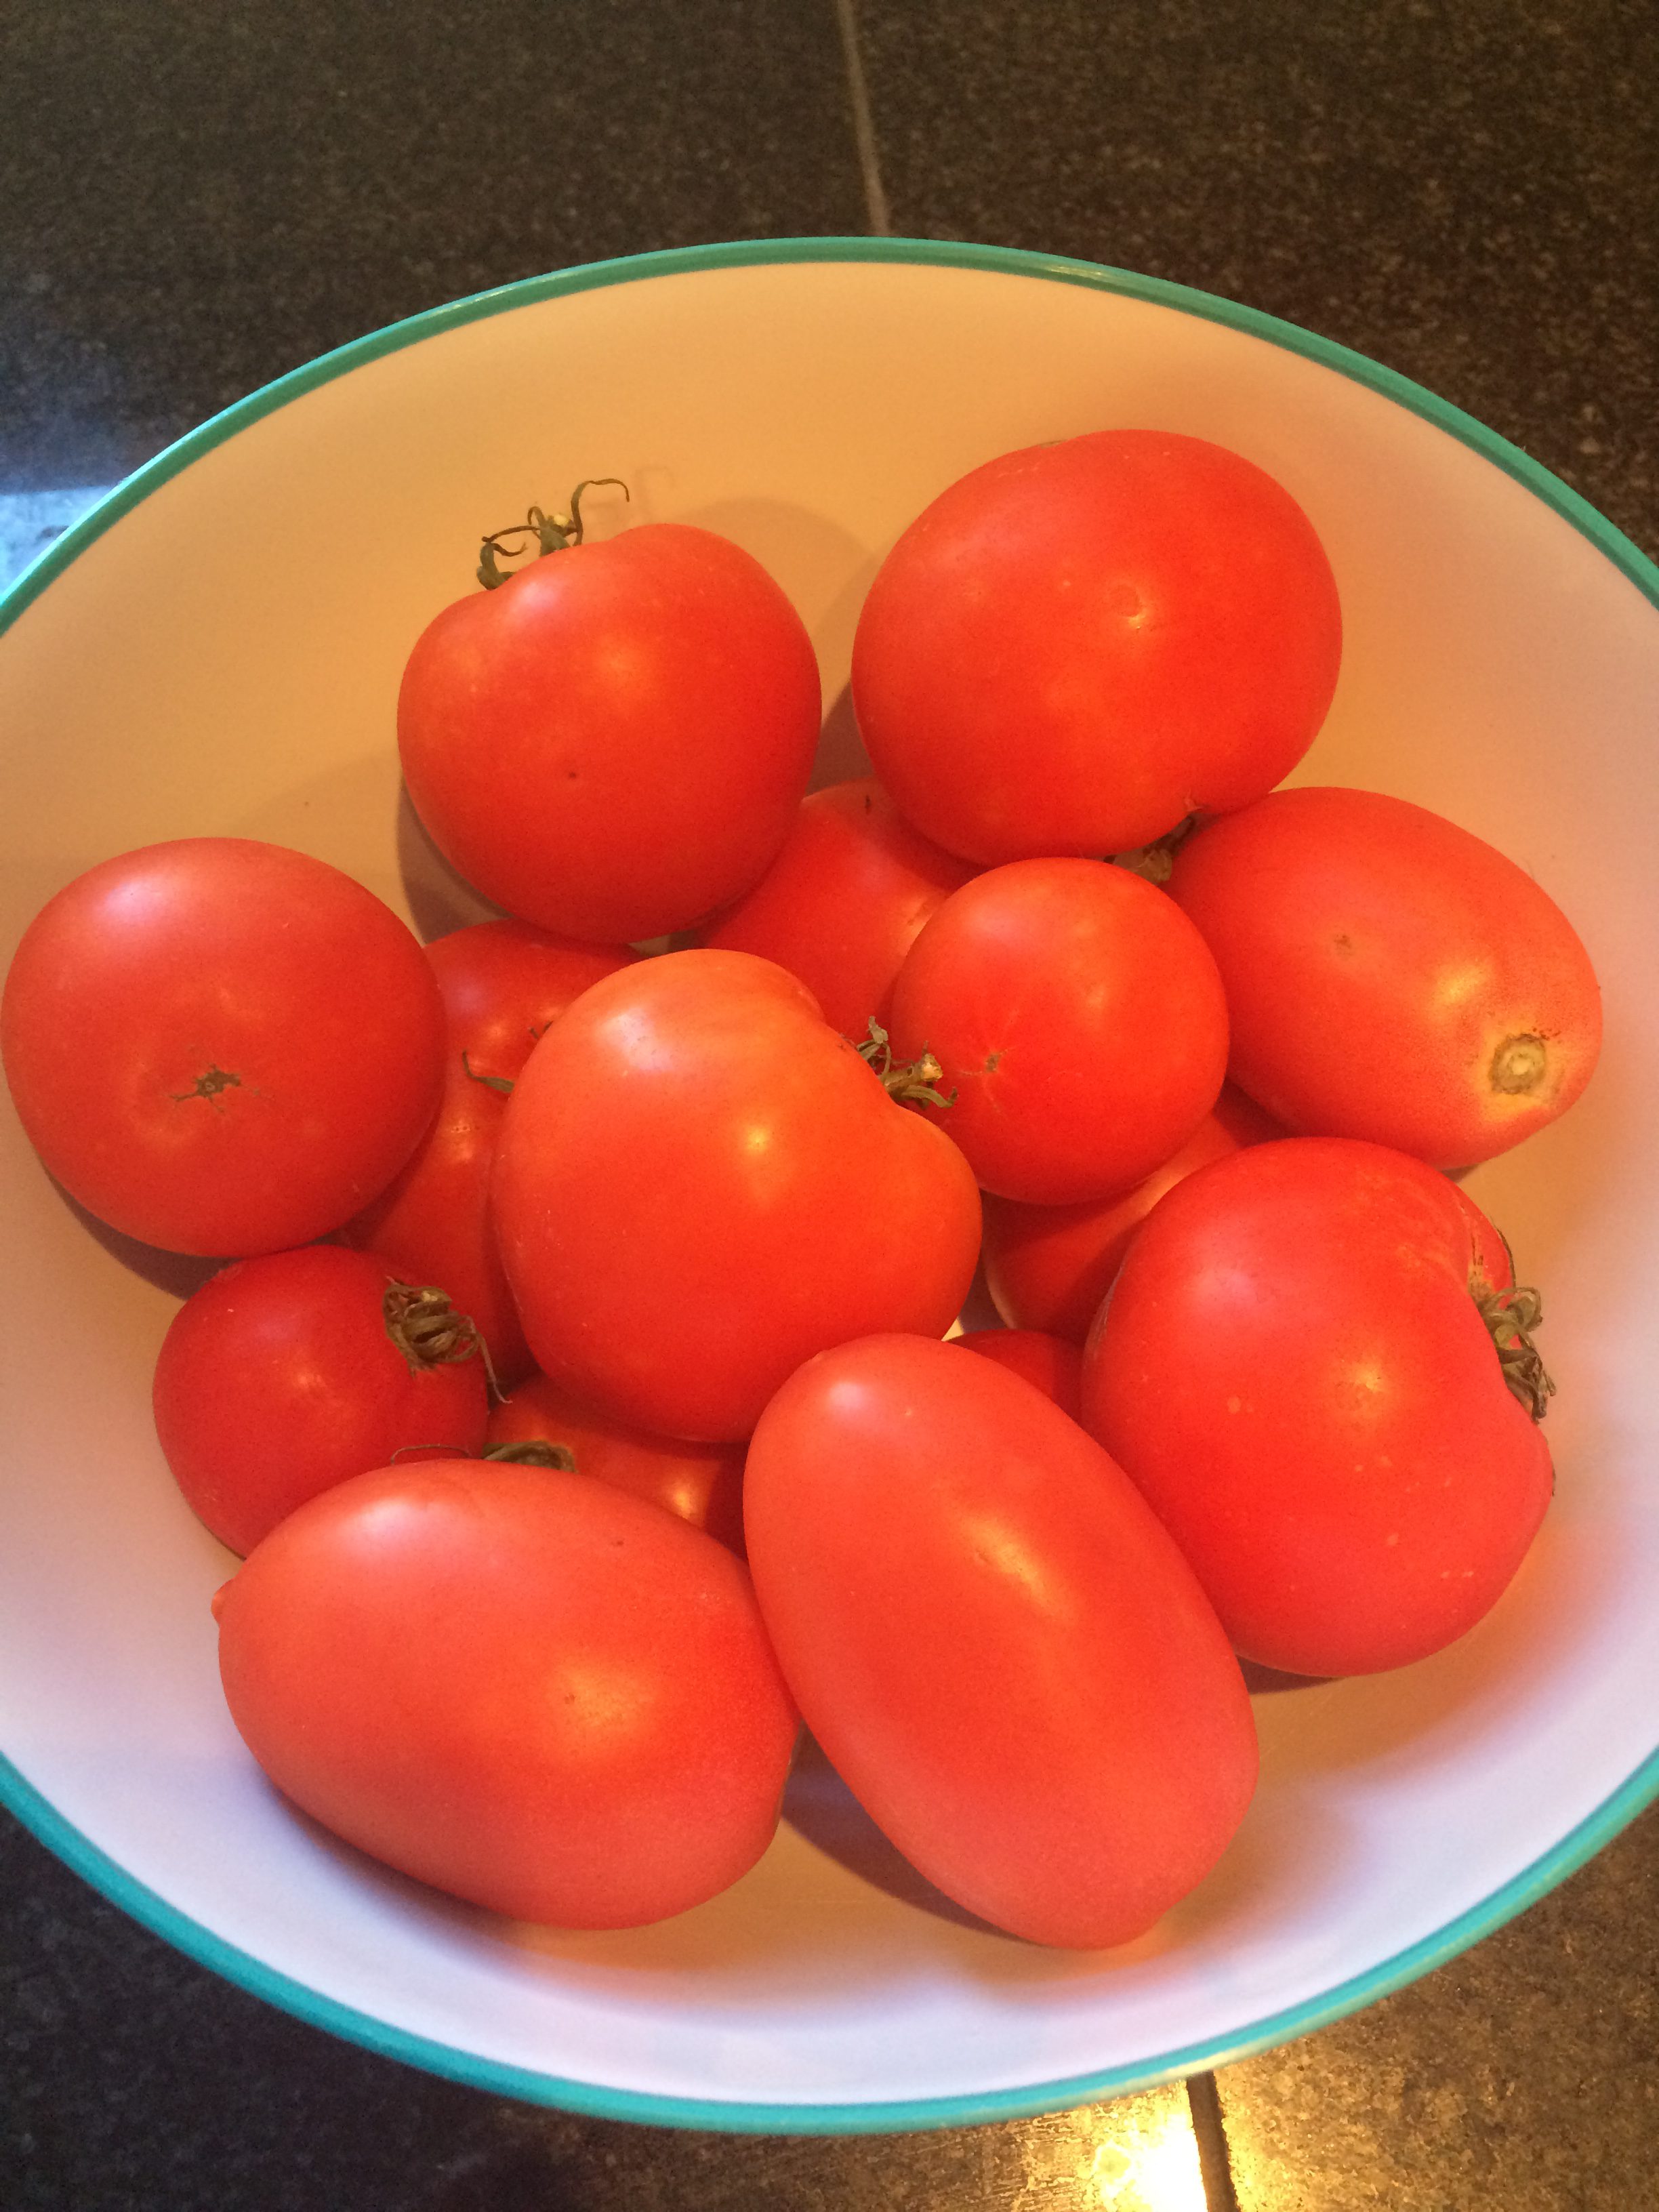
The very first thing to do, of course, is to harvest your ripe tomatoes. Any variety will do. Roma tomatoes have a salty, hearty flavor that’s good in sauces, but they can be a little more difficult to work with. Normally I would process two to four times this many tomatoes at once, but this is a “bumper crop”. It’s mid-October, so I’m thrilled to have any fresh tomatoes at all, but I only had enough for one batch of sauce this time.
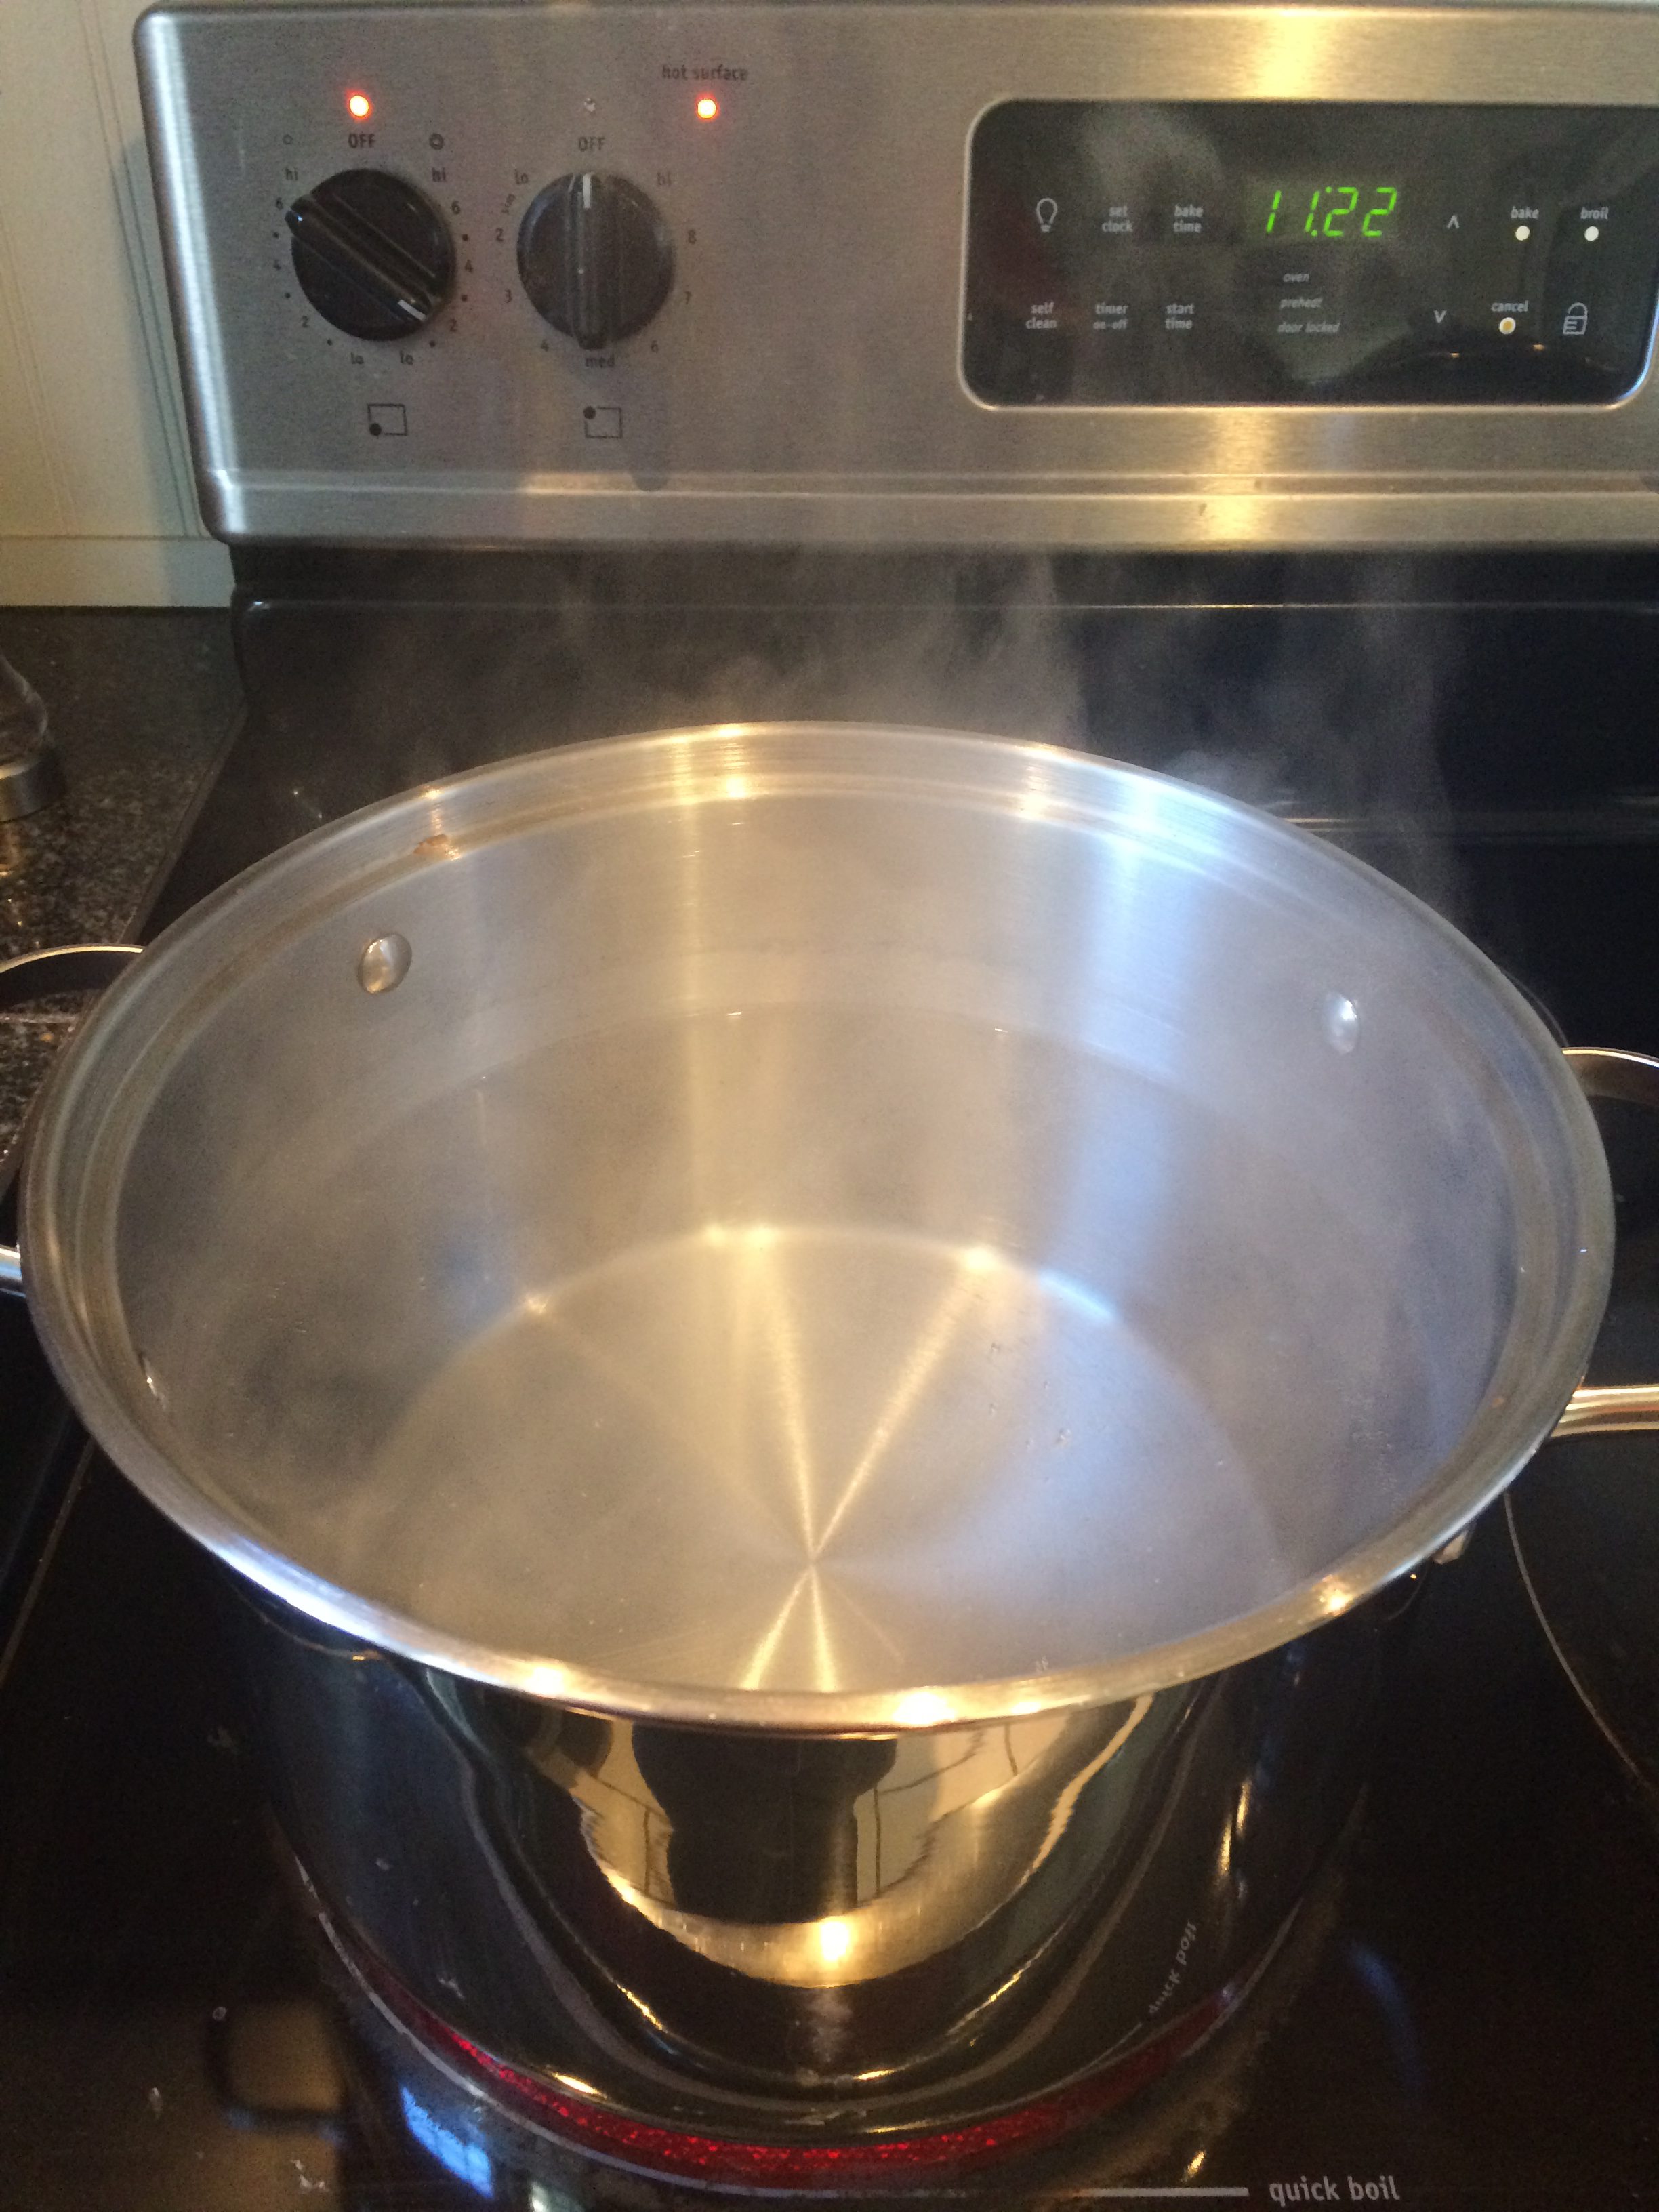
Before you begin prepping the tomatoes, set a large pot of water on the stove to simmer. You want it hot enough to steam, but not hot enough for bubbles to appear on the bottom. You don’t want it to start boiling. Only fill the pot 2/3 of the way, so the water won’t overflow when you put the tomatoes in later.
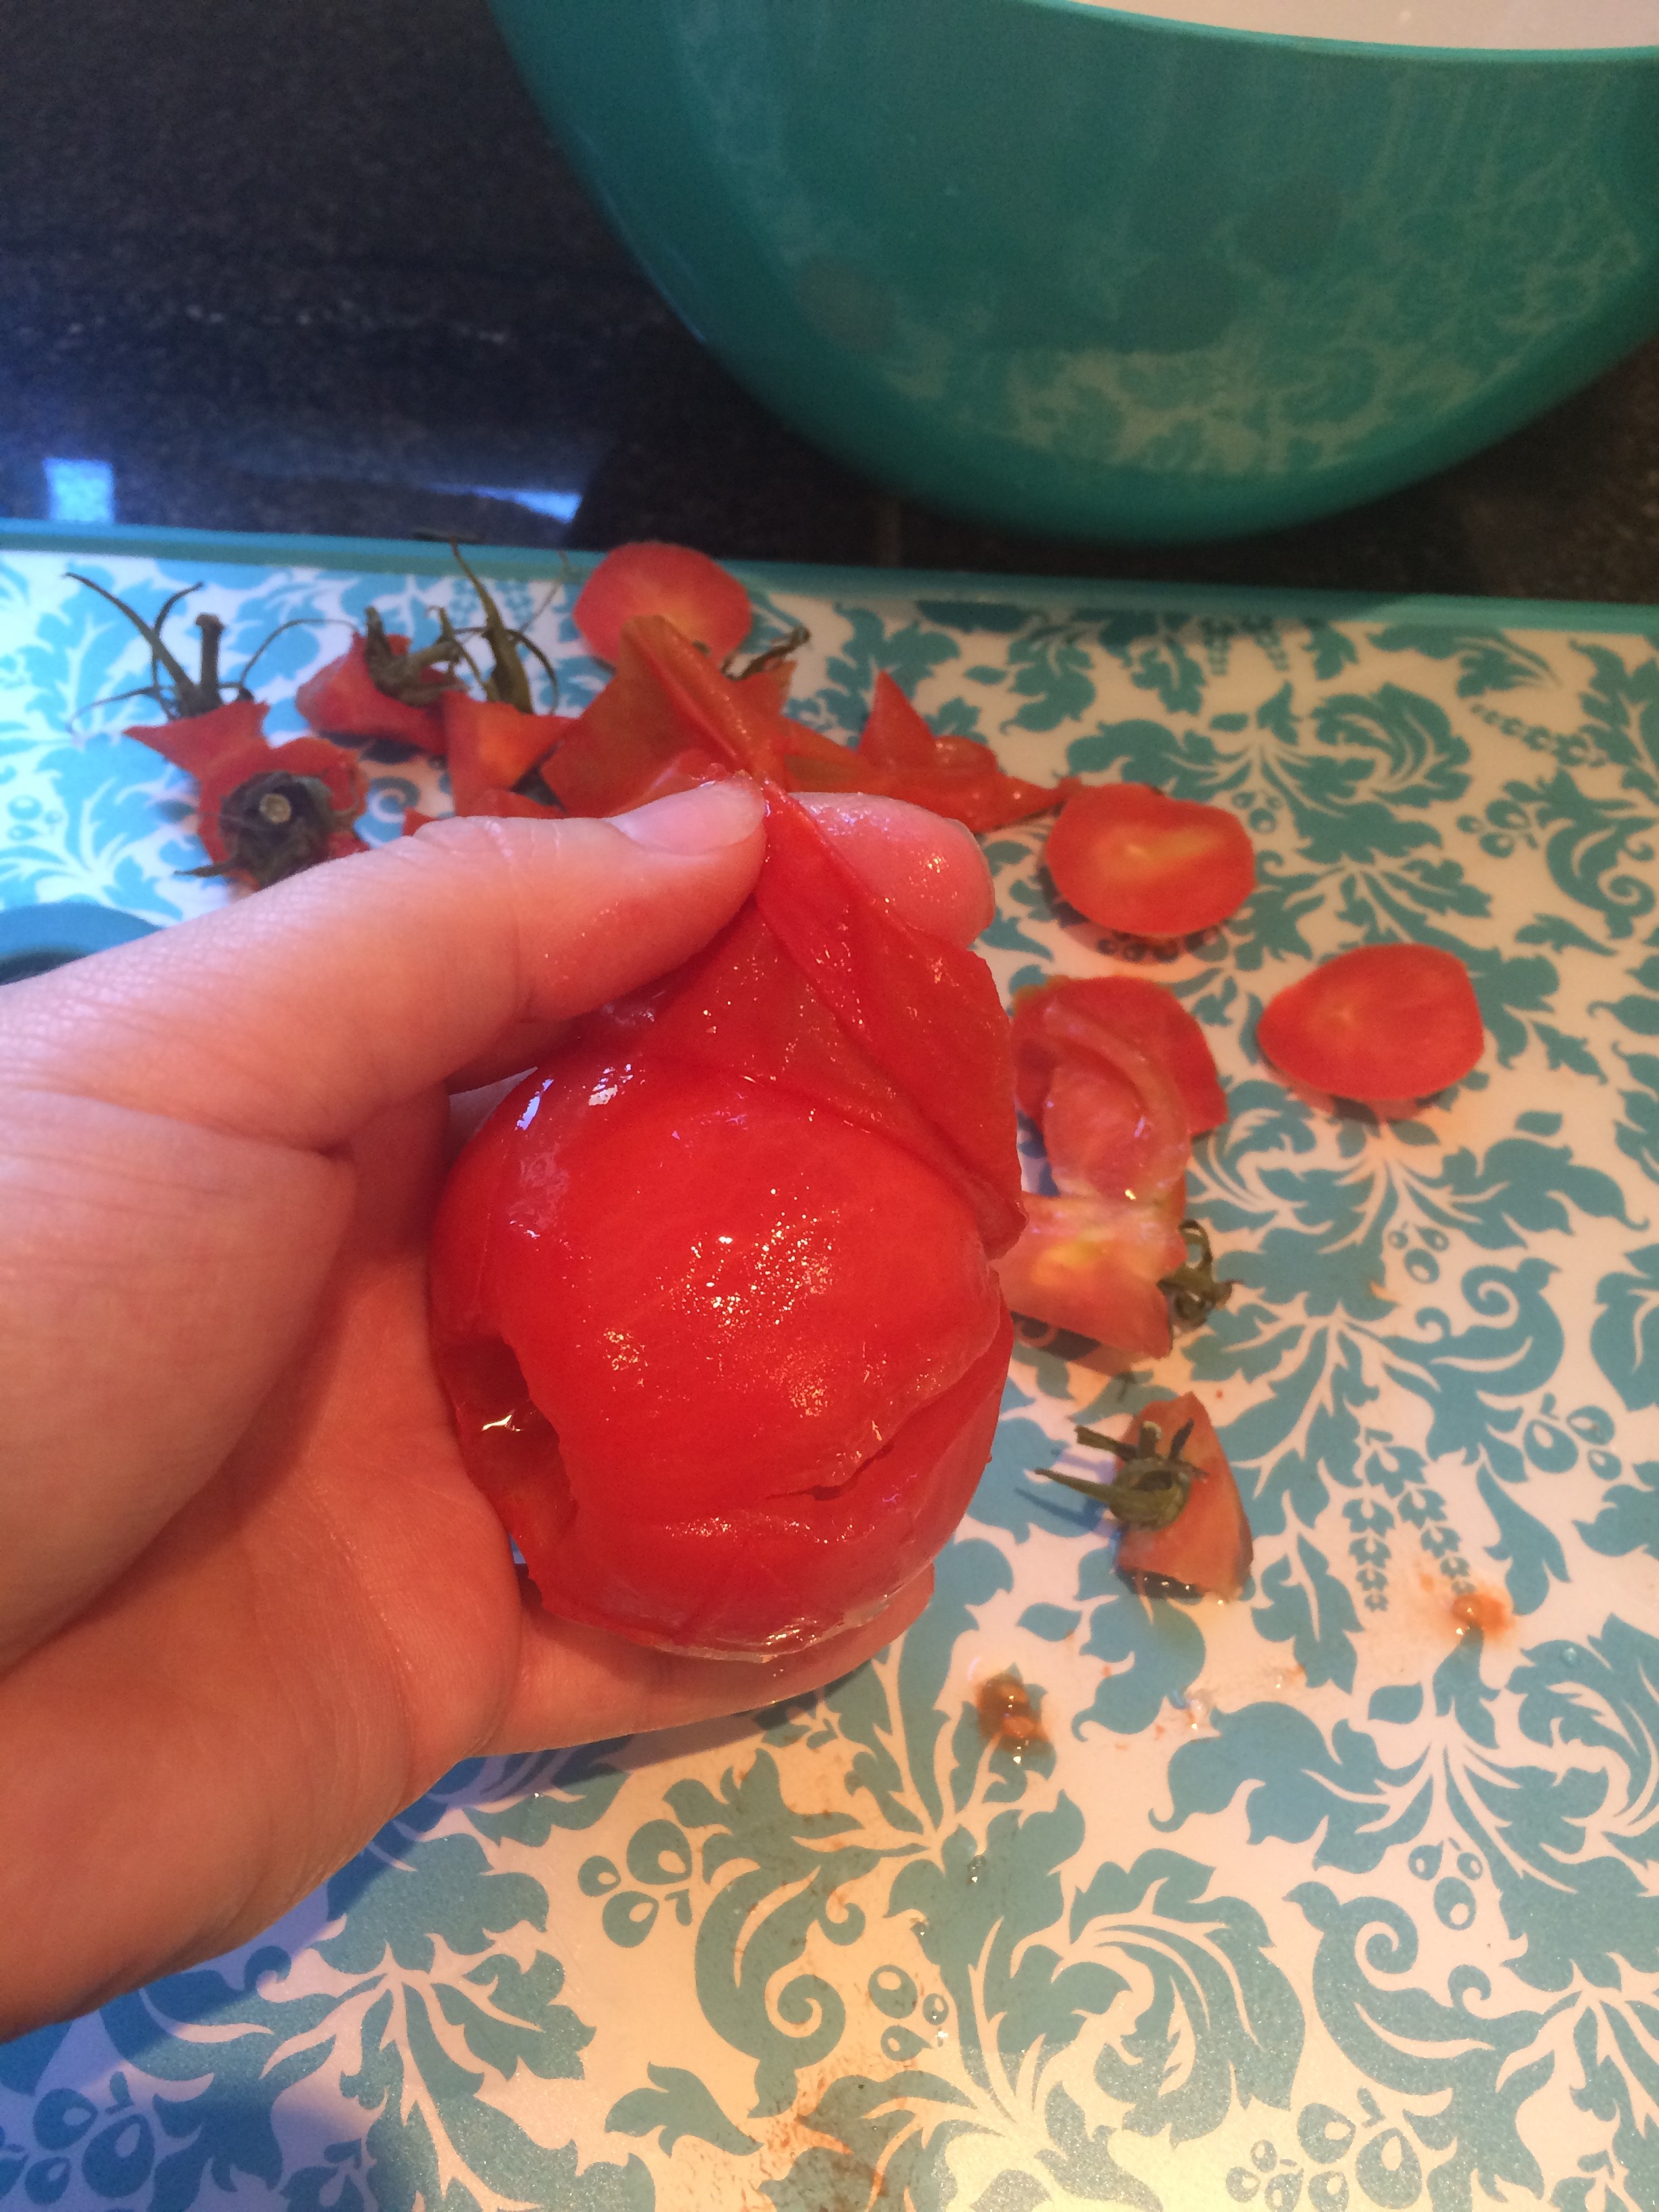
Once you’ve picked the tomatoes, wash them gently. Next remove the stems using a paring knife. You can just cut the stem end off completely to make it easier, but it only saves a few seconds and wastes a lot of tomato-y goodness. Instead I dug in towards the center, removing the stem in a cone shape. For Romas you can just cut the end off.
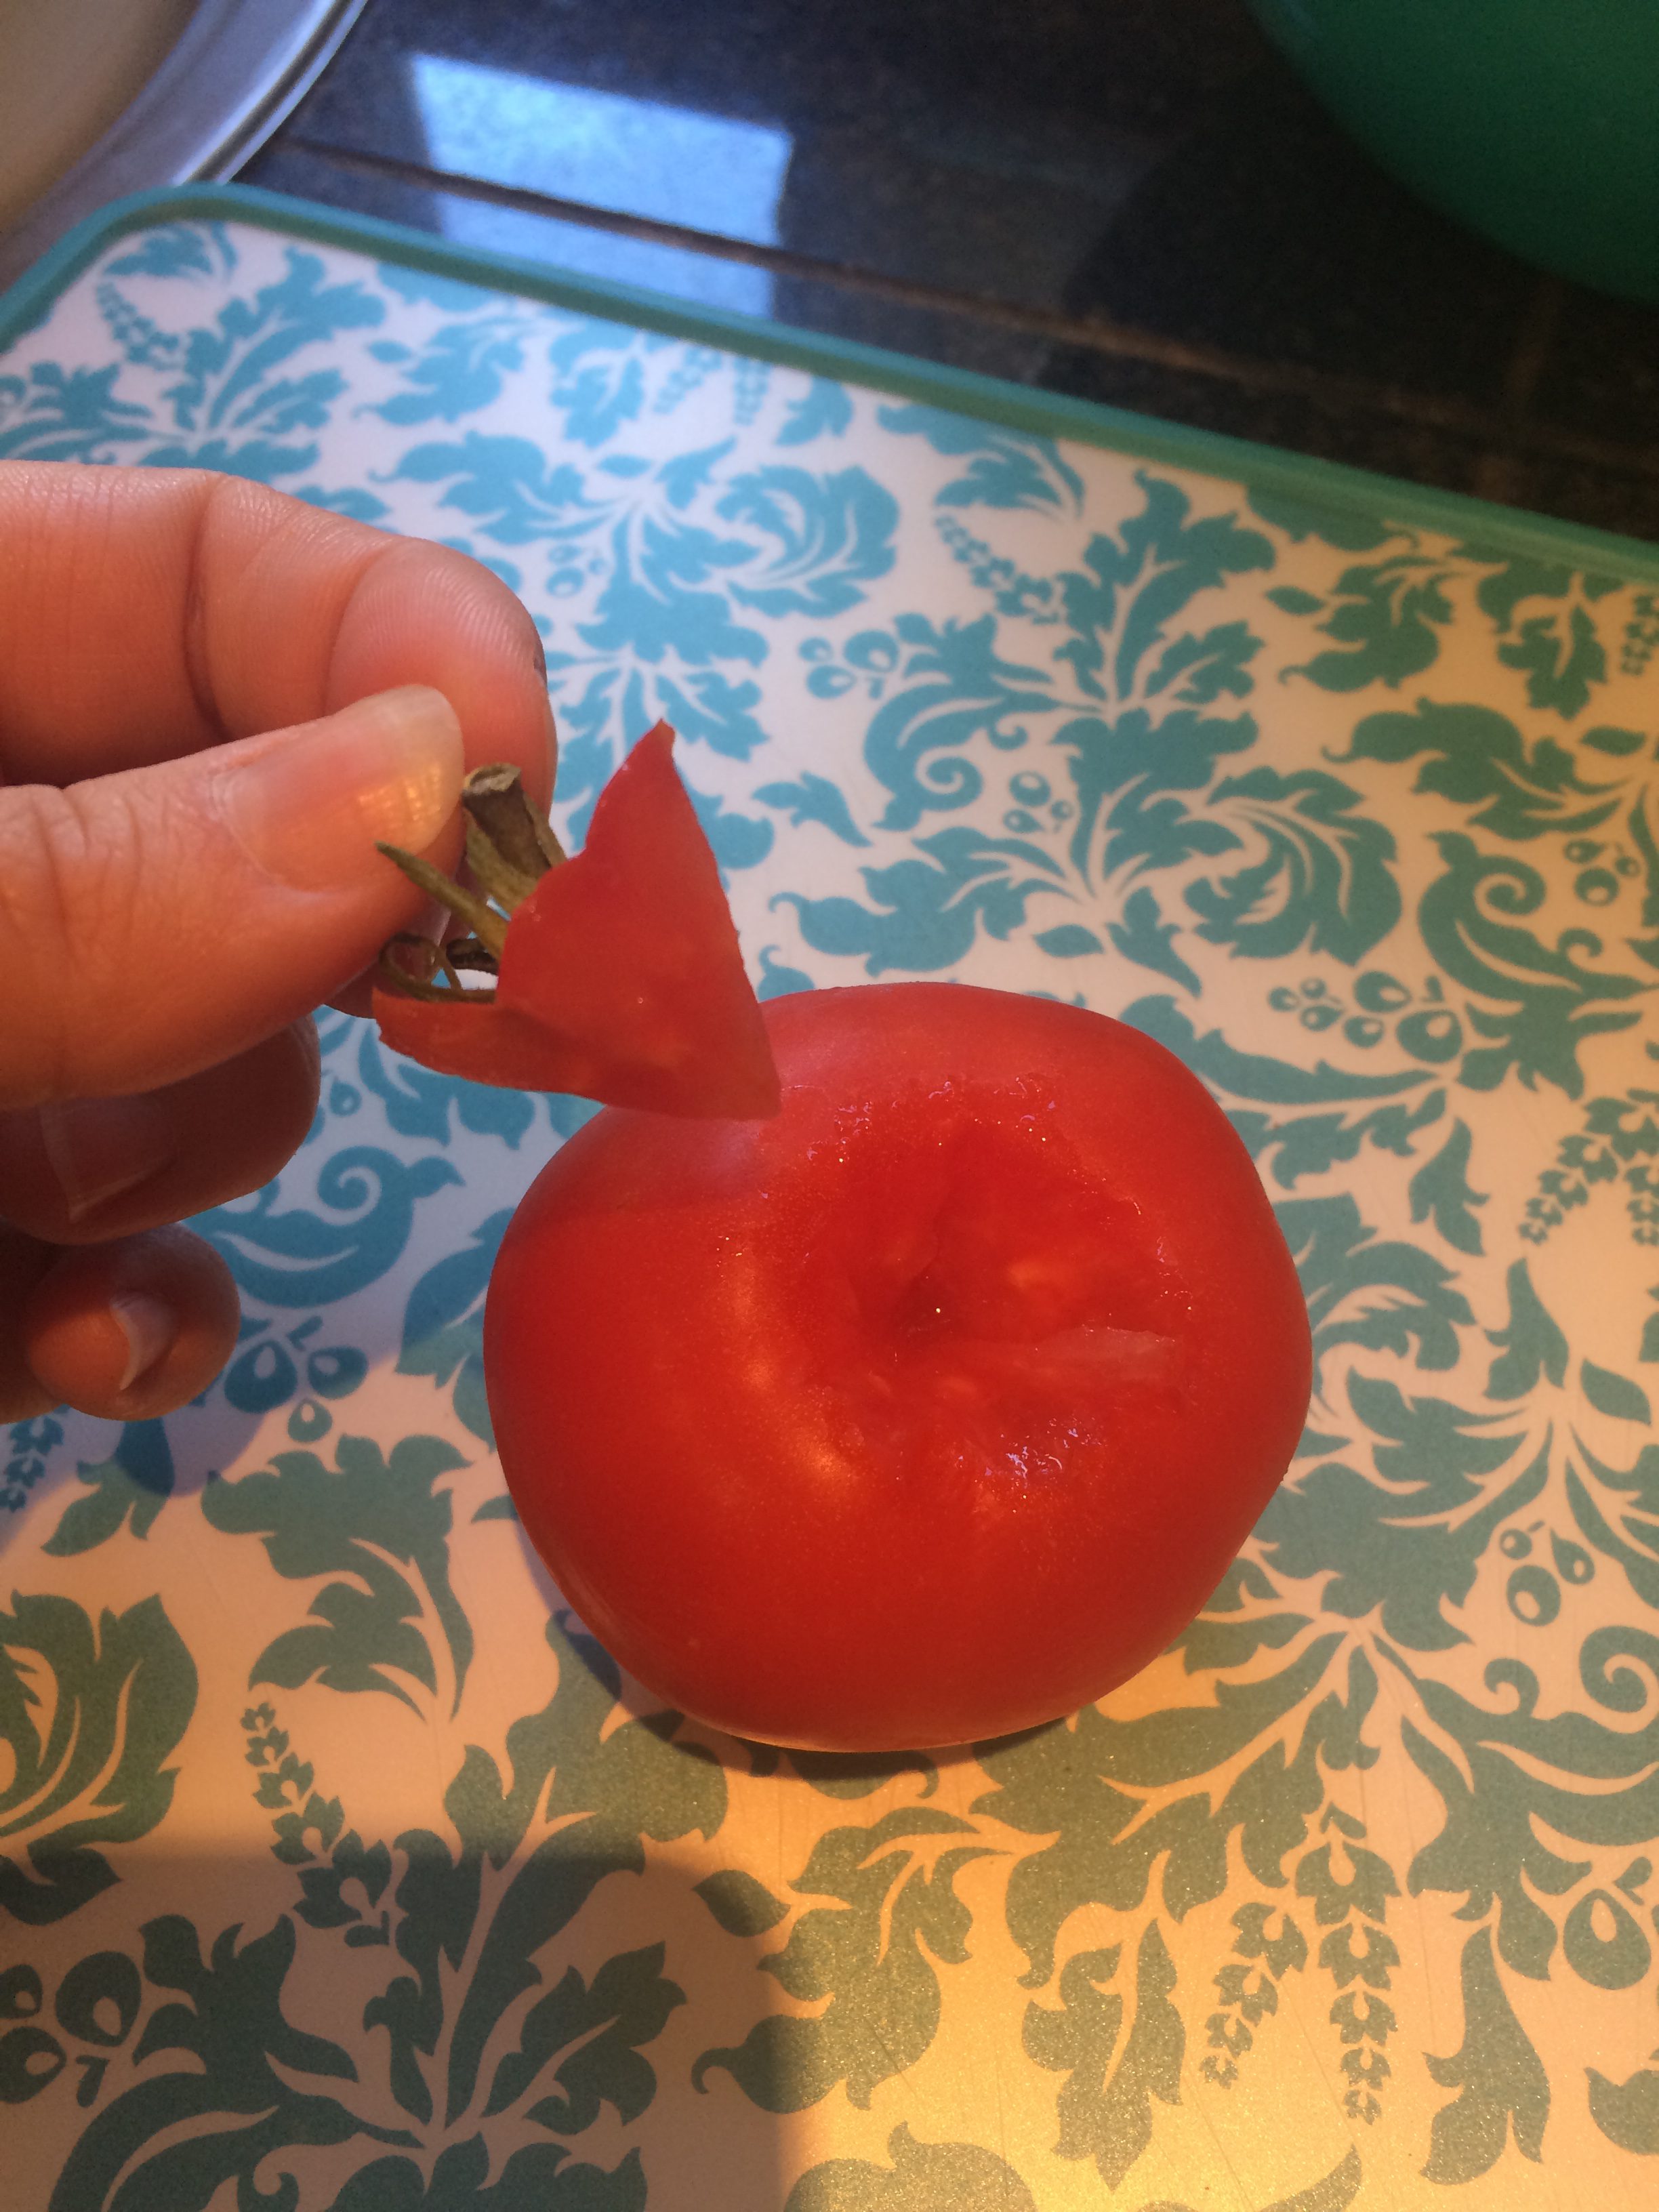
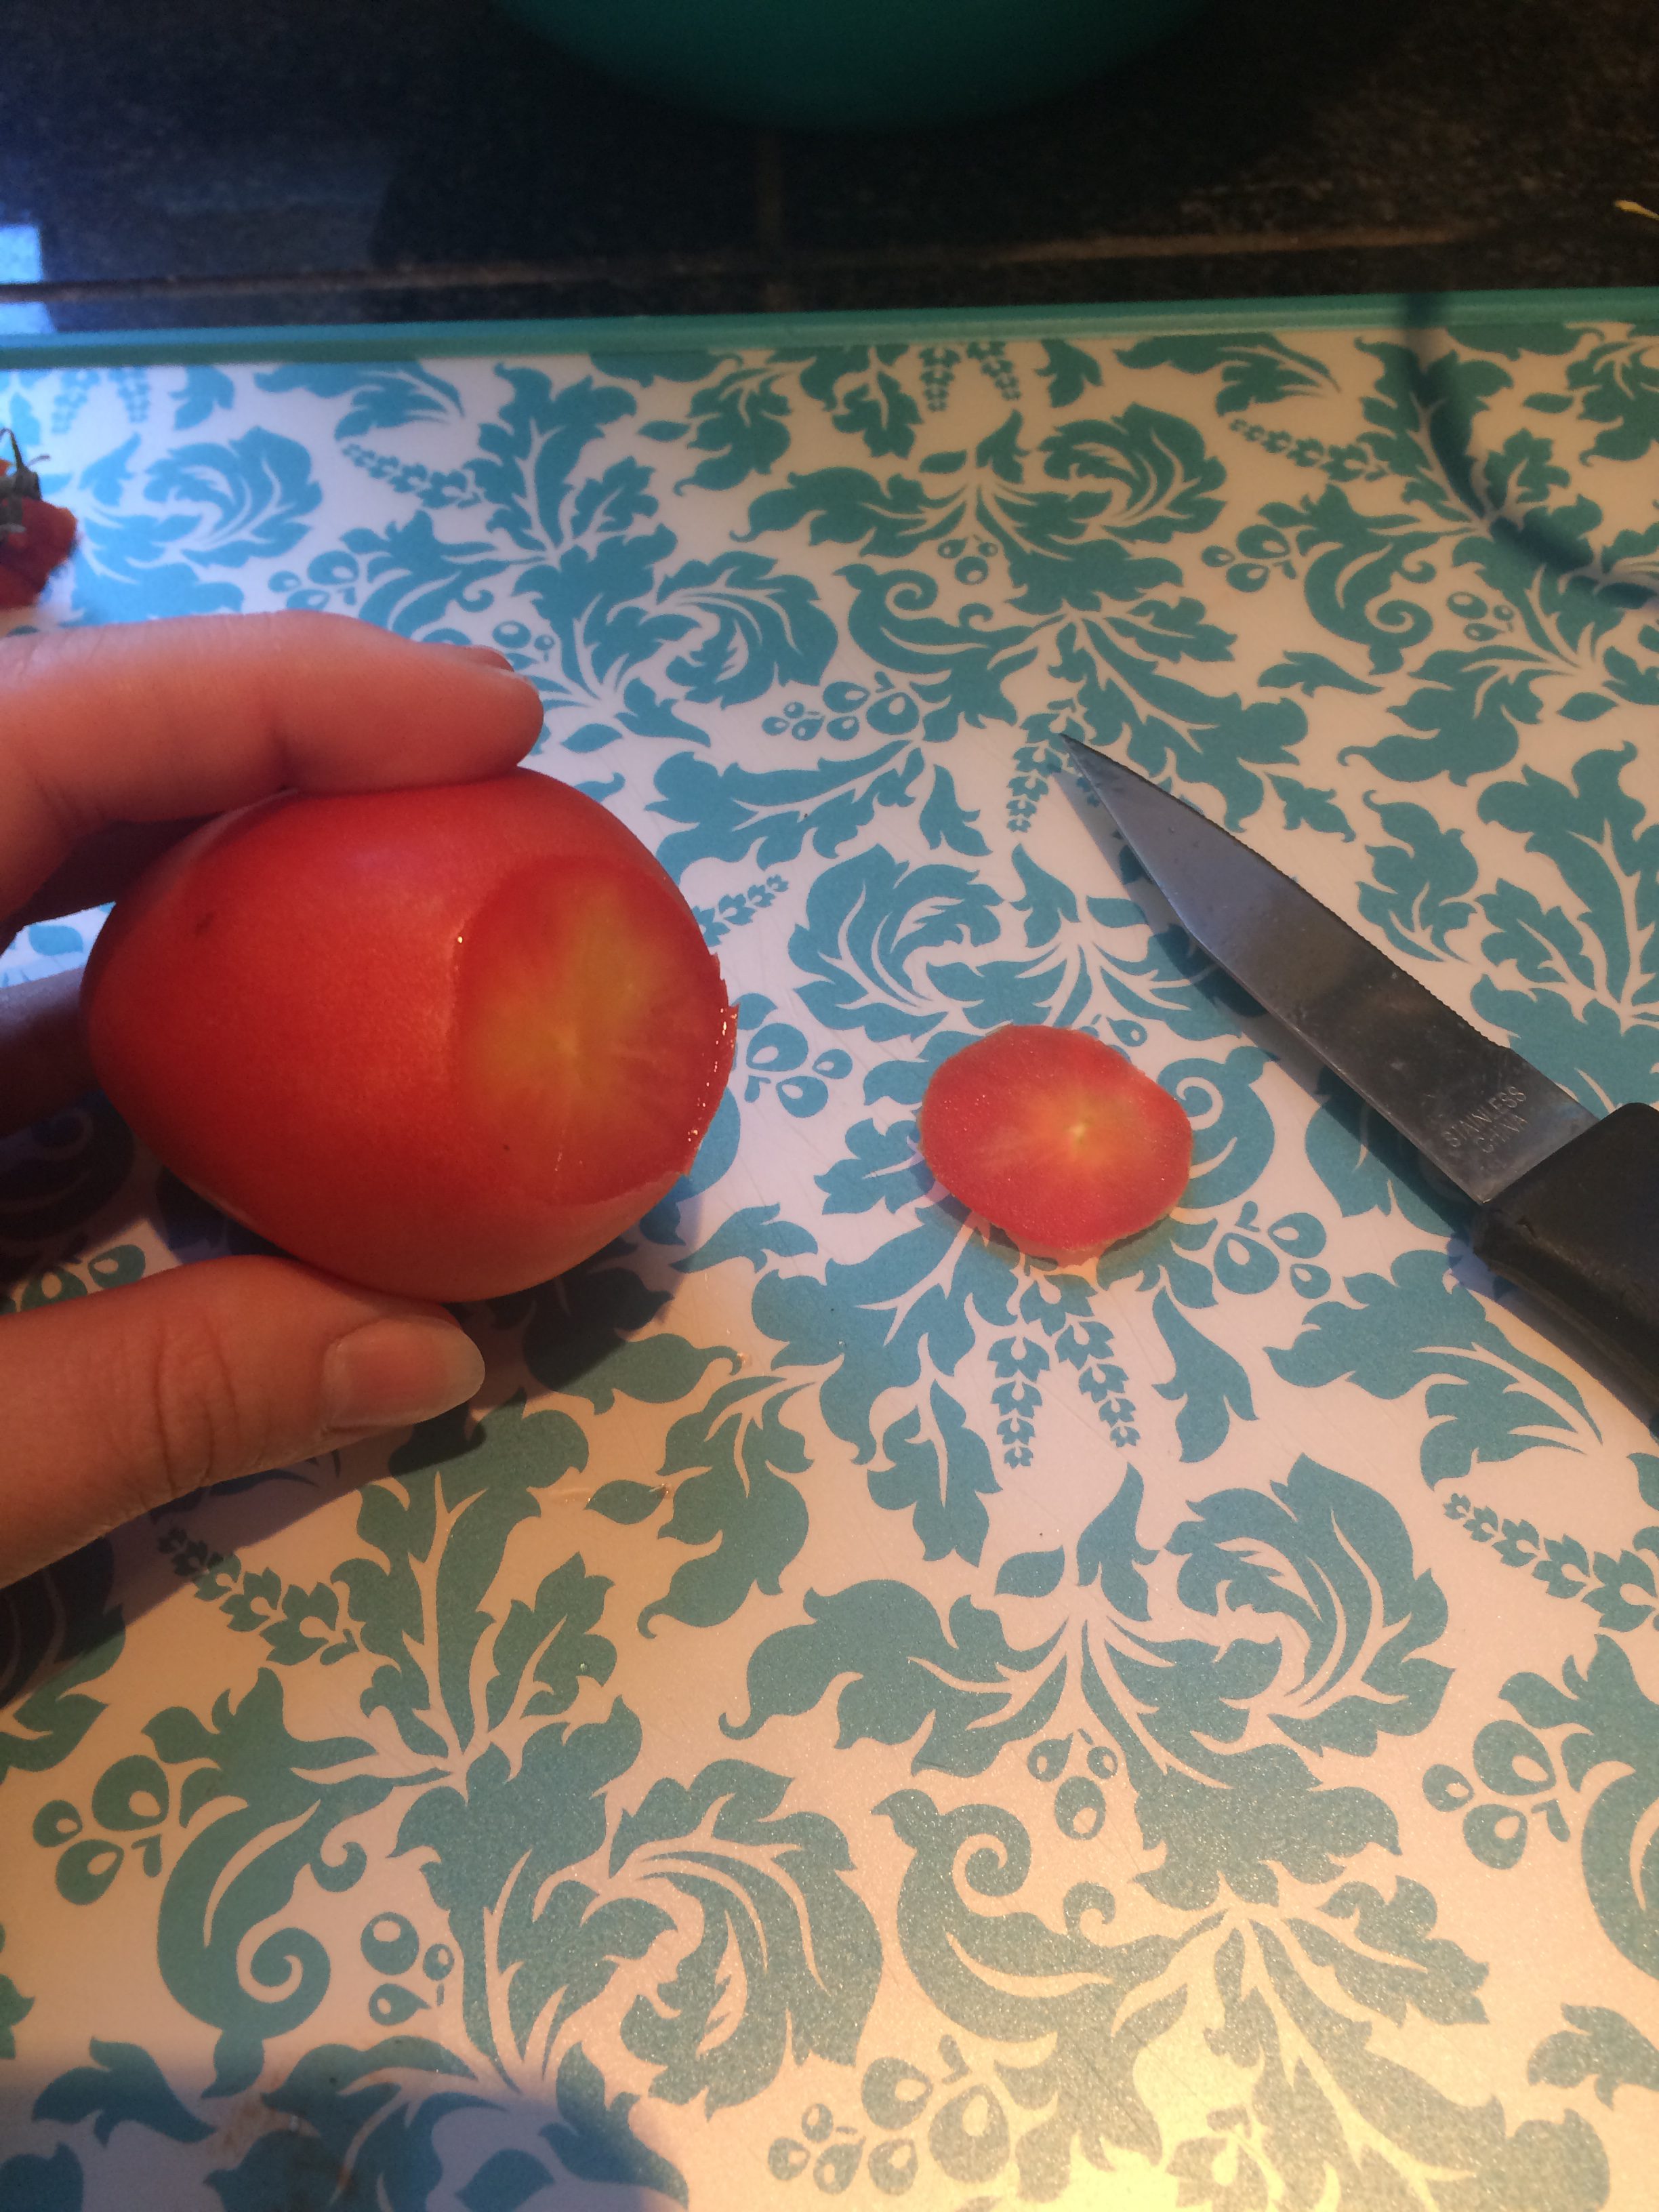
You will also want to cut off any blemishes at this time. Tomatoes can split their skins from getting excess water while growing. These splits look unsightly, but aren’t going to hurt anything. Cut them out if you can do so without ruining the whole tomato. If not, don’t worry about it too much.
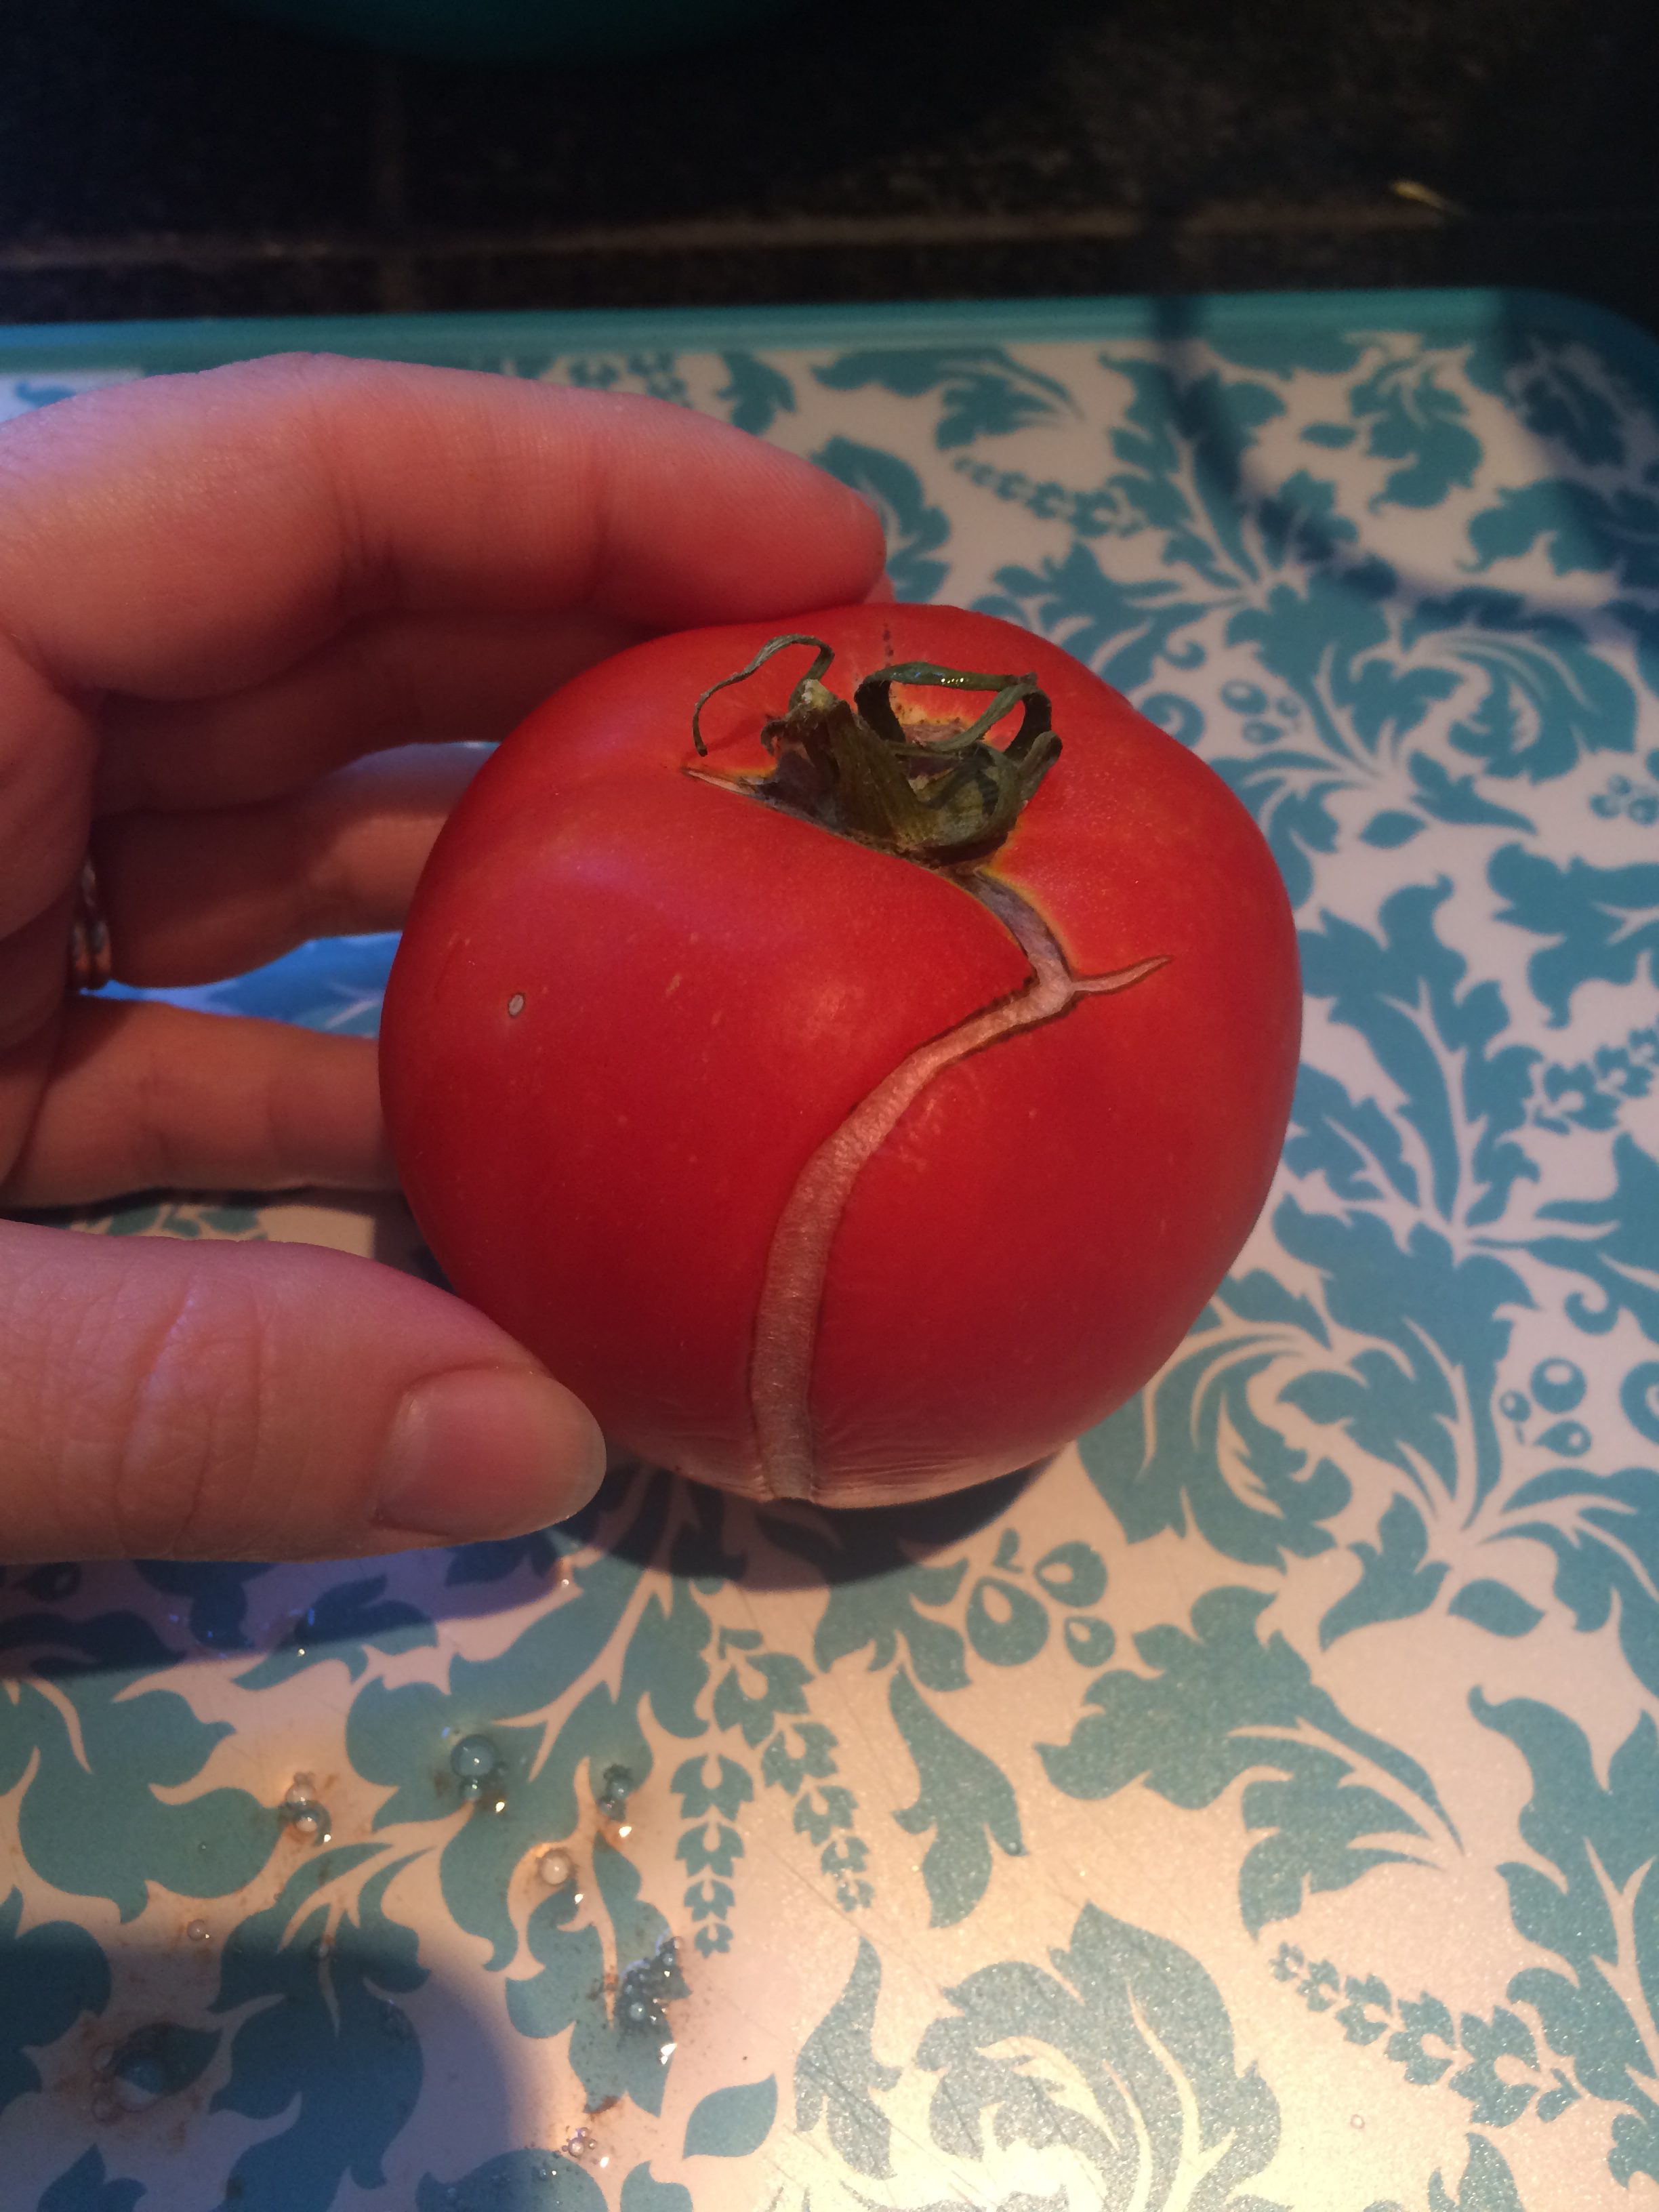
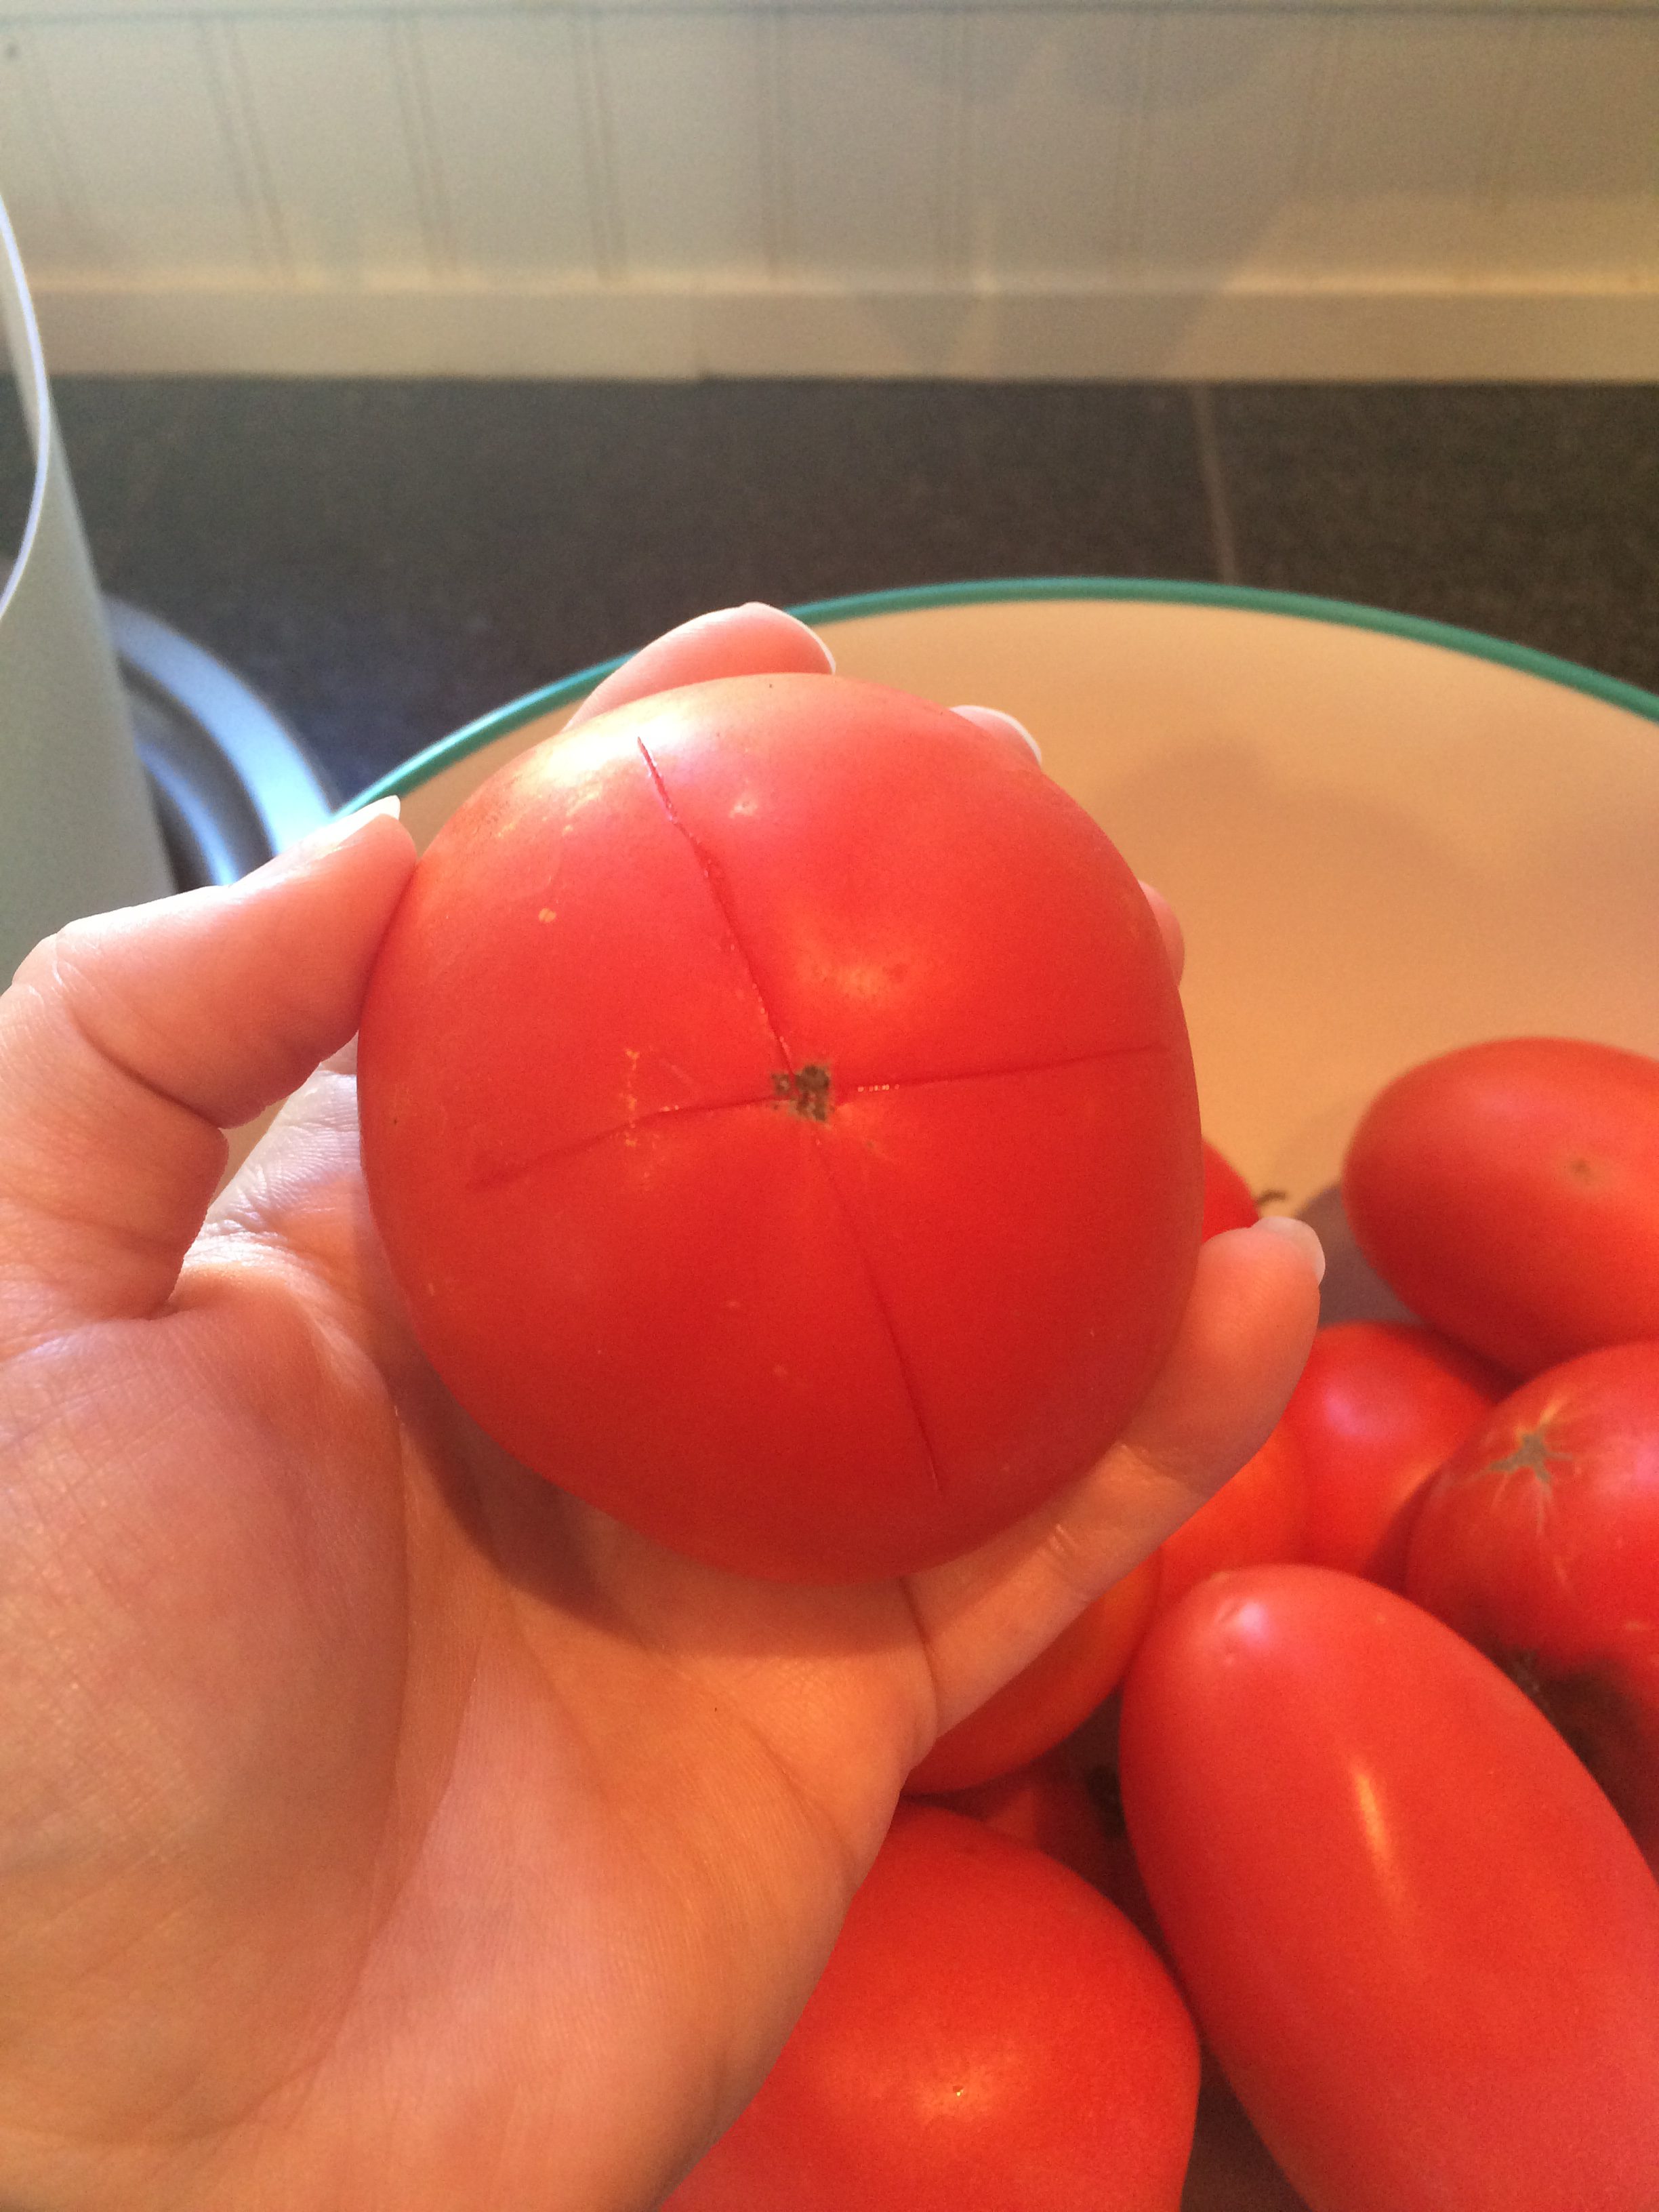
Now you will want to cut a shallow X into the bottom of each tomato. This isn’t required, but it makes it much easier to peel the tomatoes after the next step!
Step Two: Blanch and Peel the Tomatoes
Blanching is the process of very lightly cooking a food in hot water, then stopping the cooking process using cold water. Blanching only takes a couple minutes, and will make the skins slide right off with almost no effort. You can use this same process for peaches! If you have a stock pot that came with a strainer, it will be even easier. Just place the tomatoes in the strainer and lower it into your steaming water. Set a timer for one minute; you’ll see the skins starting to split by the time the minute is up.
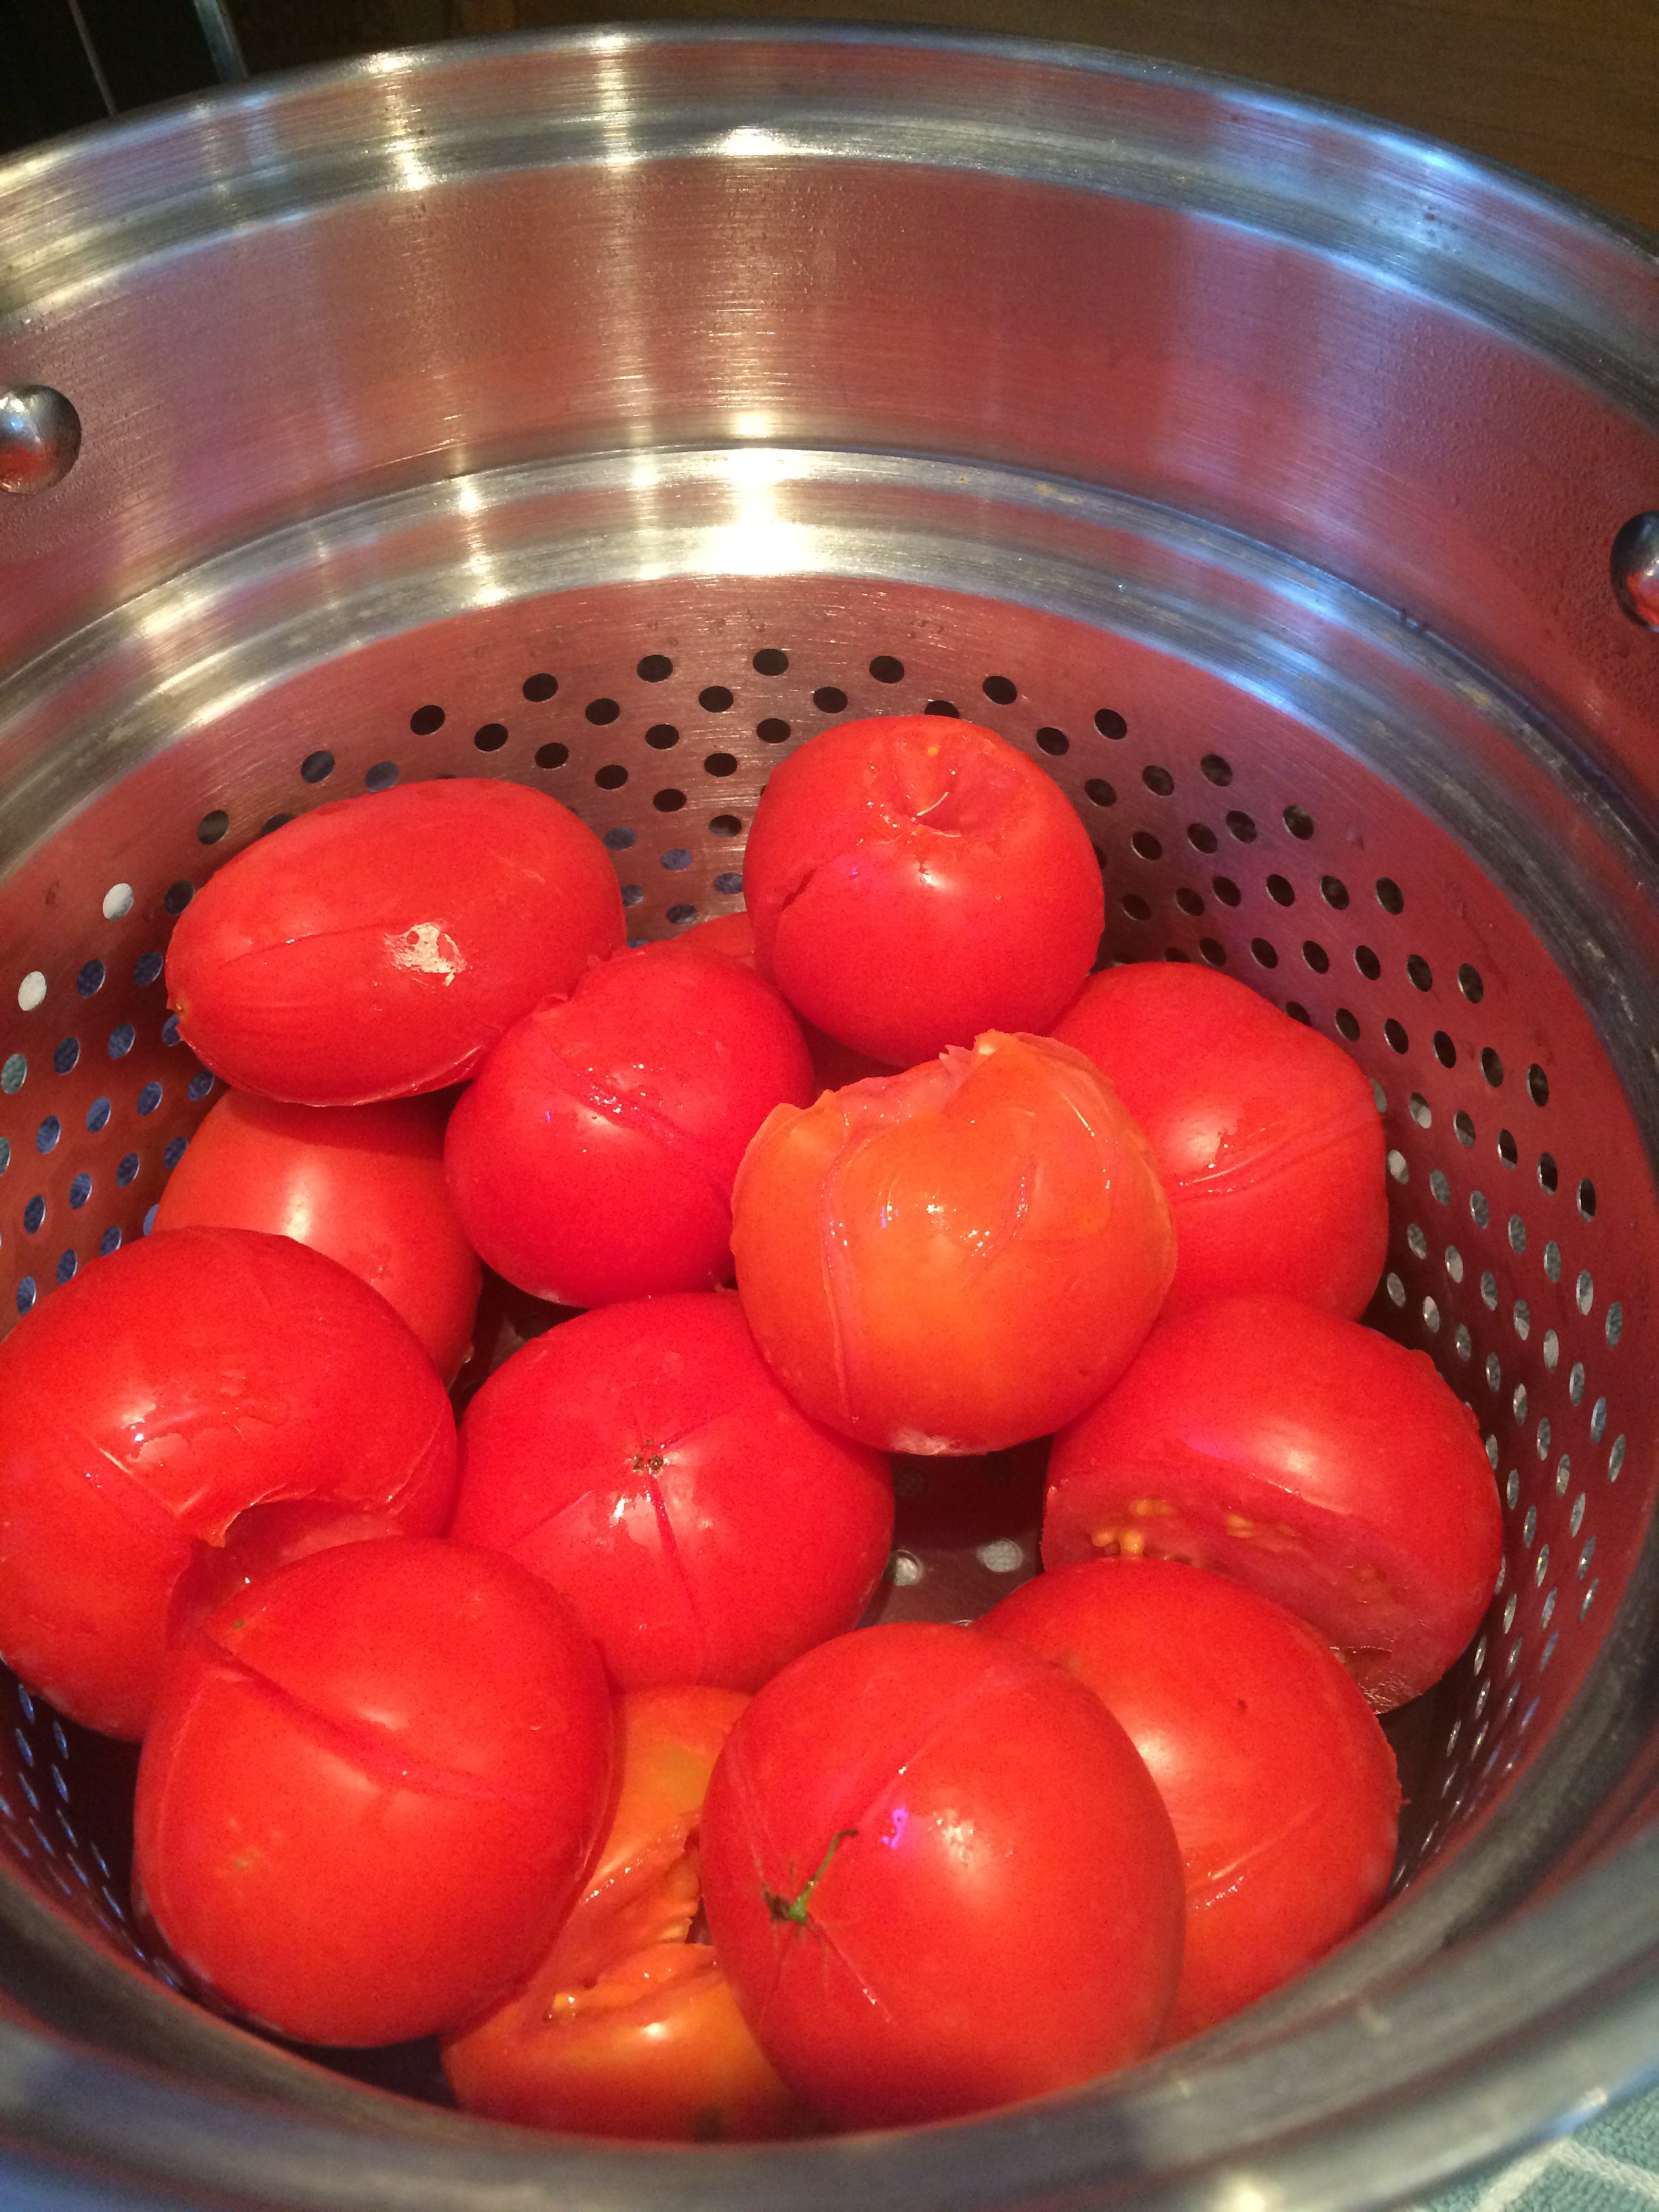
Remove the tomatoes and place them in an ice bath, which is simply a big bowl of ice water. Or do what I did – forget to set up the ice bath and run them under the faucet instead. 🙂 The cold water serves two purposes; it stops the tomatoes from cooking any further, and cools them so you don’t get burned. When the tomatoes are cool enough to handle, you can begin skinning them. The peels should slip off very easily using only your fingers. If they don’t, dunk them in the hot water for another 30 seconds and try again. I had a few Romas from our food co-op that I added, and they were a little more feisty. Next time I would give them an extra minute in the pot, and cut a shallow slit around their middles in addition to the X.
Step Three: Seed the Tomatoes
Some people leave the seeds in their tomatoes. I prefer to take as many out as I can, because they can taste bitter and be an odd texture in sauces. To seed your tomatoes, first cut them into quarters. If you have very large tomatoes, you may want to cut them even smaller.
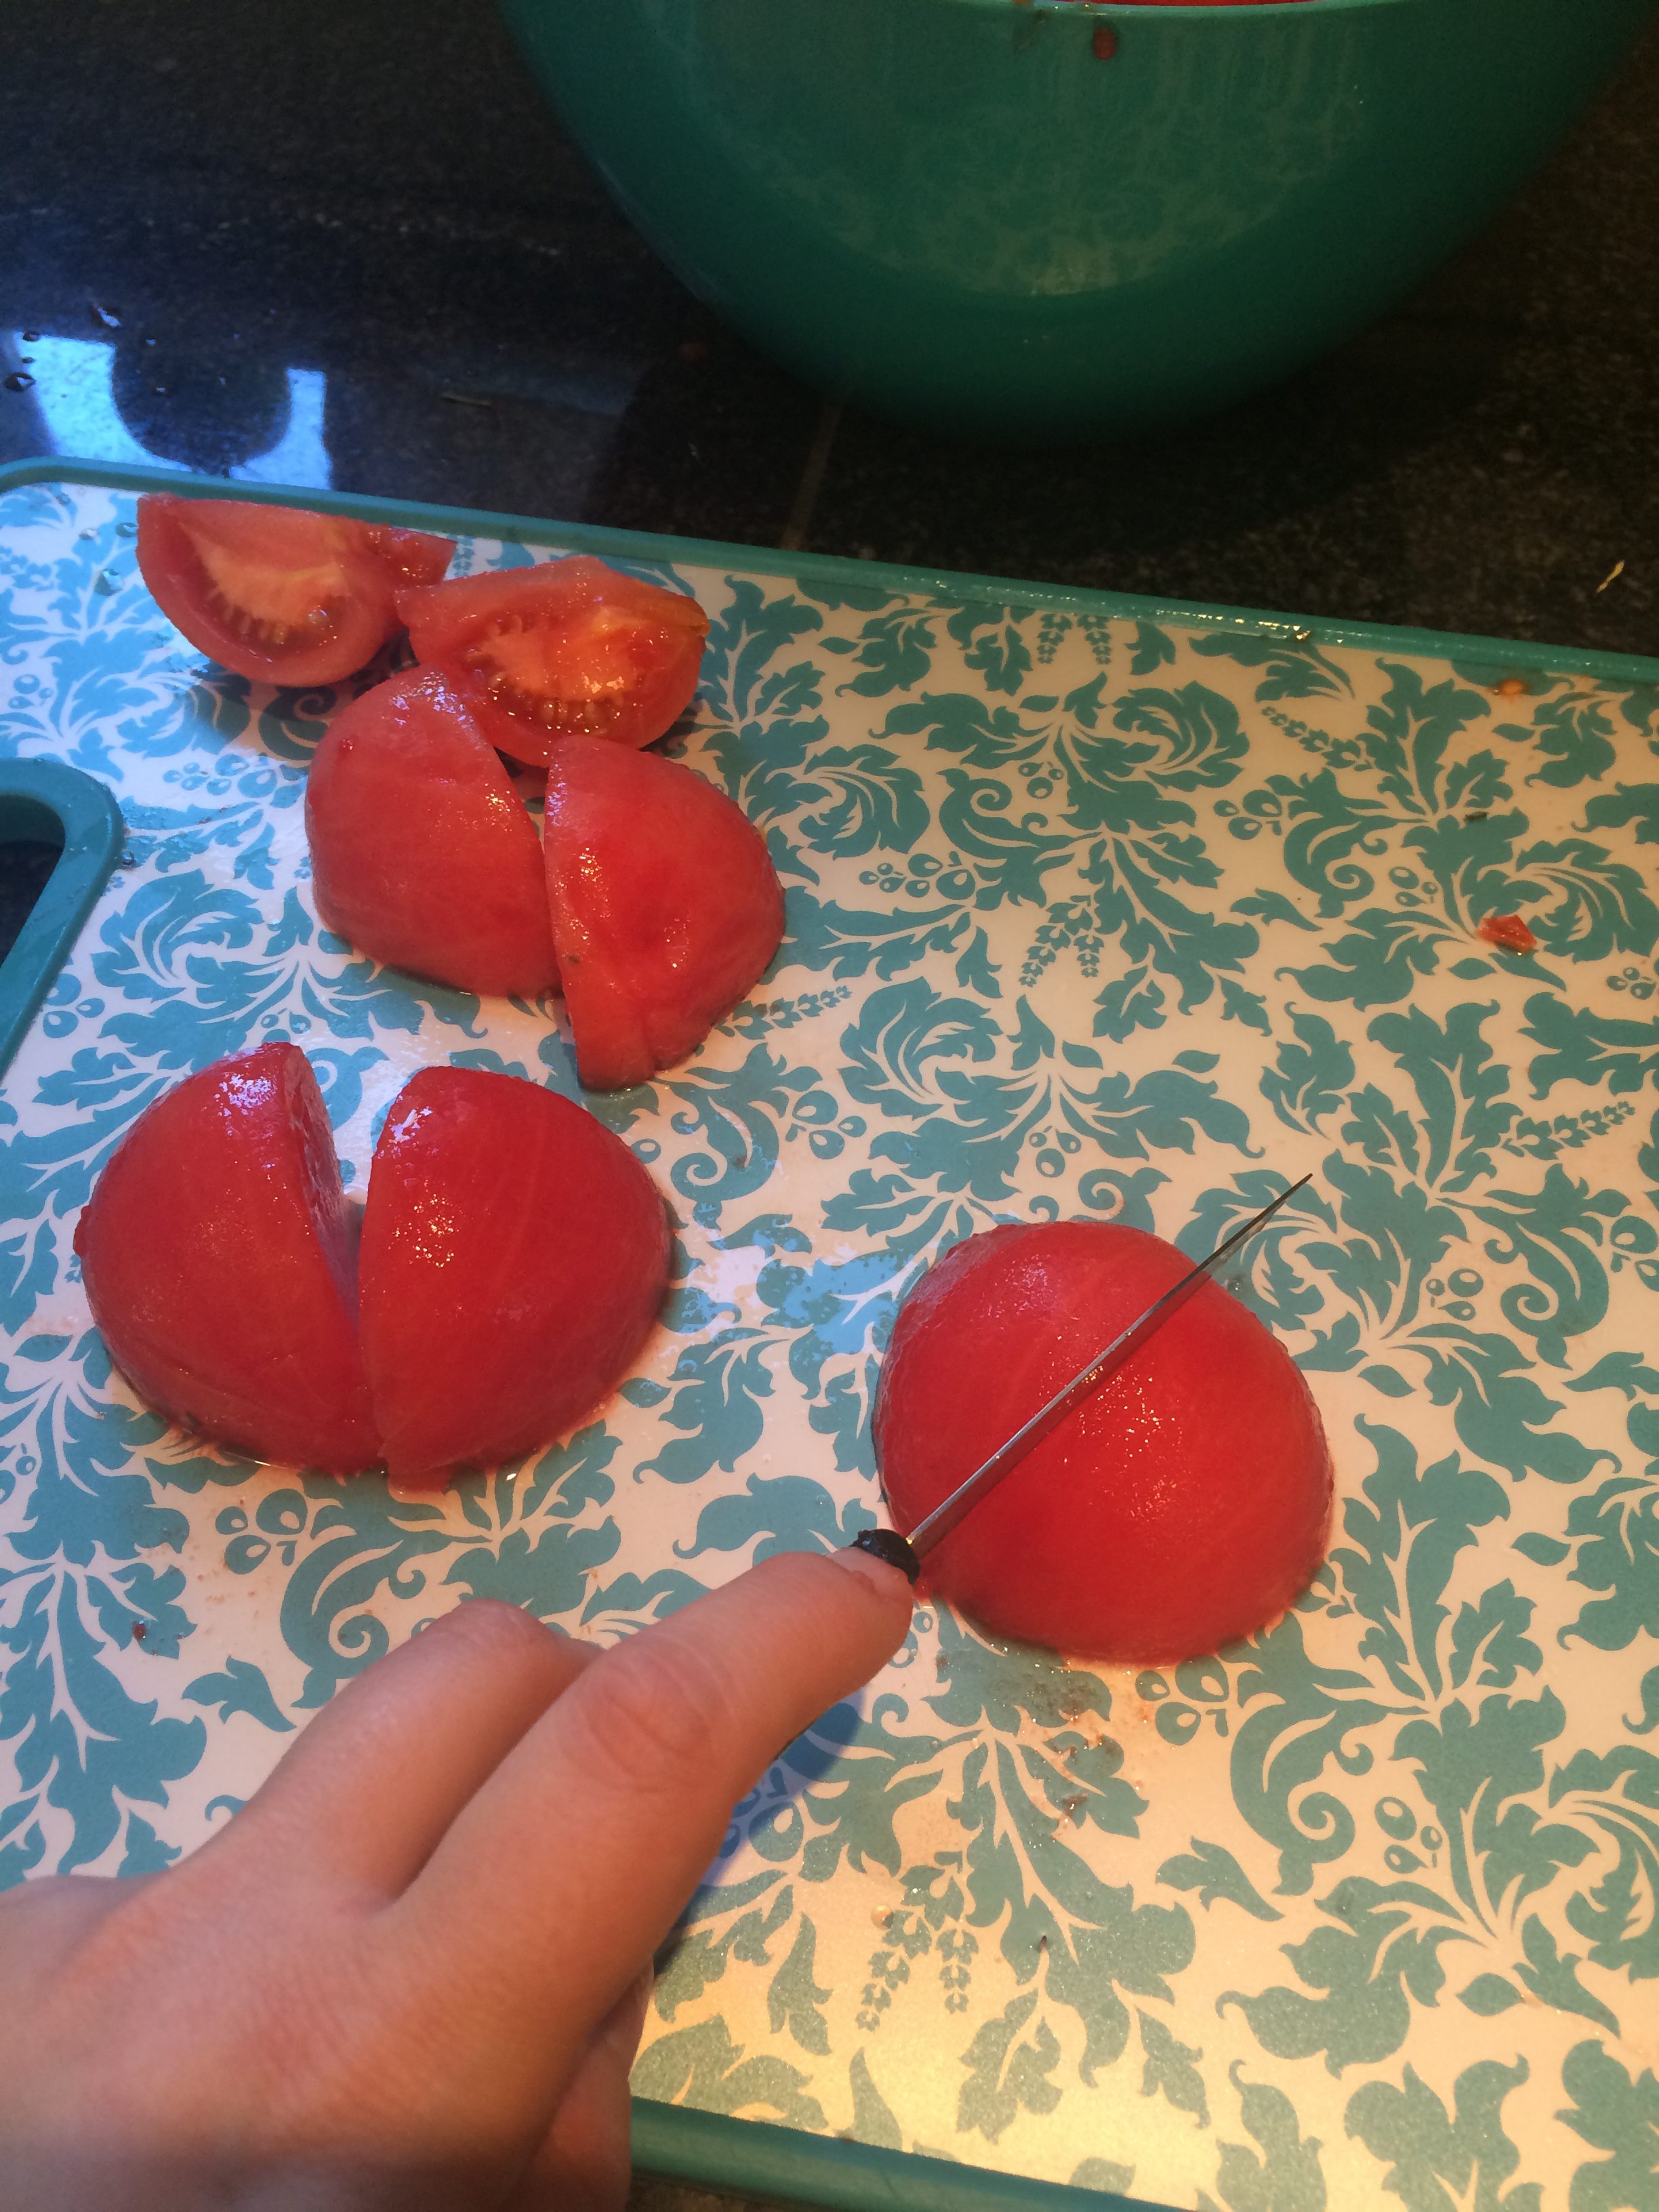
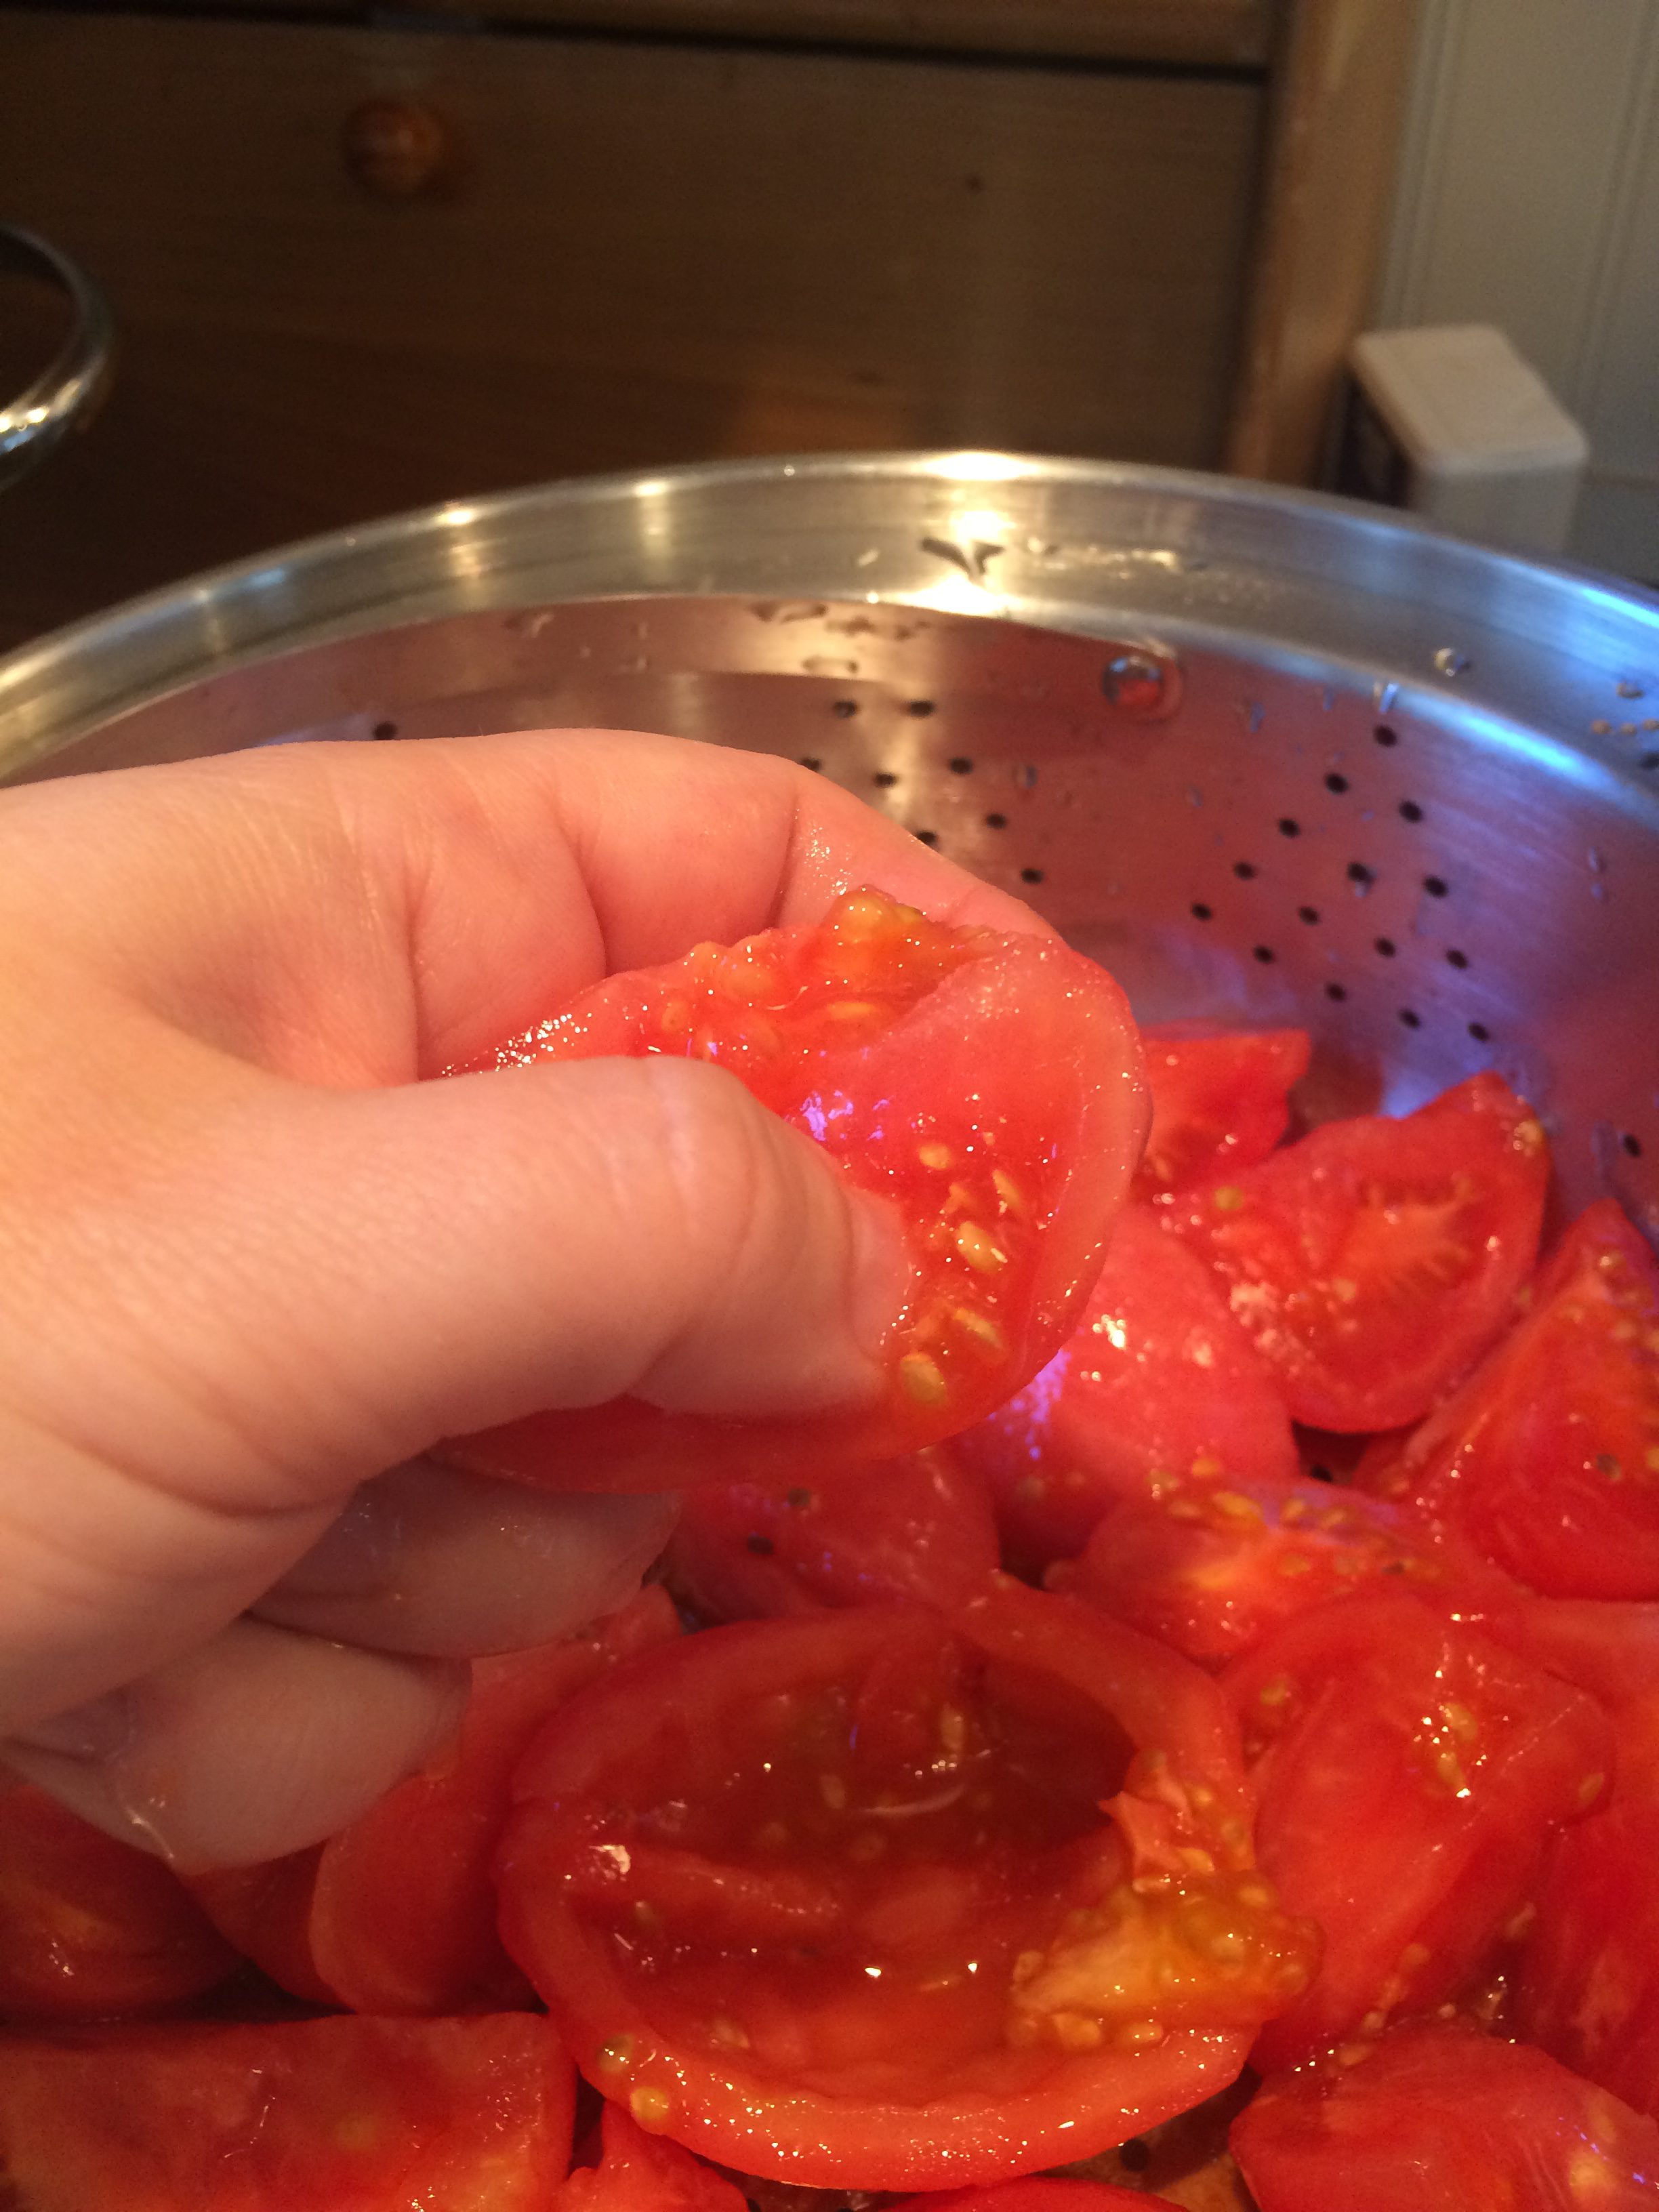
Place the quartered tomatoes into a strainer or steamer basket, over a bowl or pot. You’re going to use your fingers again – processing tomatoes is a very hands-on business! The easiest way I’ve found to seed tomatoes is to push your thumbnail inside the seed cavity and press outward. This scrapes the seed goop out in one nice clump.
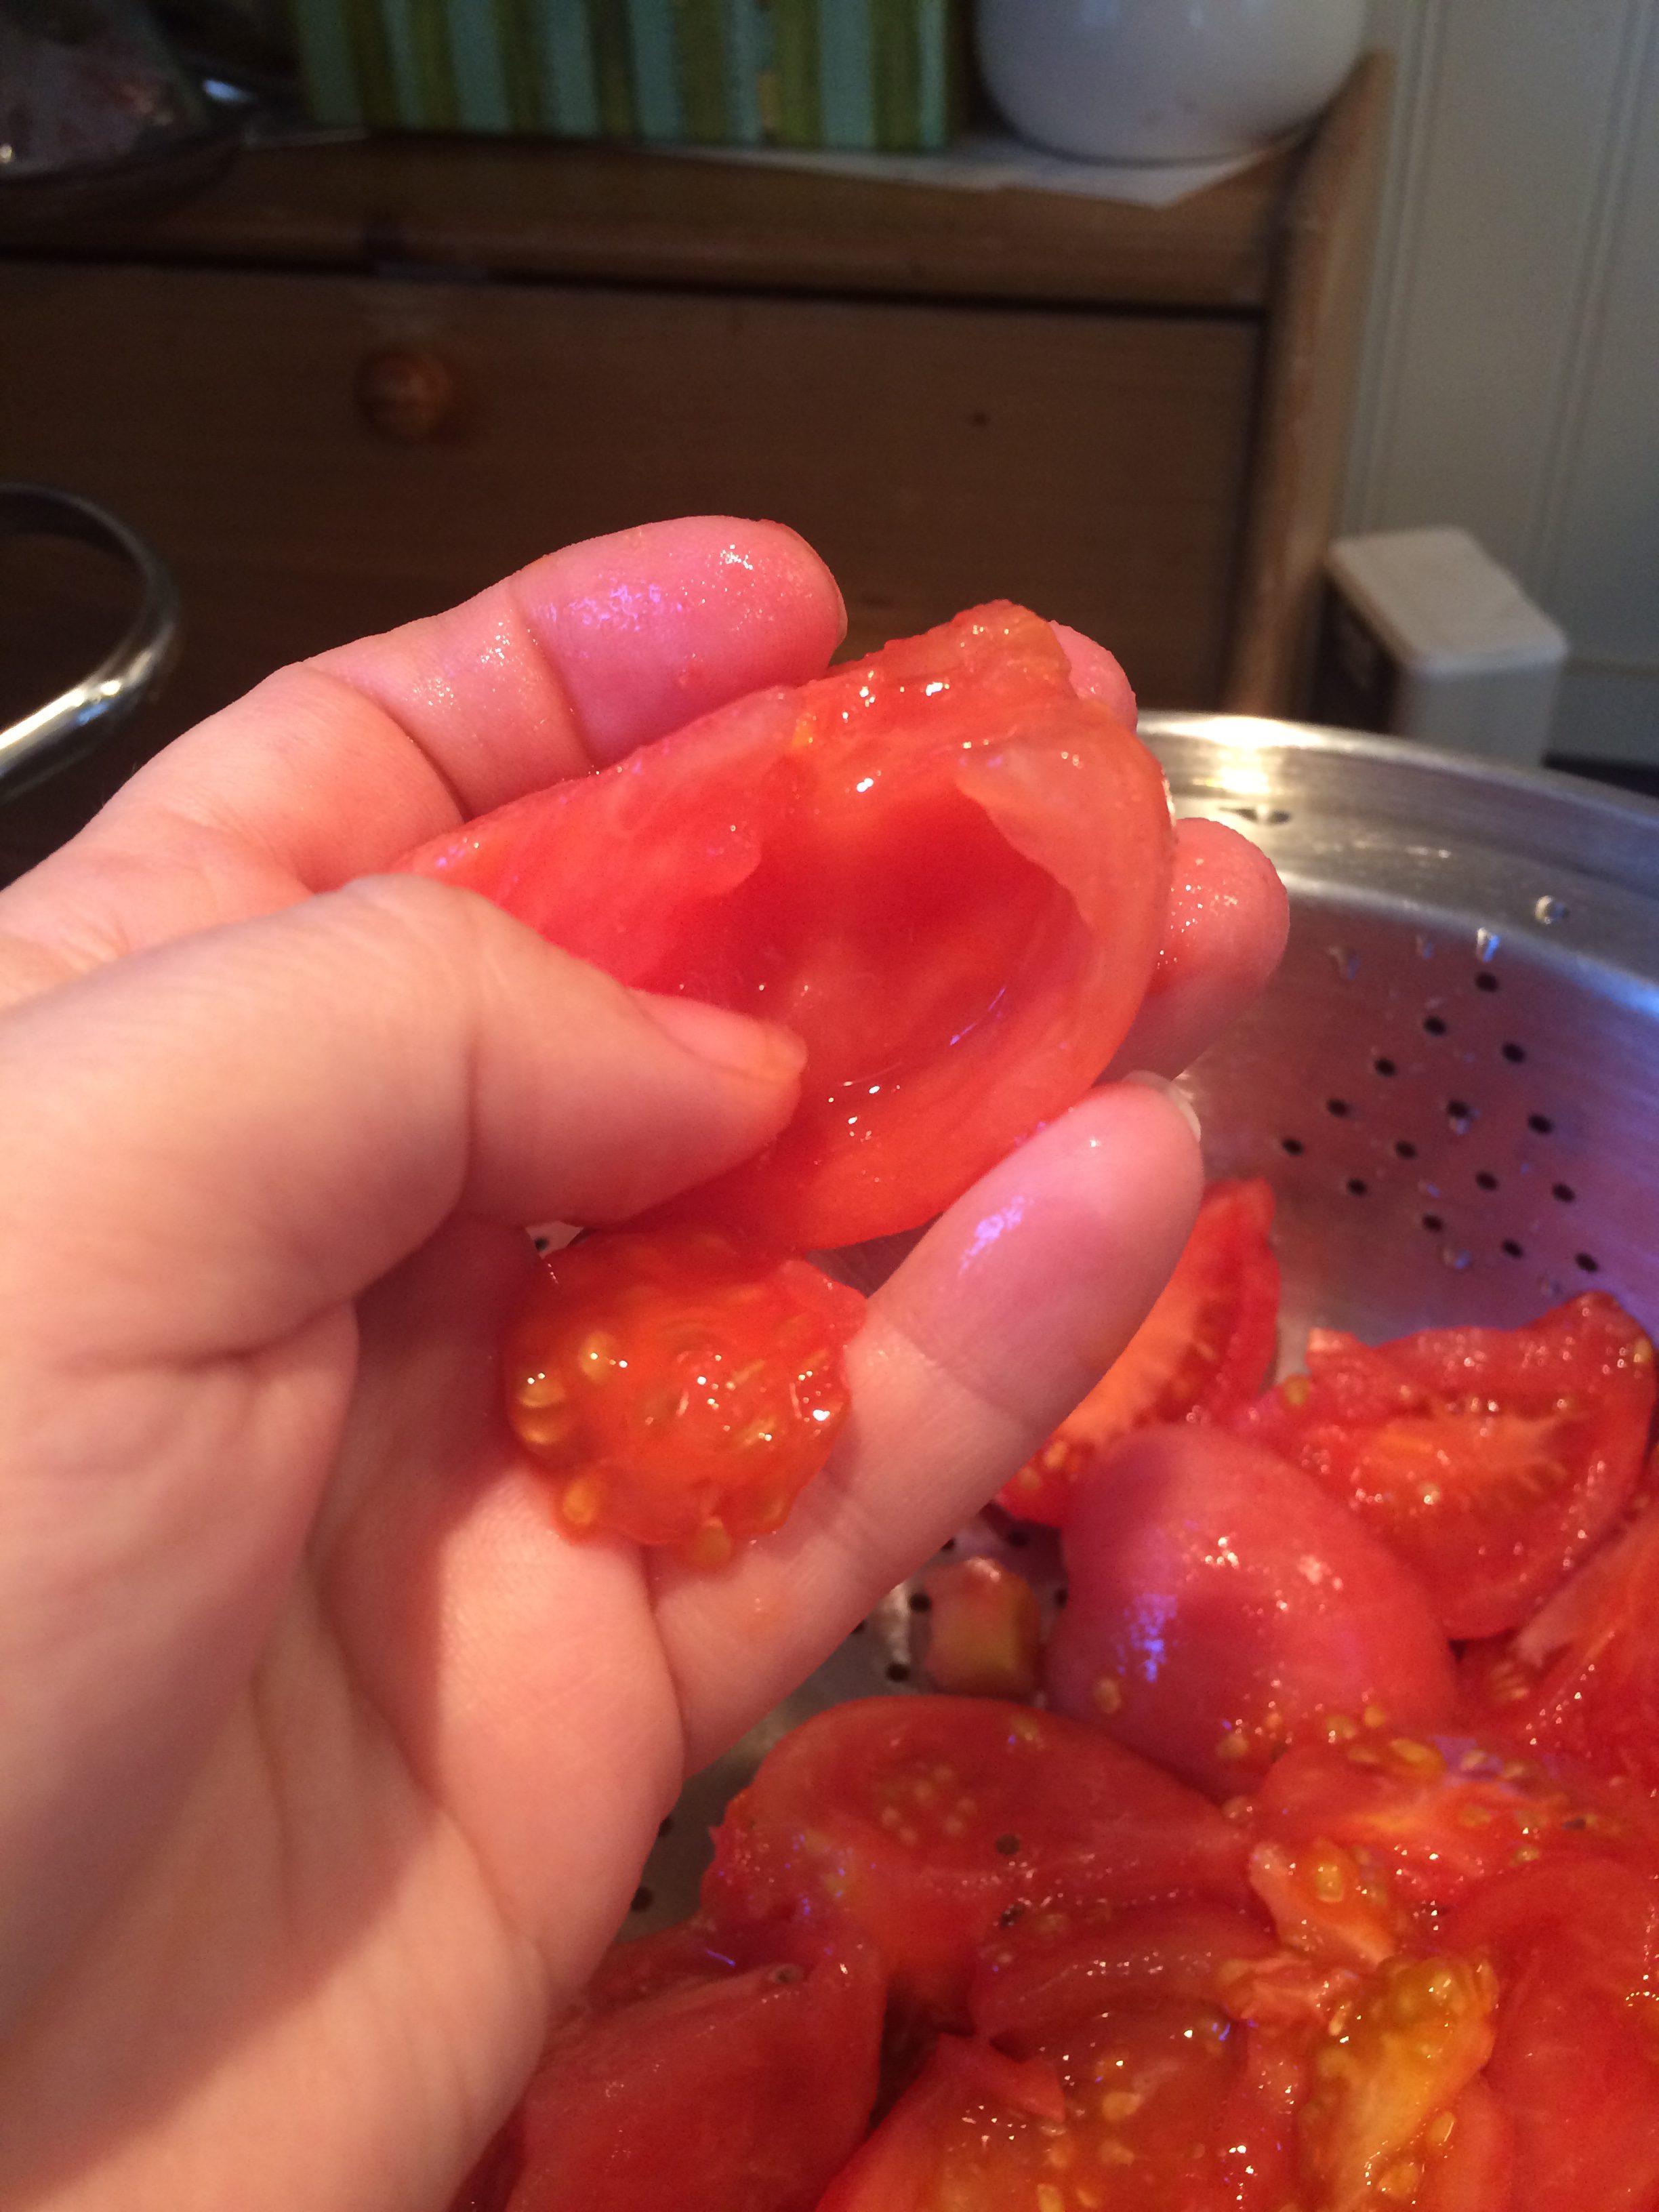
See how nice and neat that came out? Romas have a bit of a core in them that you may need to cut out with a knife, or you can leave it if it’s not too hard or green.
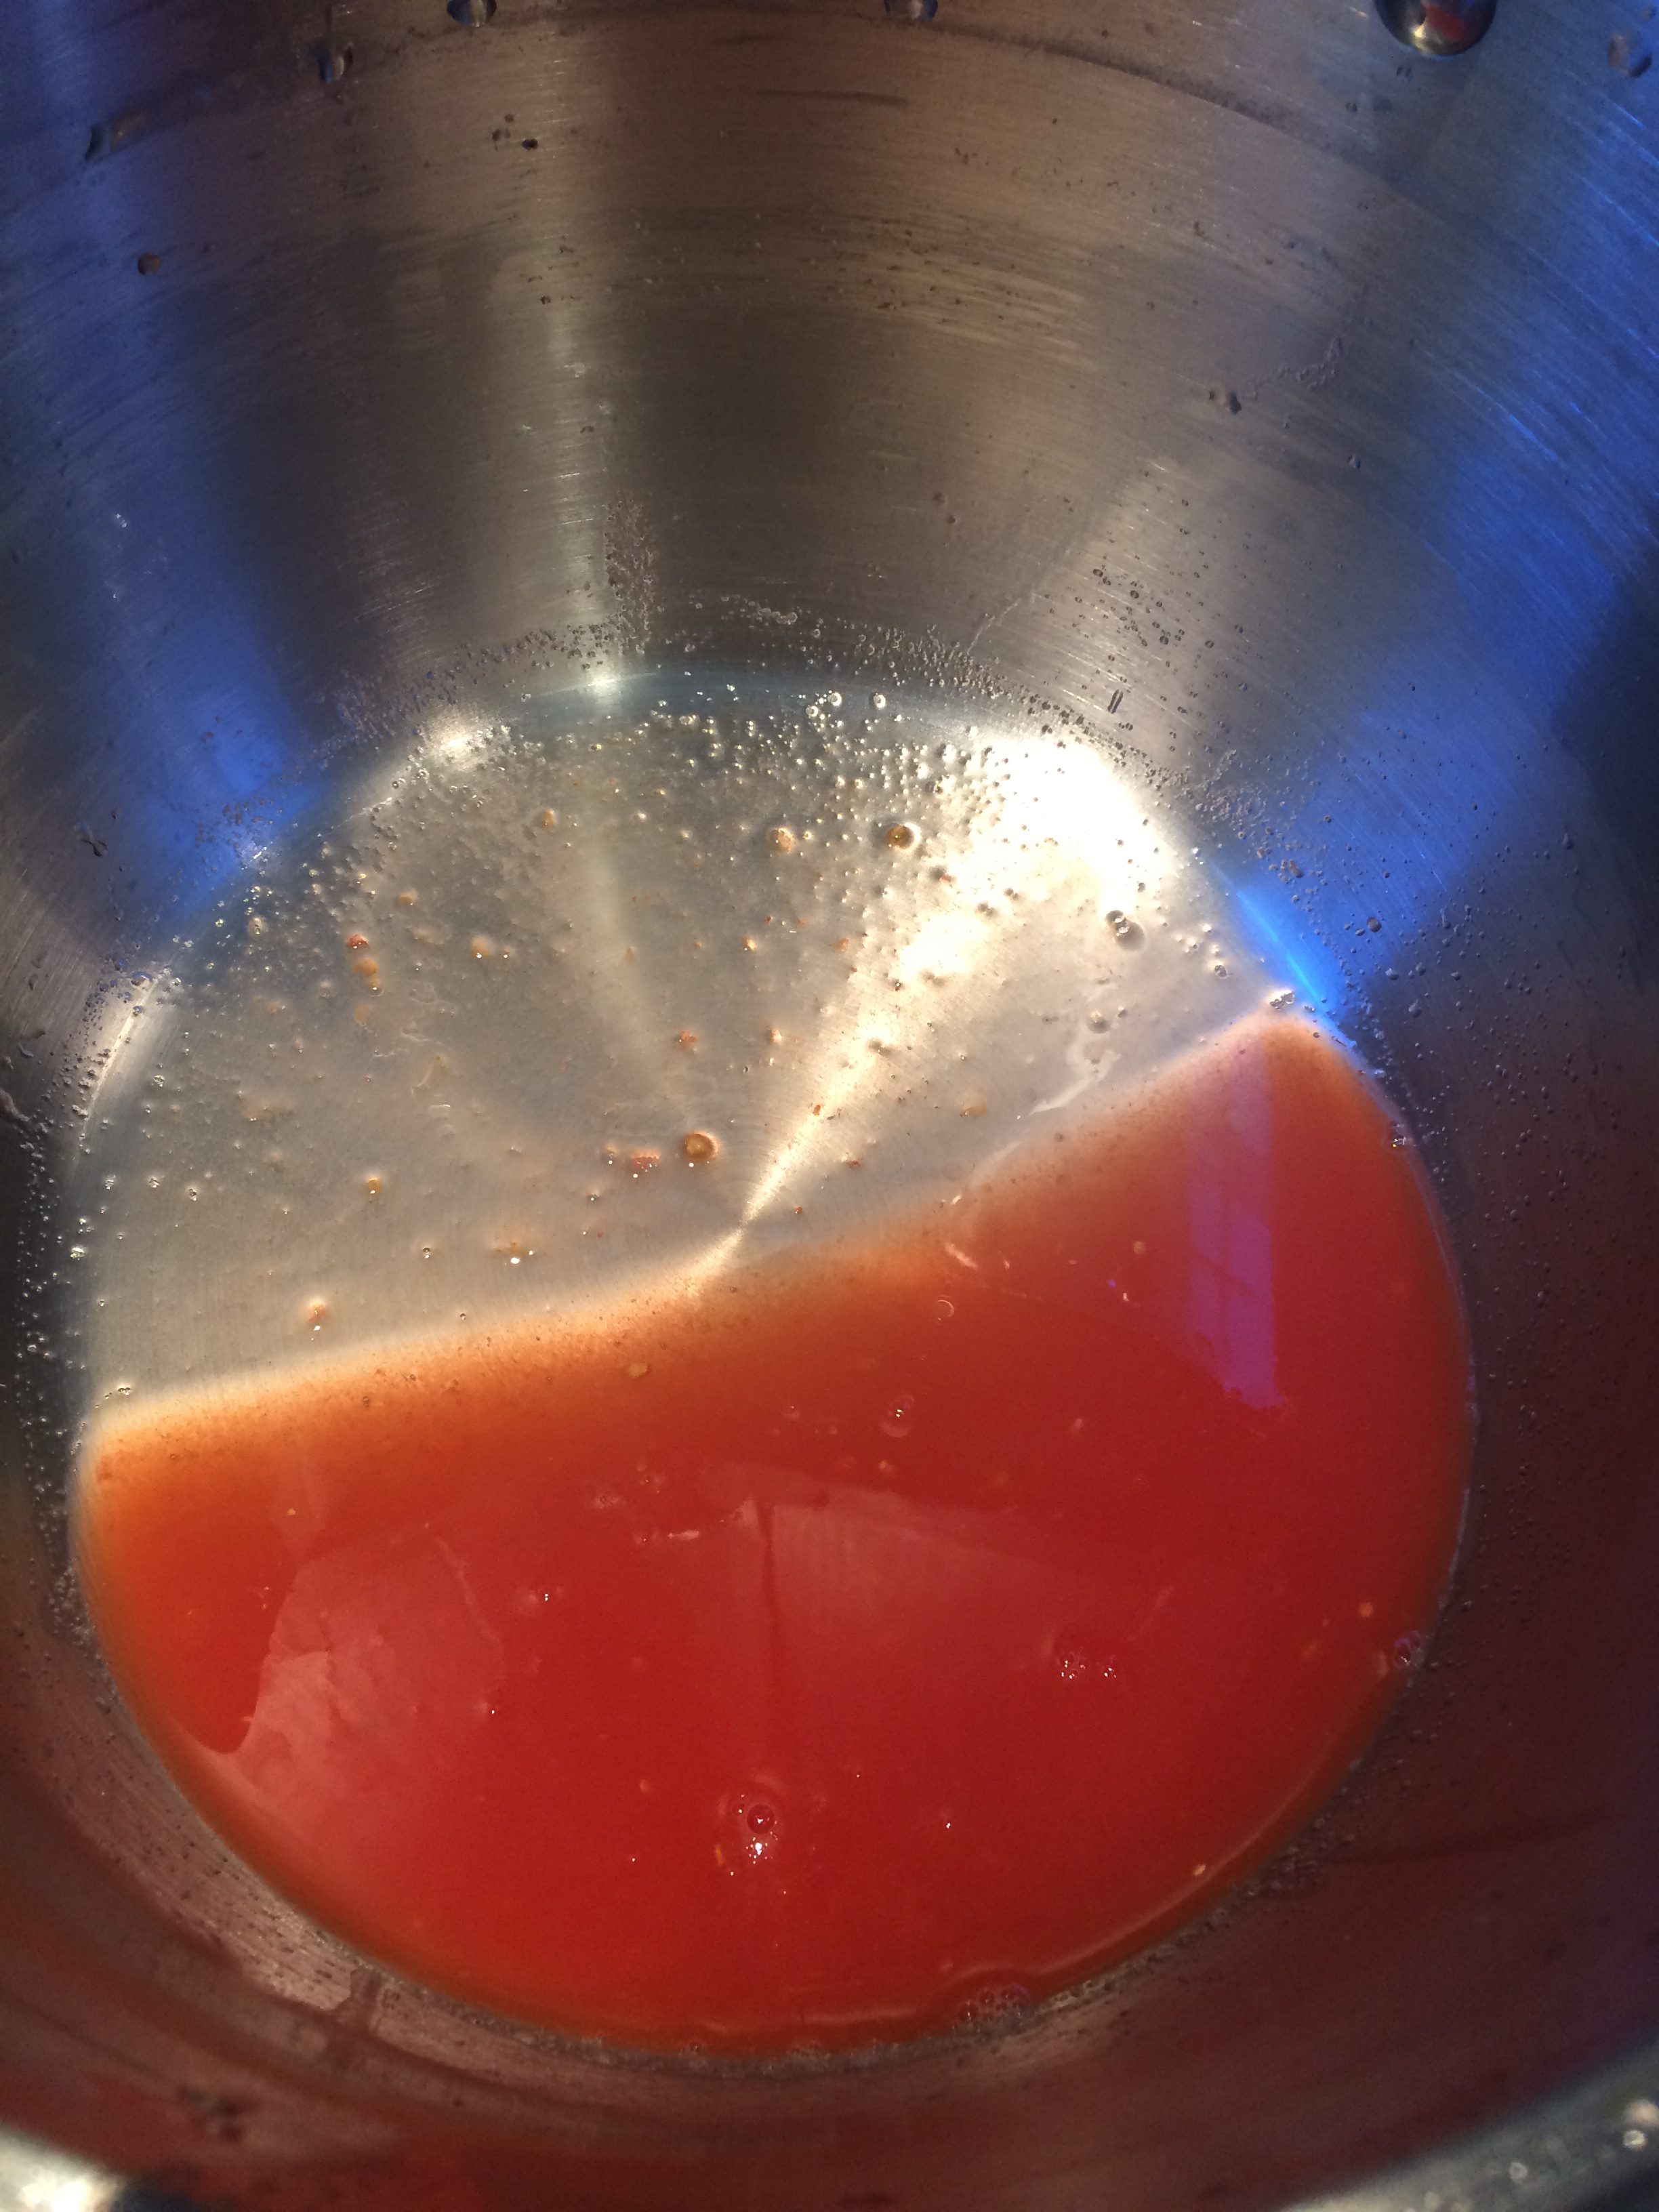
Continue until all the tomatoes have been seeded. If you did the work in a strainer, you can lift the seeds out and find you have a good amount of tomato juice in your pot. (You will have more to add to it later.) This juice is very versatile: you can add spices and other veggies to it to make a V8-type drink; add it to soups and chili in place of water; cook rice or pasta in it; add seasonings to make a very light pasta sauce; use it for gazpacho; freeze it in ice cube trays for later; put it in your hair as a conditioner; or bathe your skunk-sprayed dog in it. The possibilities are endless!
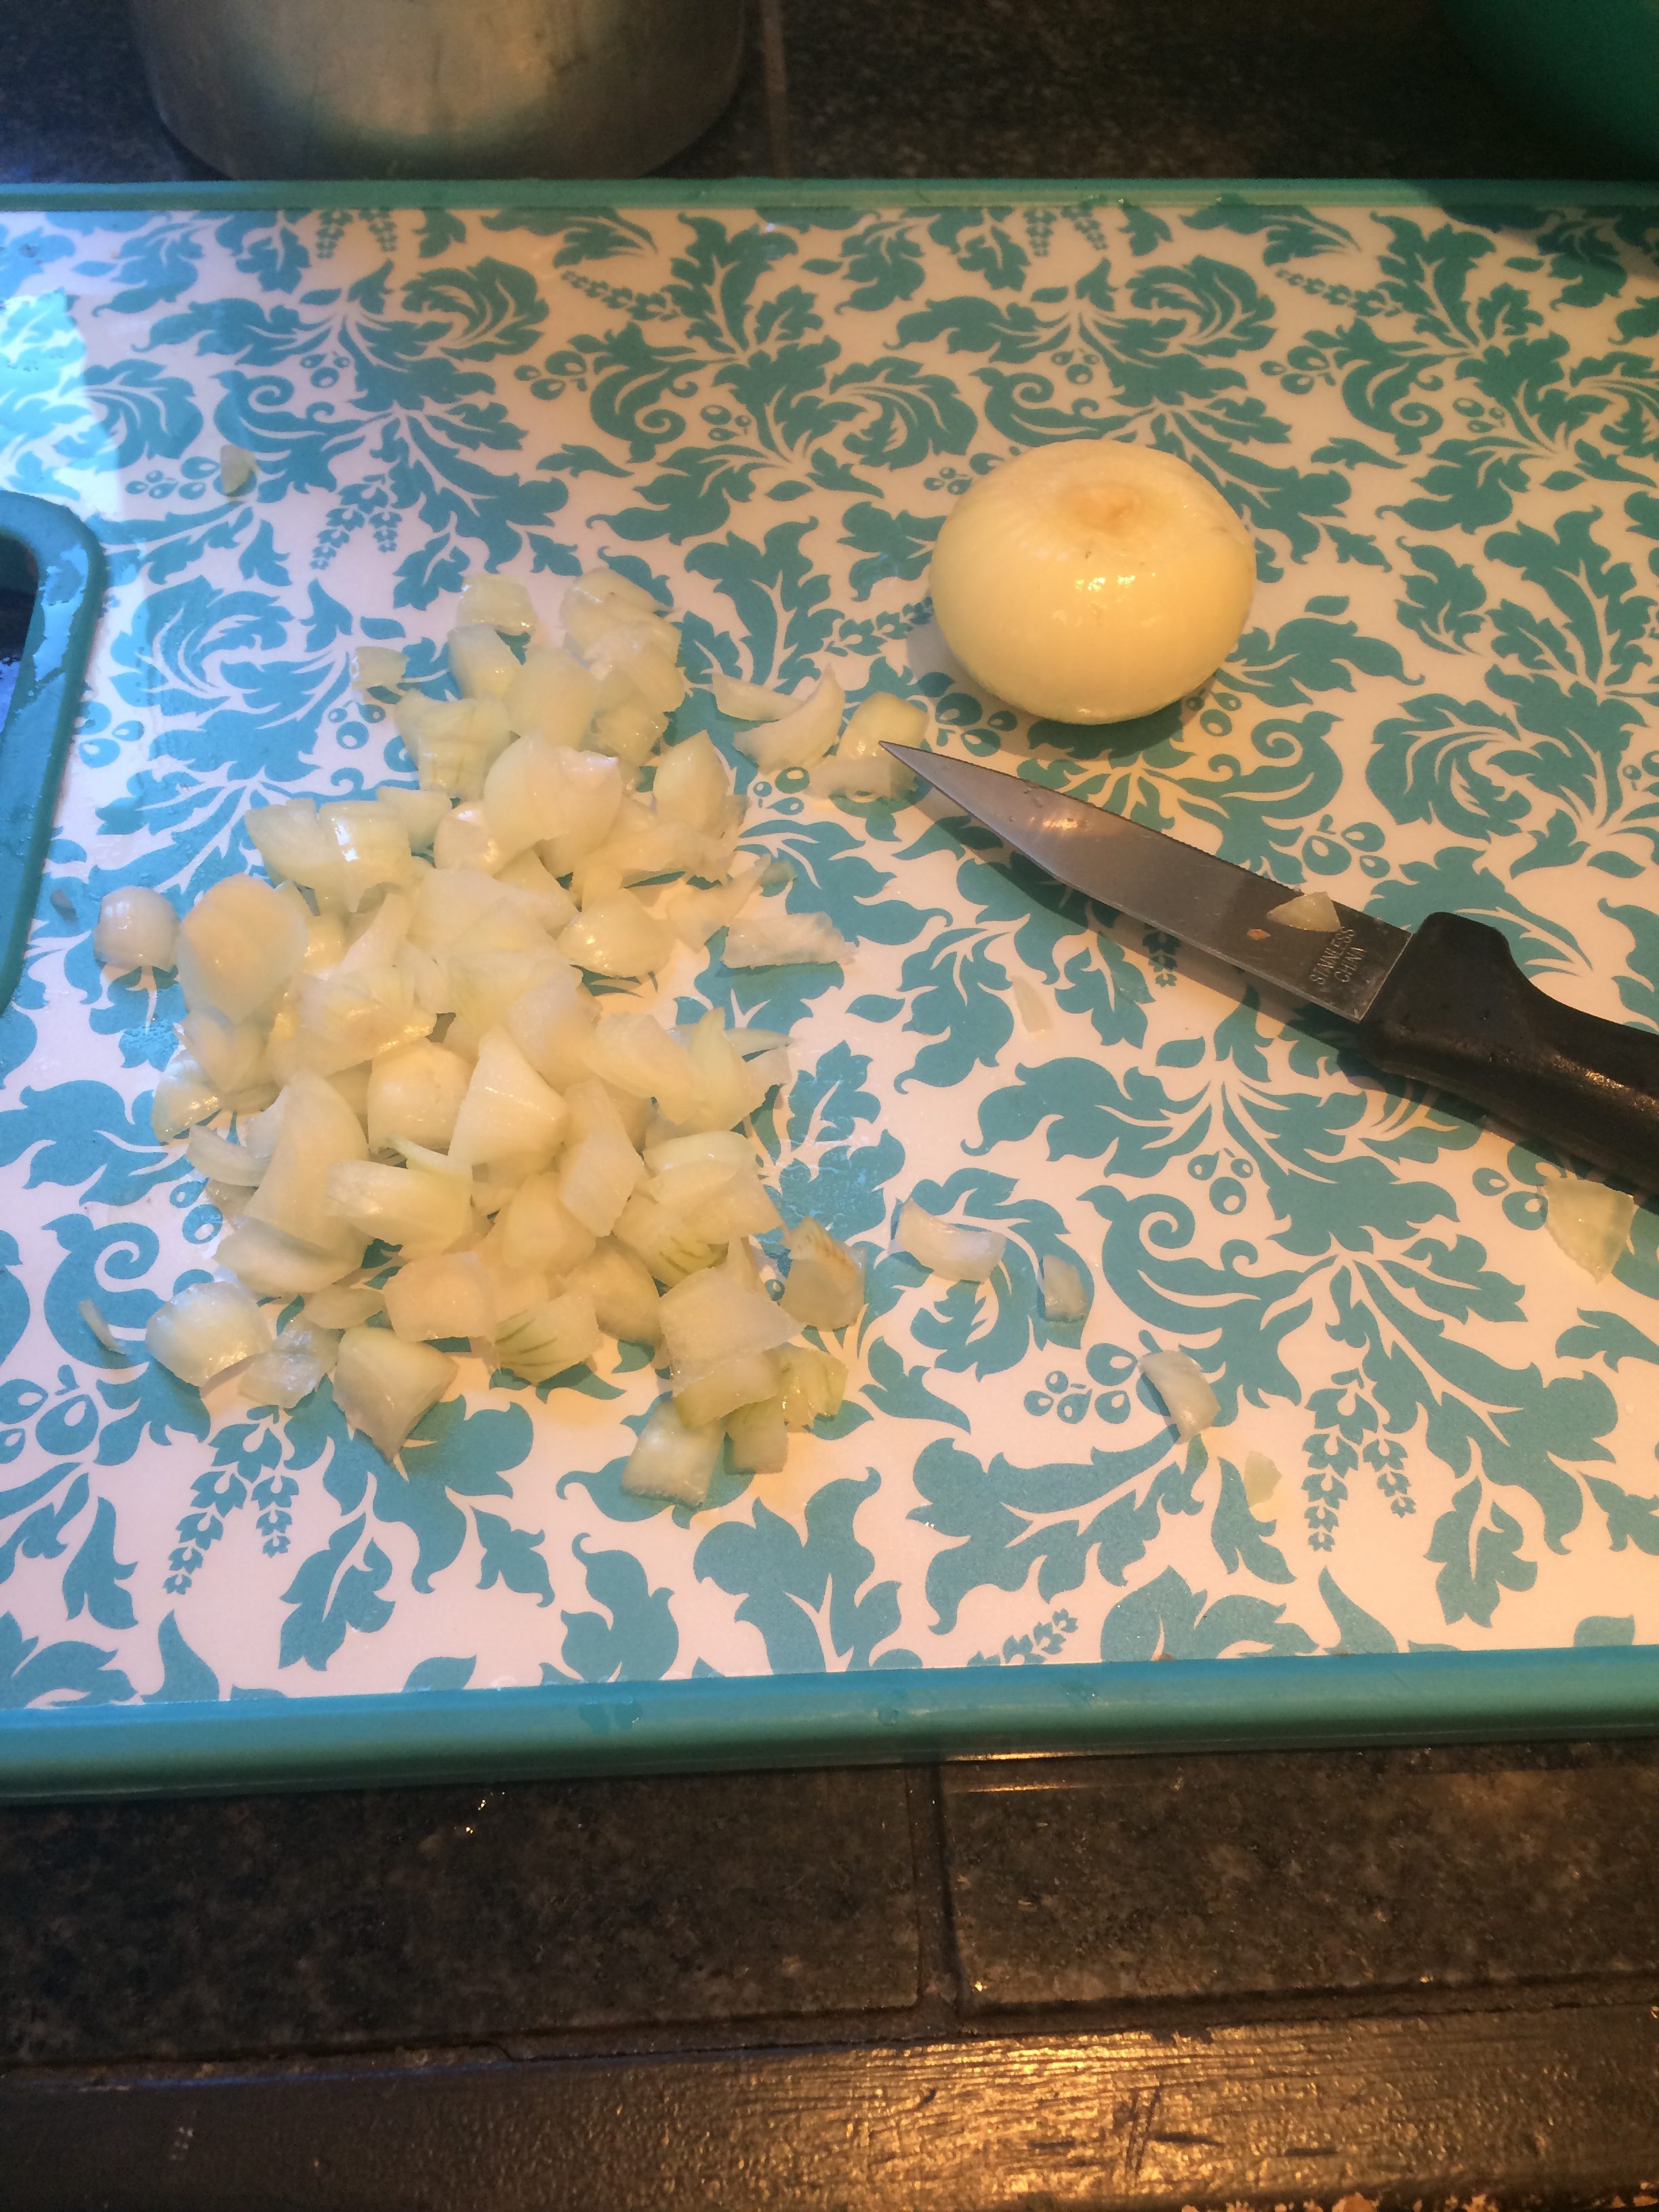
Step Four: Cook Your Onion and Garlic
At this point you have a couple options. If you just want diced tomatoes, you only need to cut your tomatoes up small and freeze them as-is. Simple! If you’re going to make spaghetti sauce from scratch, now is when you will begin cooking the onions and garlic.
Start by heating up about a tablespoon of olive oil in a small skillet, on medium heat. Dice your onion while it warms. I actually used onions that were also from my garden. They’re tiny, but man they pack a punch! My eyes were burning and watering like crazy, and the kids got a kick out of me flailing around the kitchen… I mean, I was super cool about the whole thing. (Two tips for cutting onions, neither of which I used today: one, stick your onion in the freezer for 10-15 minutes before you slice it. Two, chew gum, or mimic chewing it, while you cut. I don’t know why that one works, but it does!)
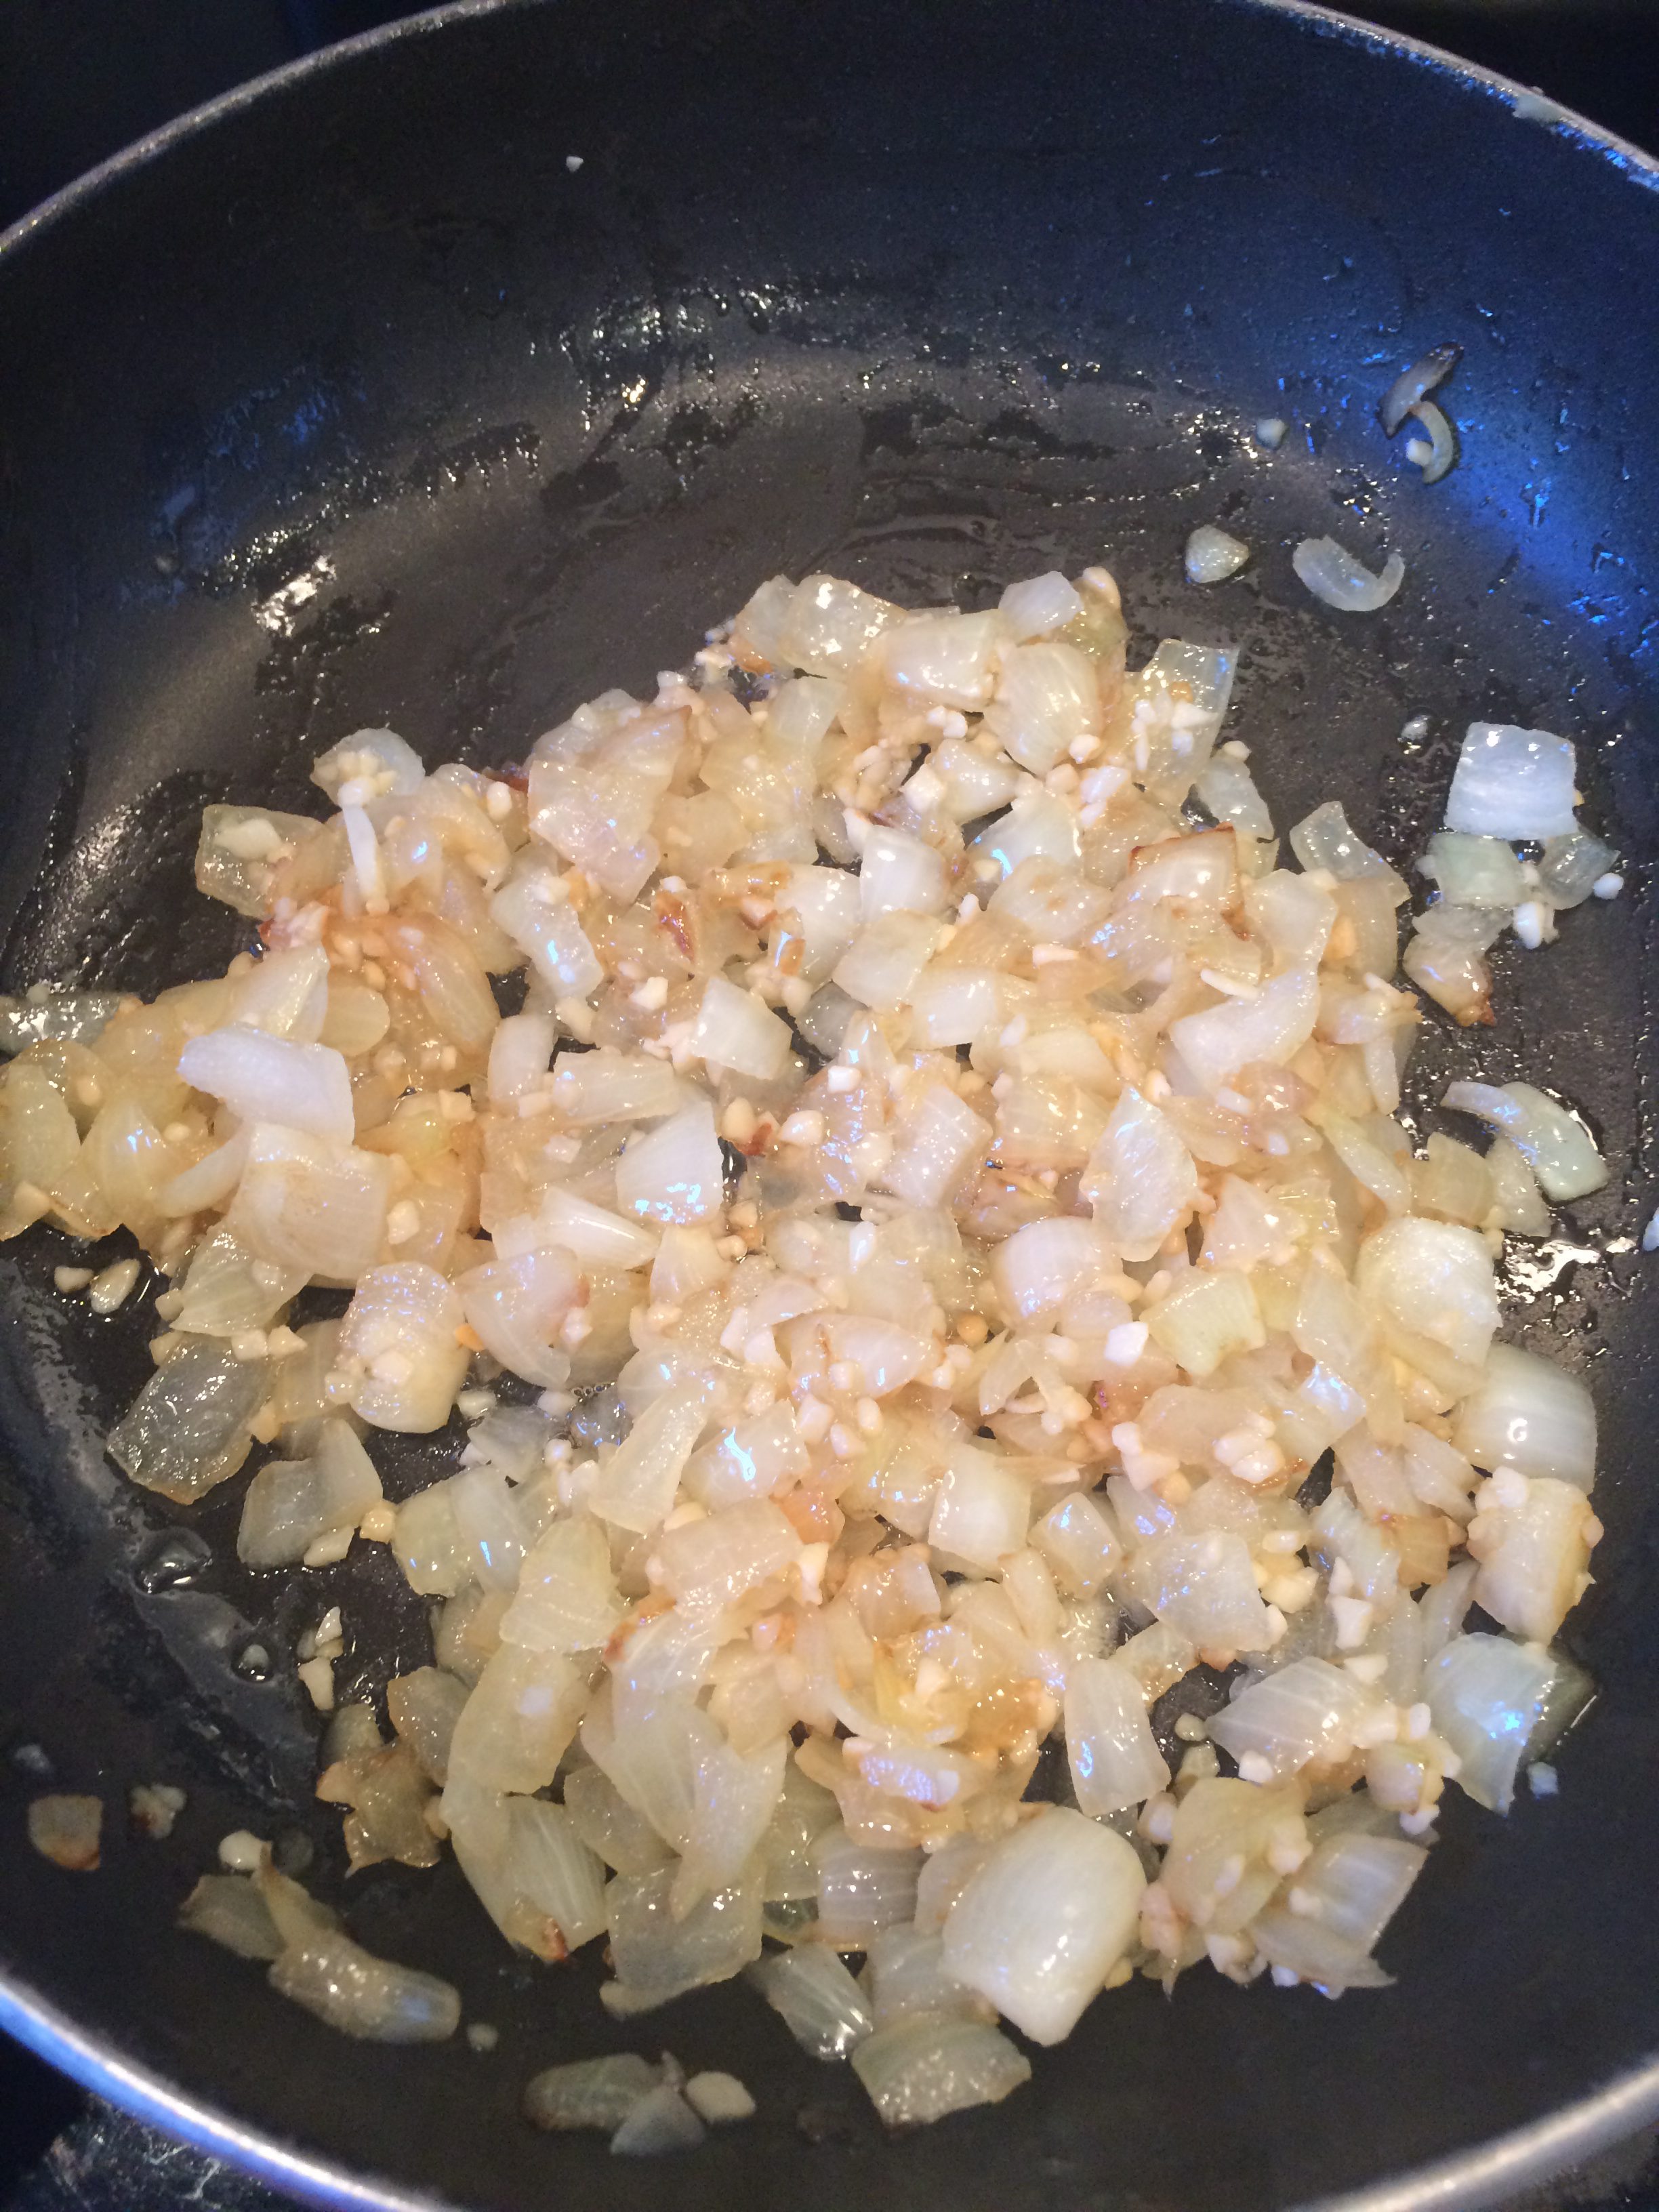
Don’t forget to keep an eye on the oil while you’re chopping, so it doesn’t burn. You’ll know it’s hot enough when it moves like water in the pan. Reduce the heat and add your onions, stirring often. When they’re almost translucent, add minced garlic (amounts for each are in the recipe at the bottom). Garlic burns easily, so only cook it for a minute or two, and watch it closely!
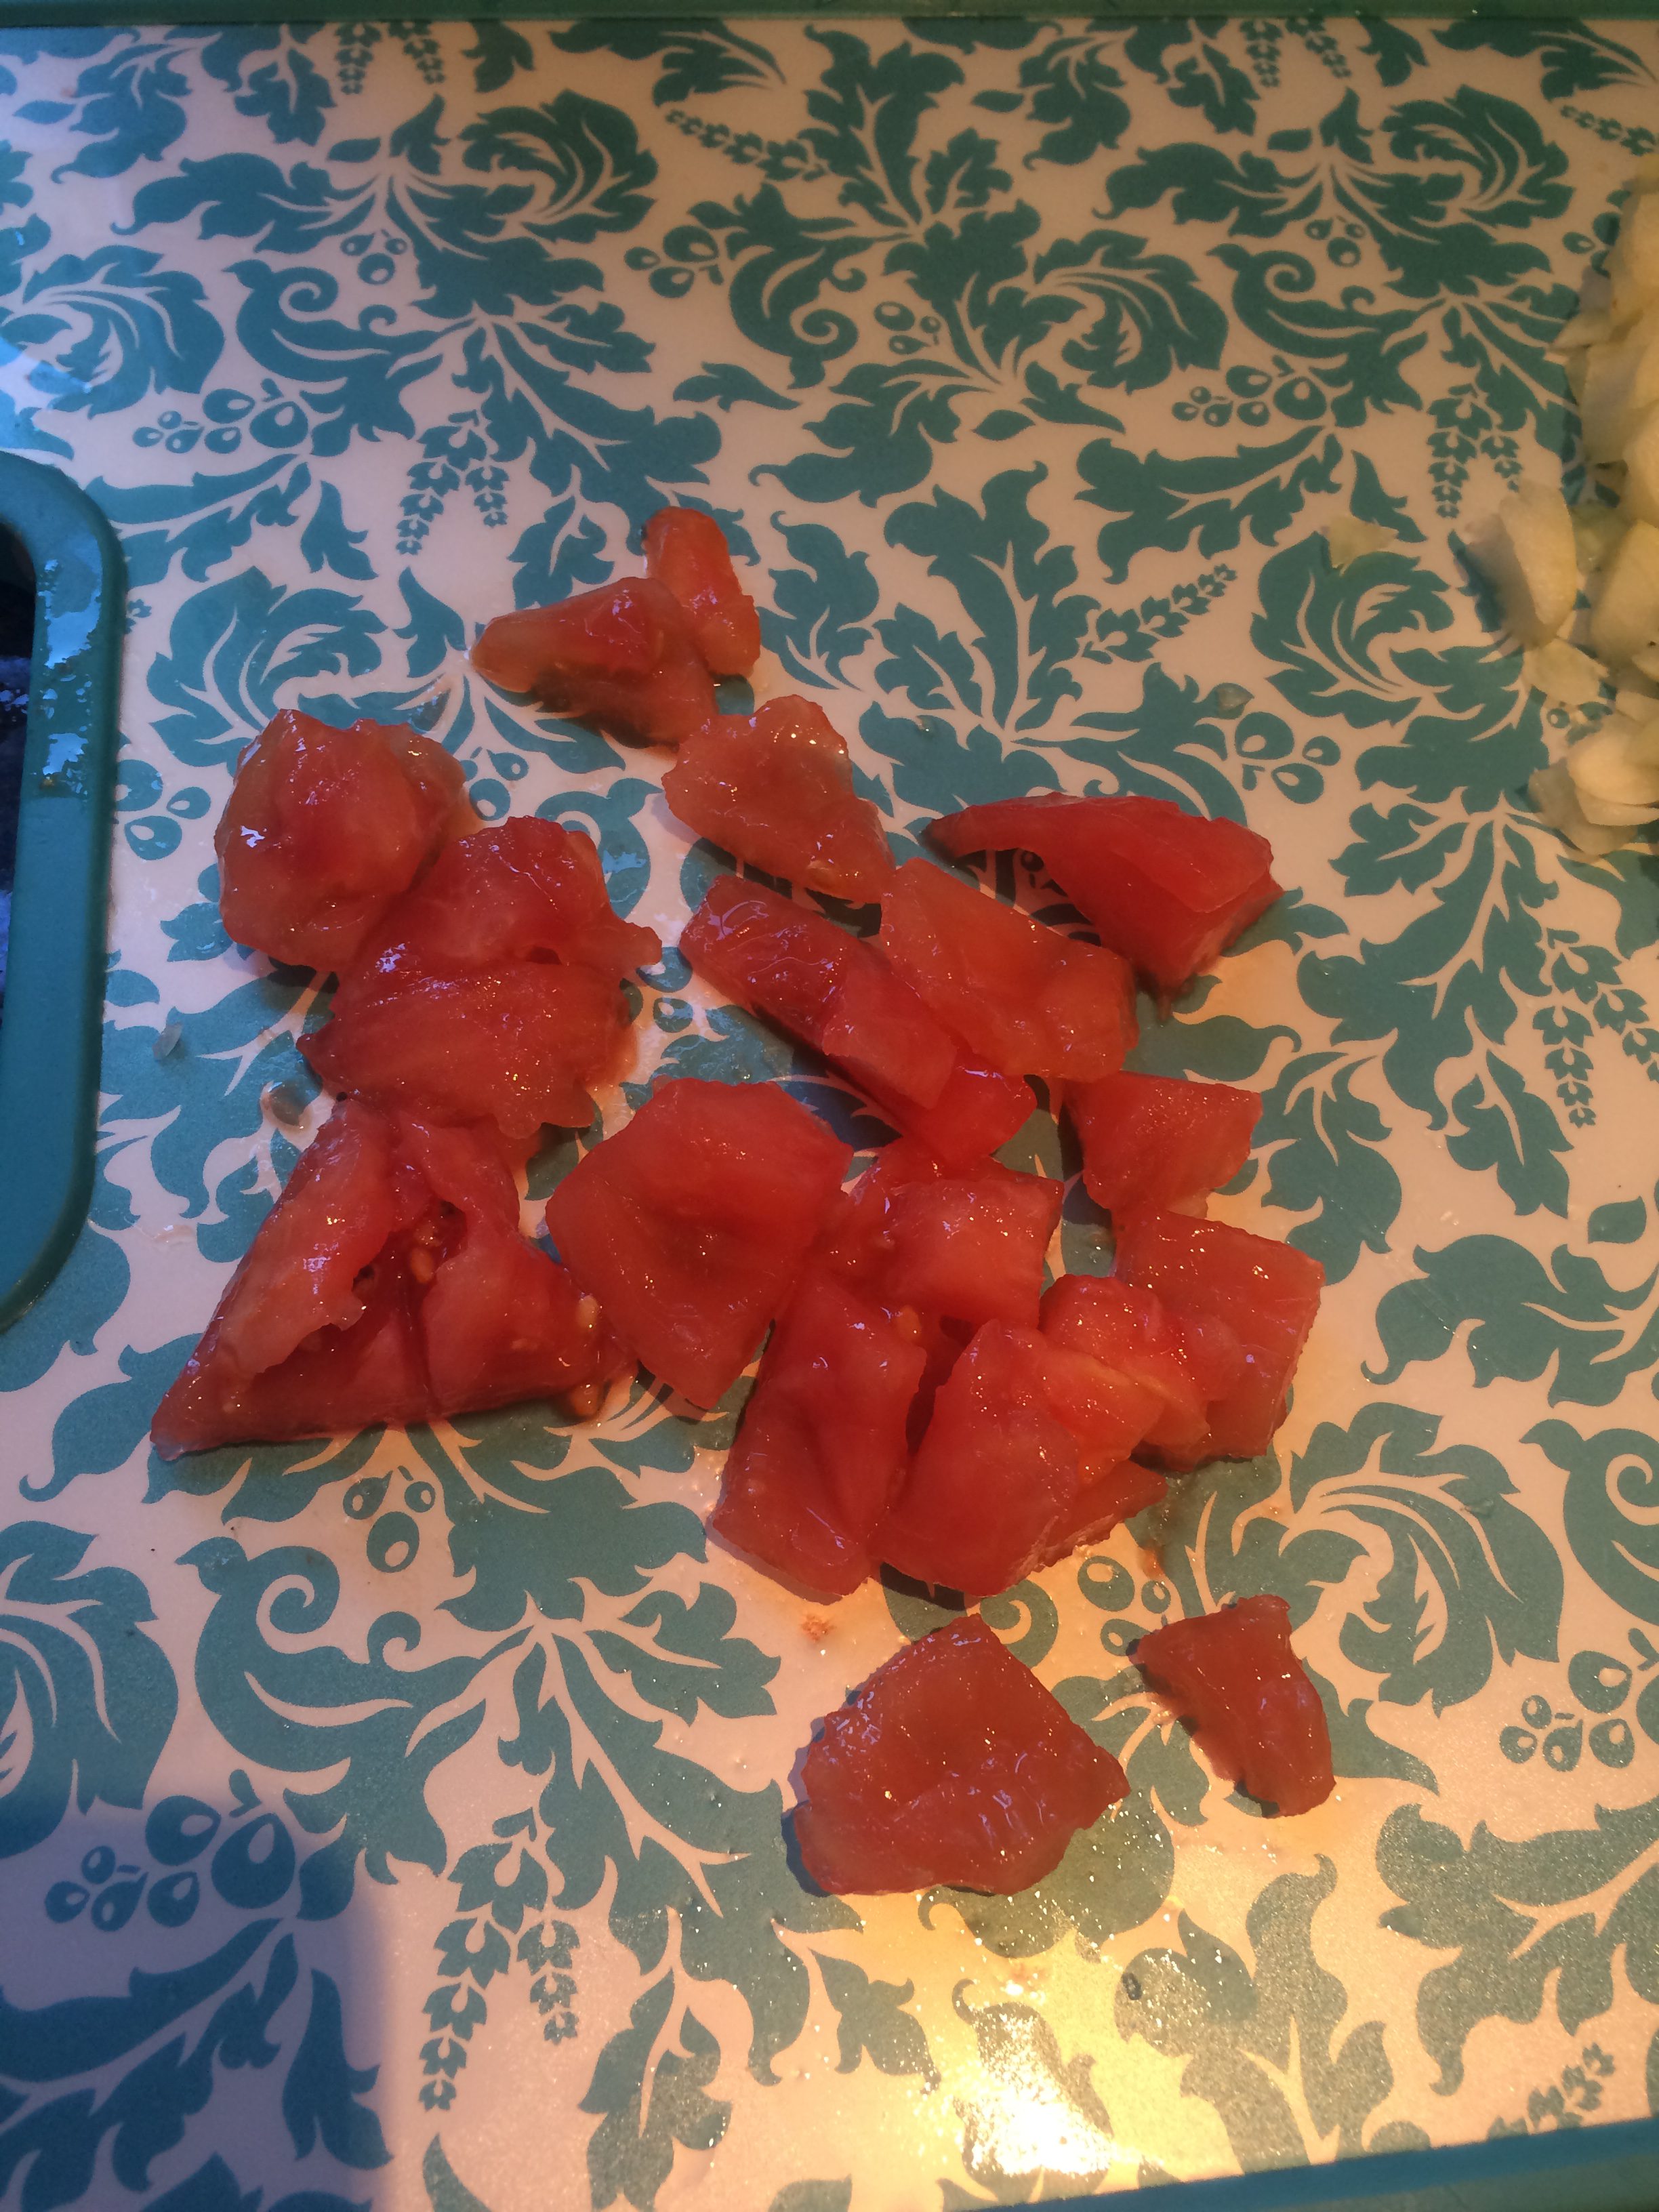
Step Five: Crush the Tomatoes
While the onions and garlic are cooking, begin roughly chopping your tomatoes. Knife cuts don’t matter at all here, you just want the tomato chunks to be smaller so they cook down better.
Place the tomato chunks back into your strainer, inside the pot or bowl. They still have a lot of juice in them, which would need to be cooked down and wasted. But if you crush the tomatoes first, you can save that juice for other things! I actually used a potato masher for this step, which I think was brilliant.
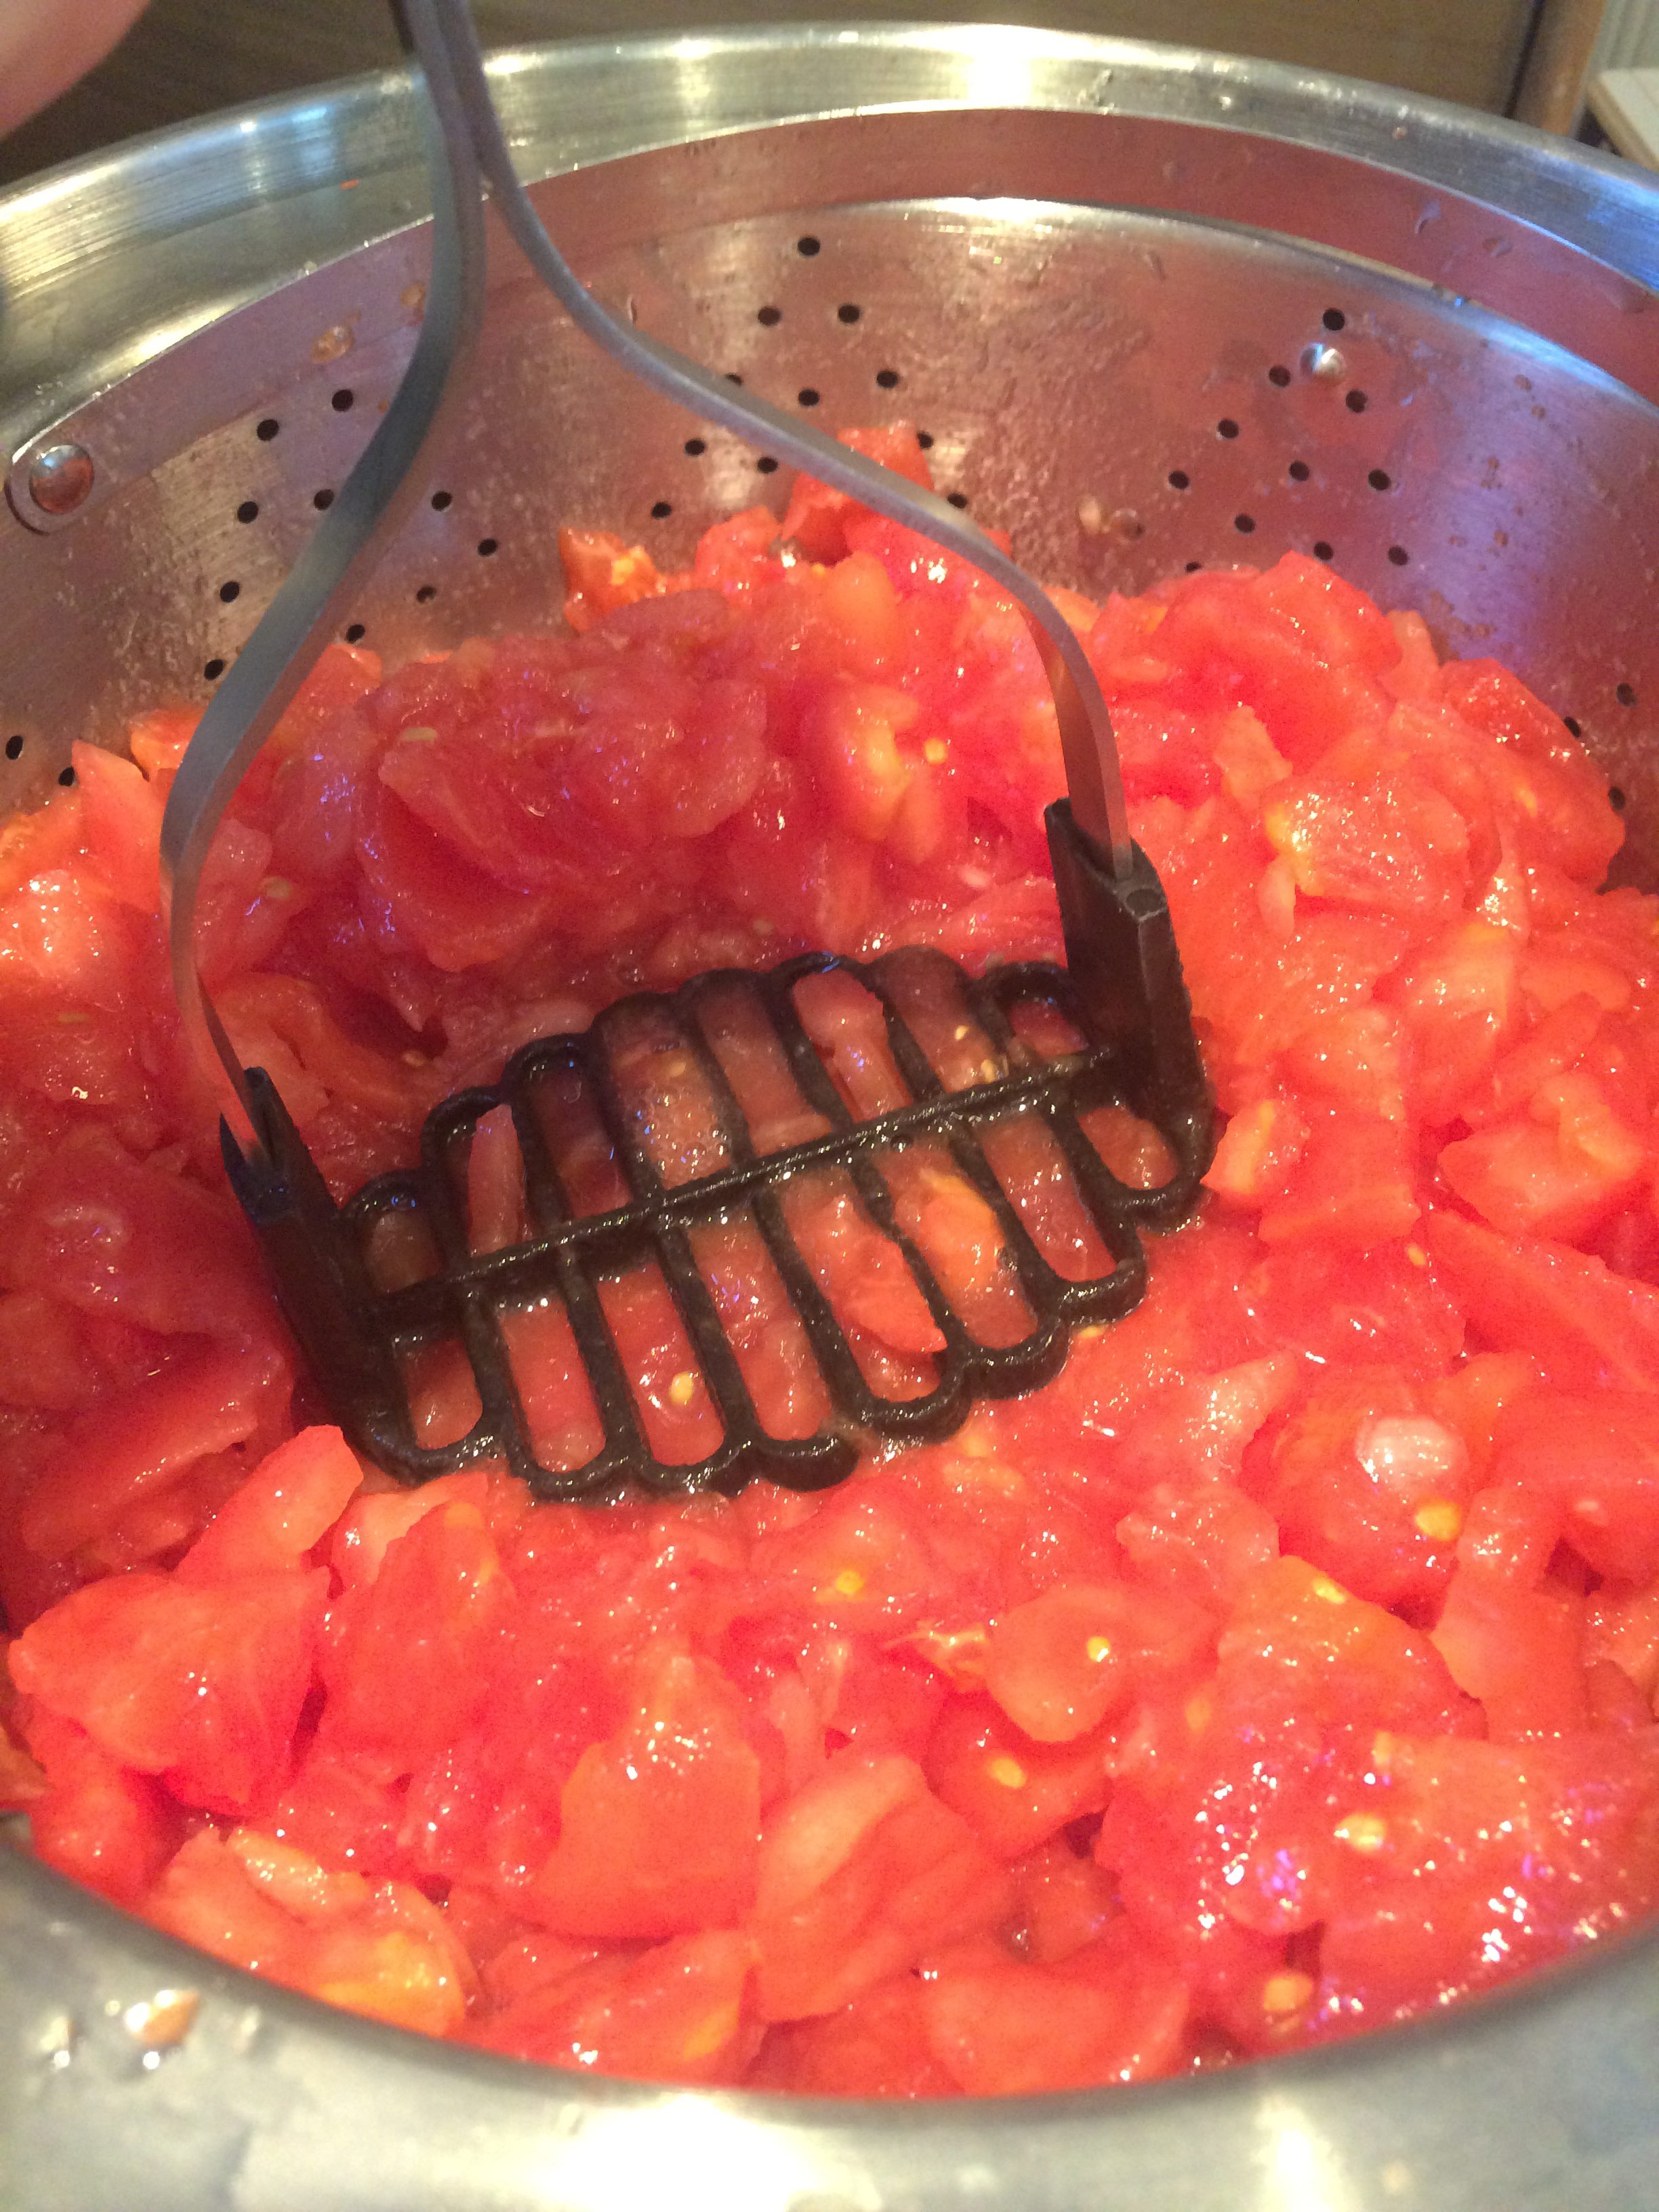
I crushed and stirred them a total of three times. It definitely doesn’t need to be perfect; you’re just trying to get most of the juice out. I added this juice to what I got from step 3, and had over 2 cups! That’s pretty good for something that would normally just be thrown out or evaporated.

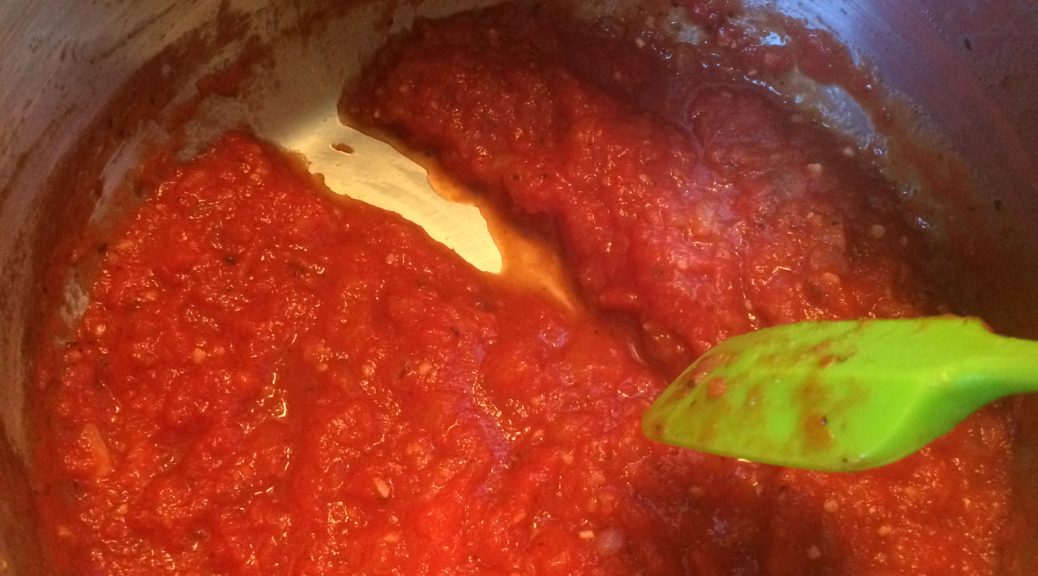
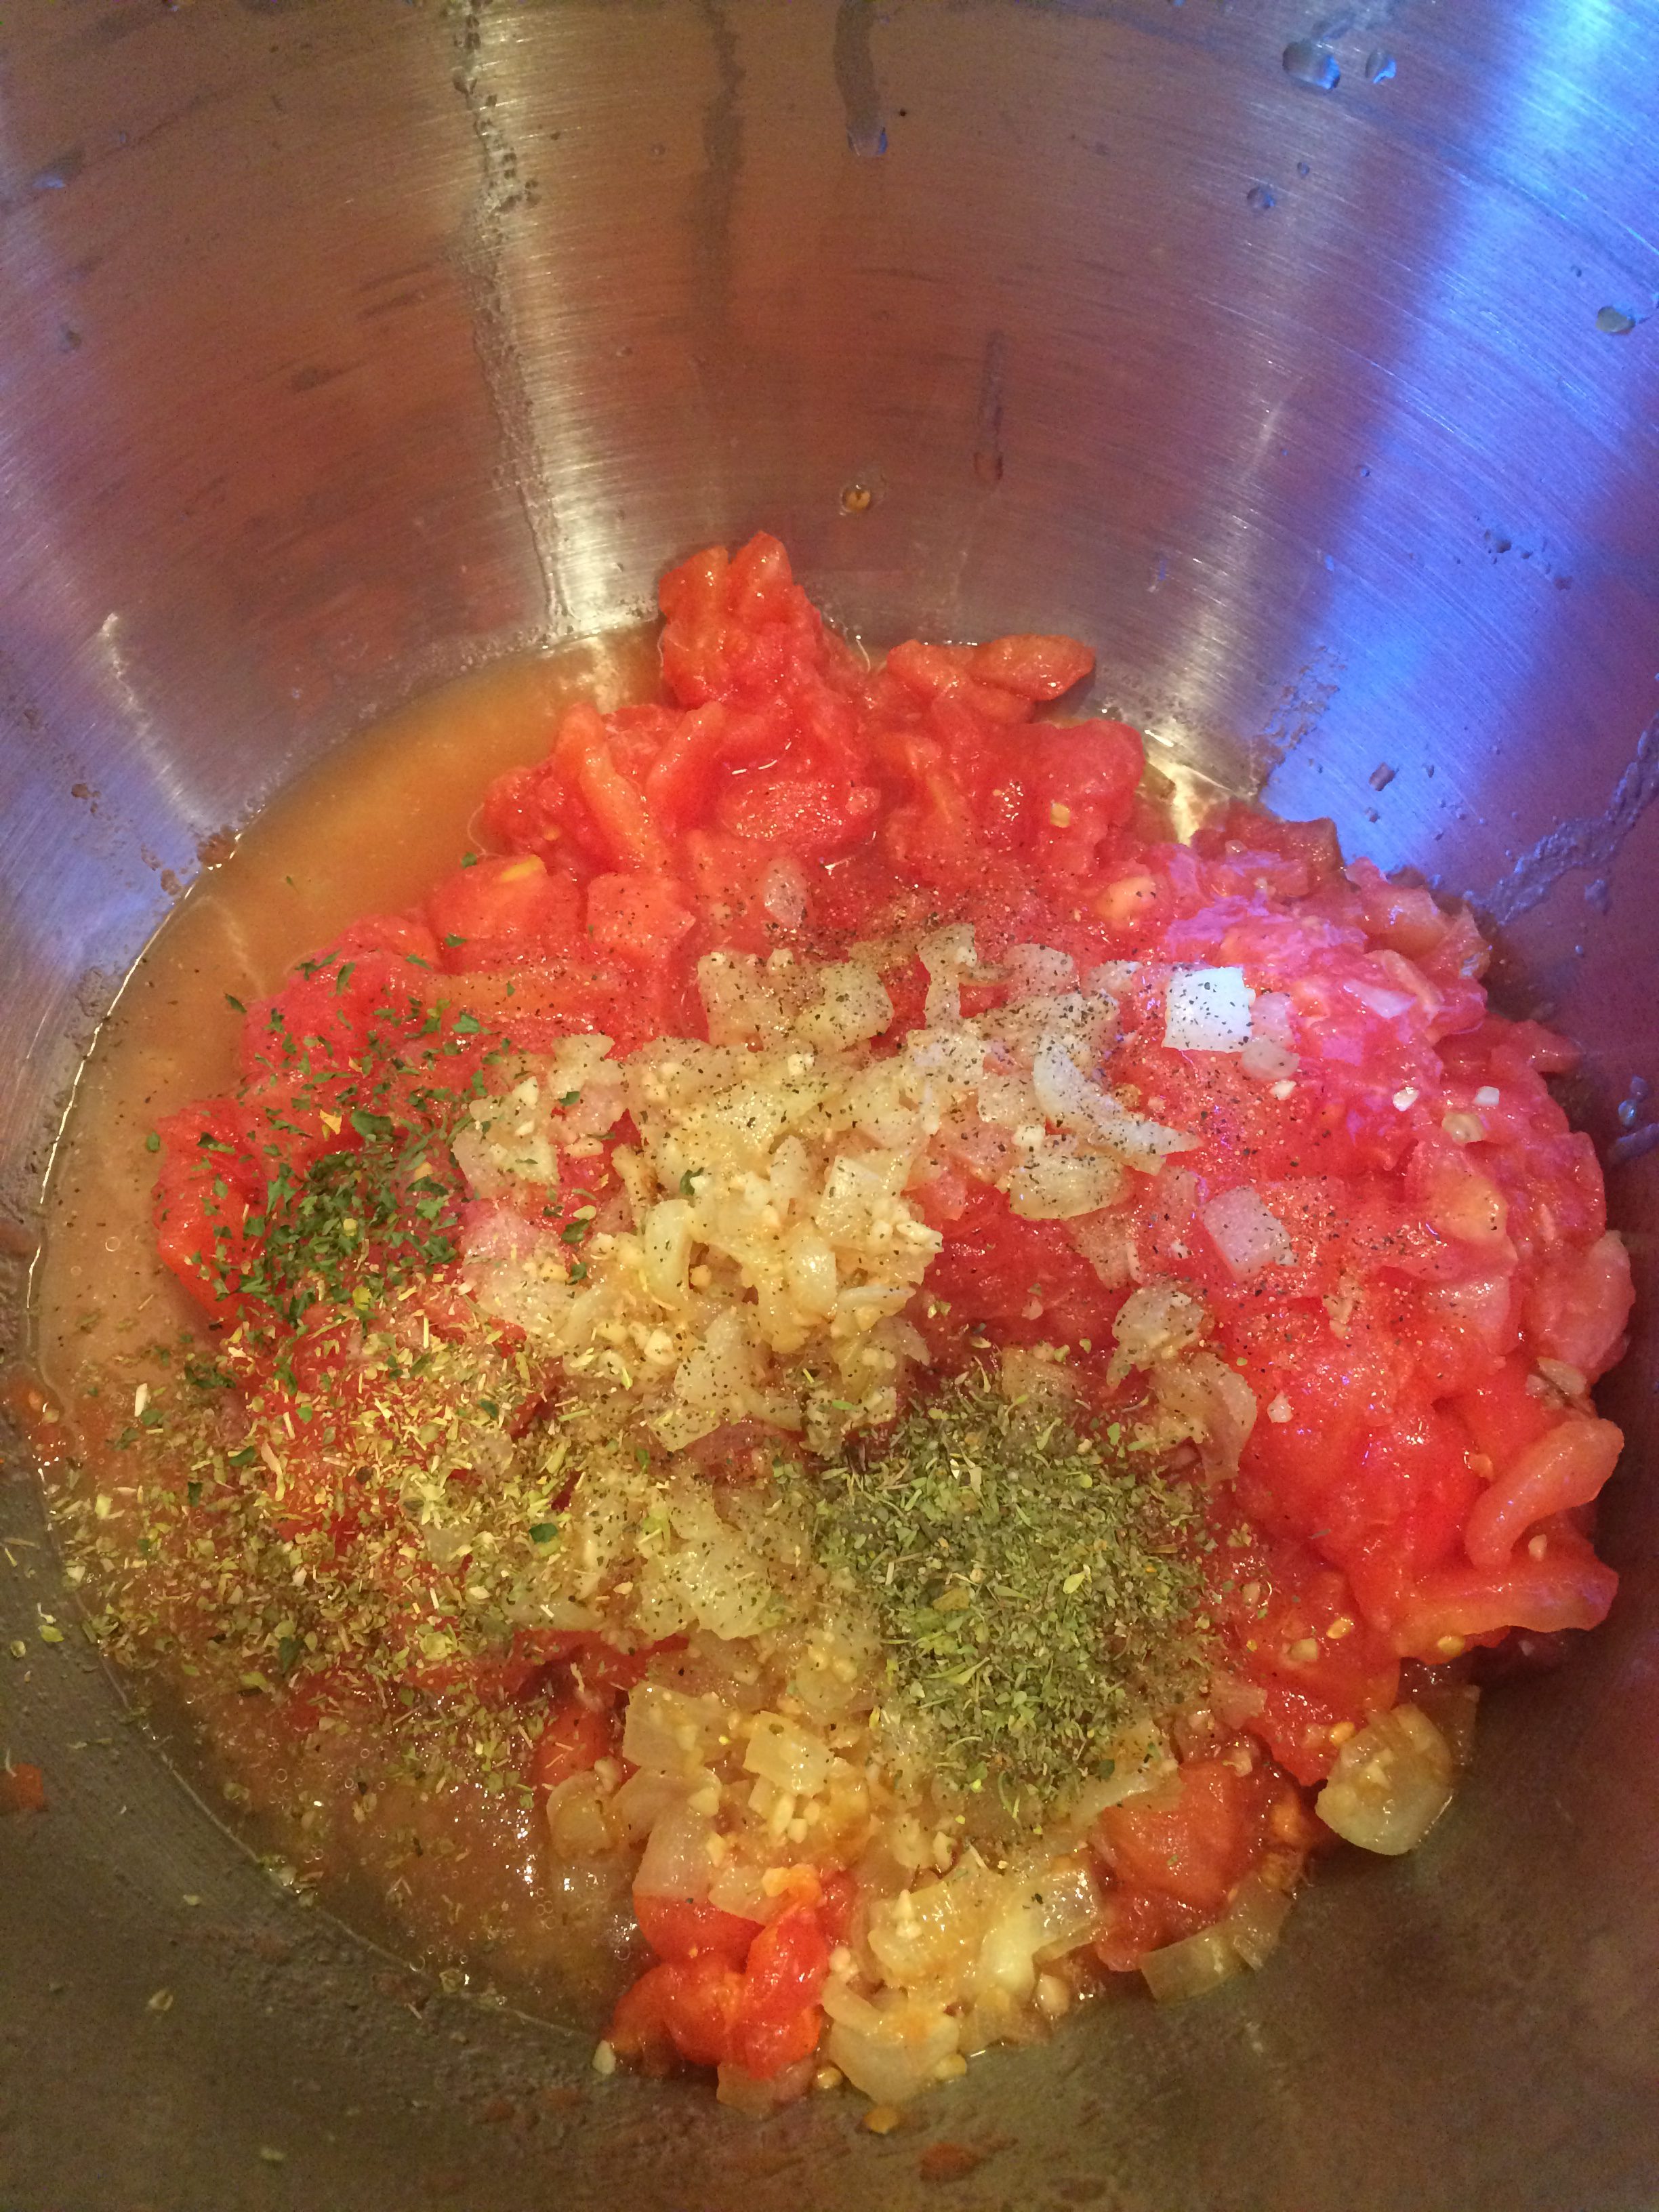
Step Six: Make Your Sauce
Now comes the really easy part! Place your crushed tomatoes in the pot, along with the onions and garlic. Add the seasonings from the recipe below: parsley, oregano, Italian seasoning, salt, pepper, and sugar. I also add a little chicken broth to my sauce. It’s not traditional, but it’s a secret chefs use to lend a deeper flavor!
Cook the sauce on low until it reaches your desired consistency (probably an hour or more). Stir occasionally. You can add tomato paste a little at a time to thicken it if you’d like. I prefer mine a little thicker, especially if I’m freezing it, since it tends to get watery when thawed.
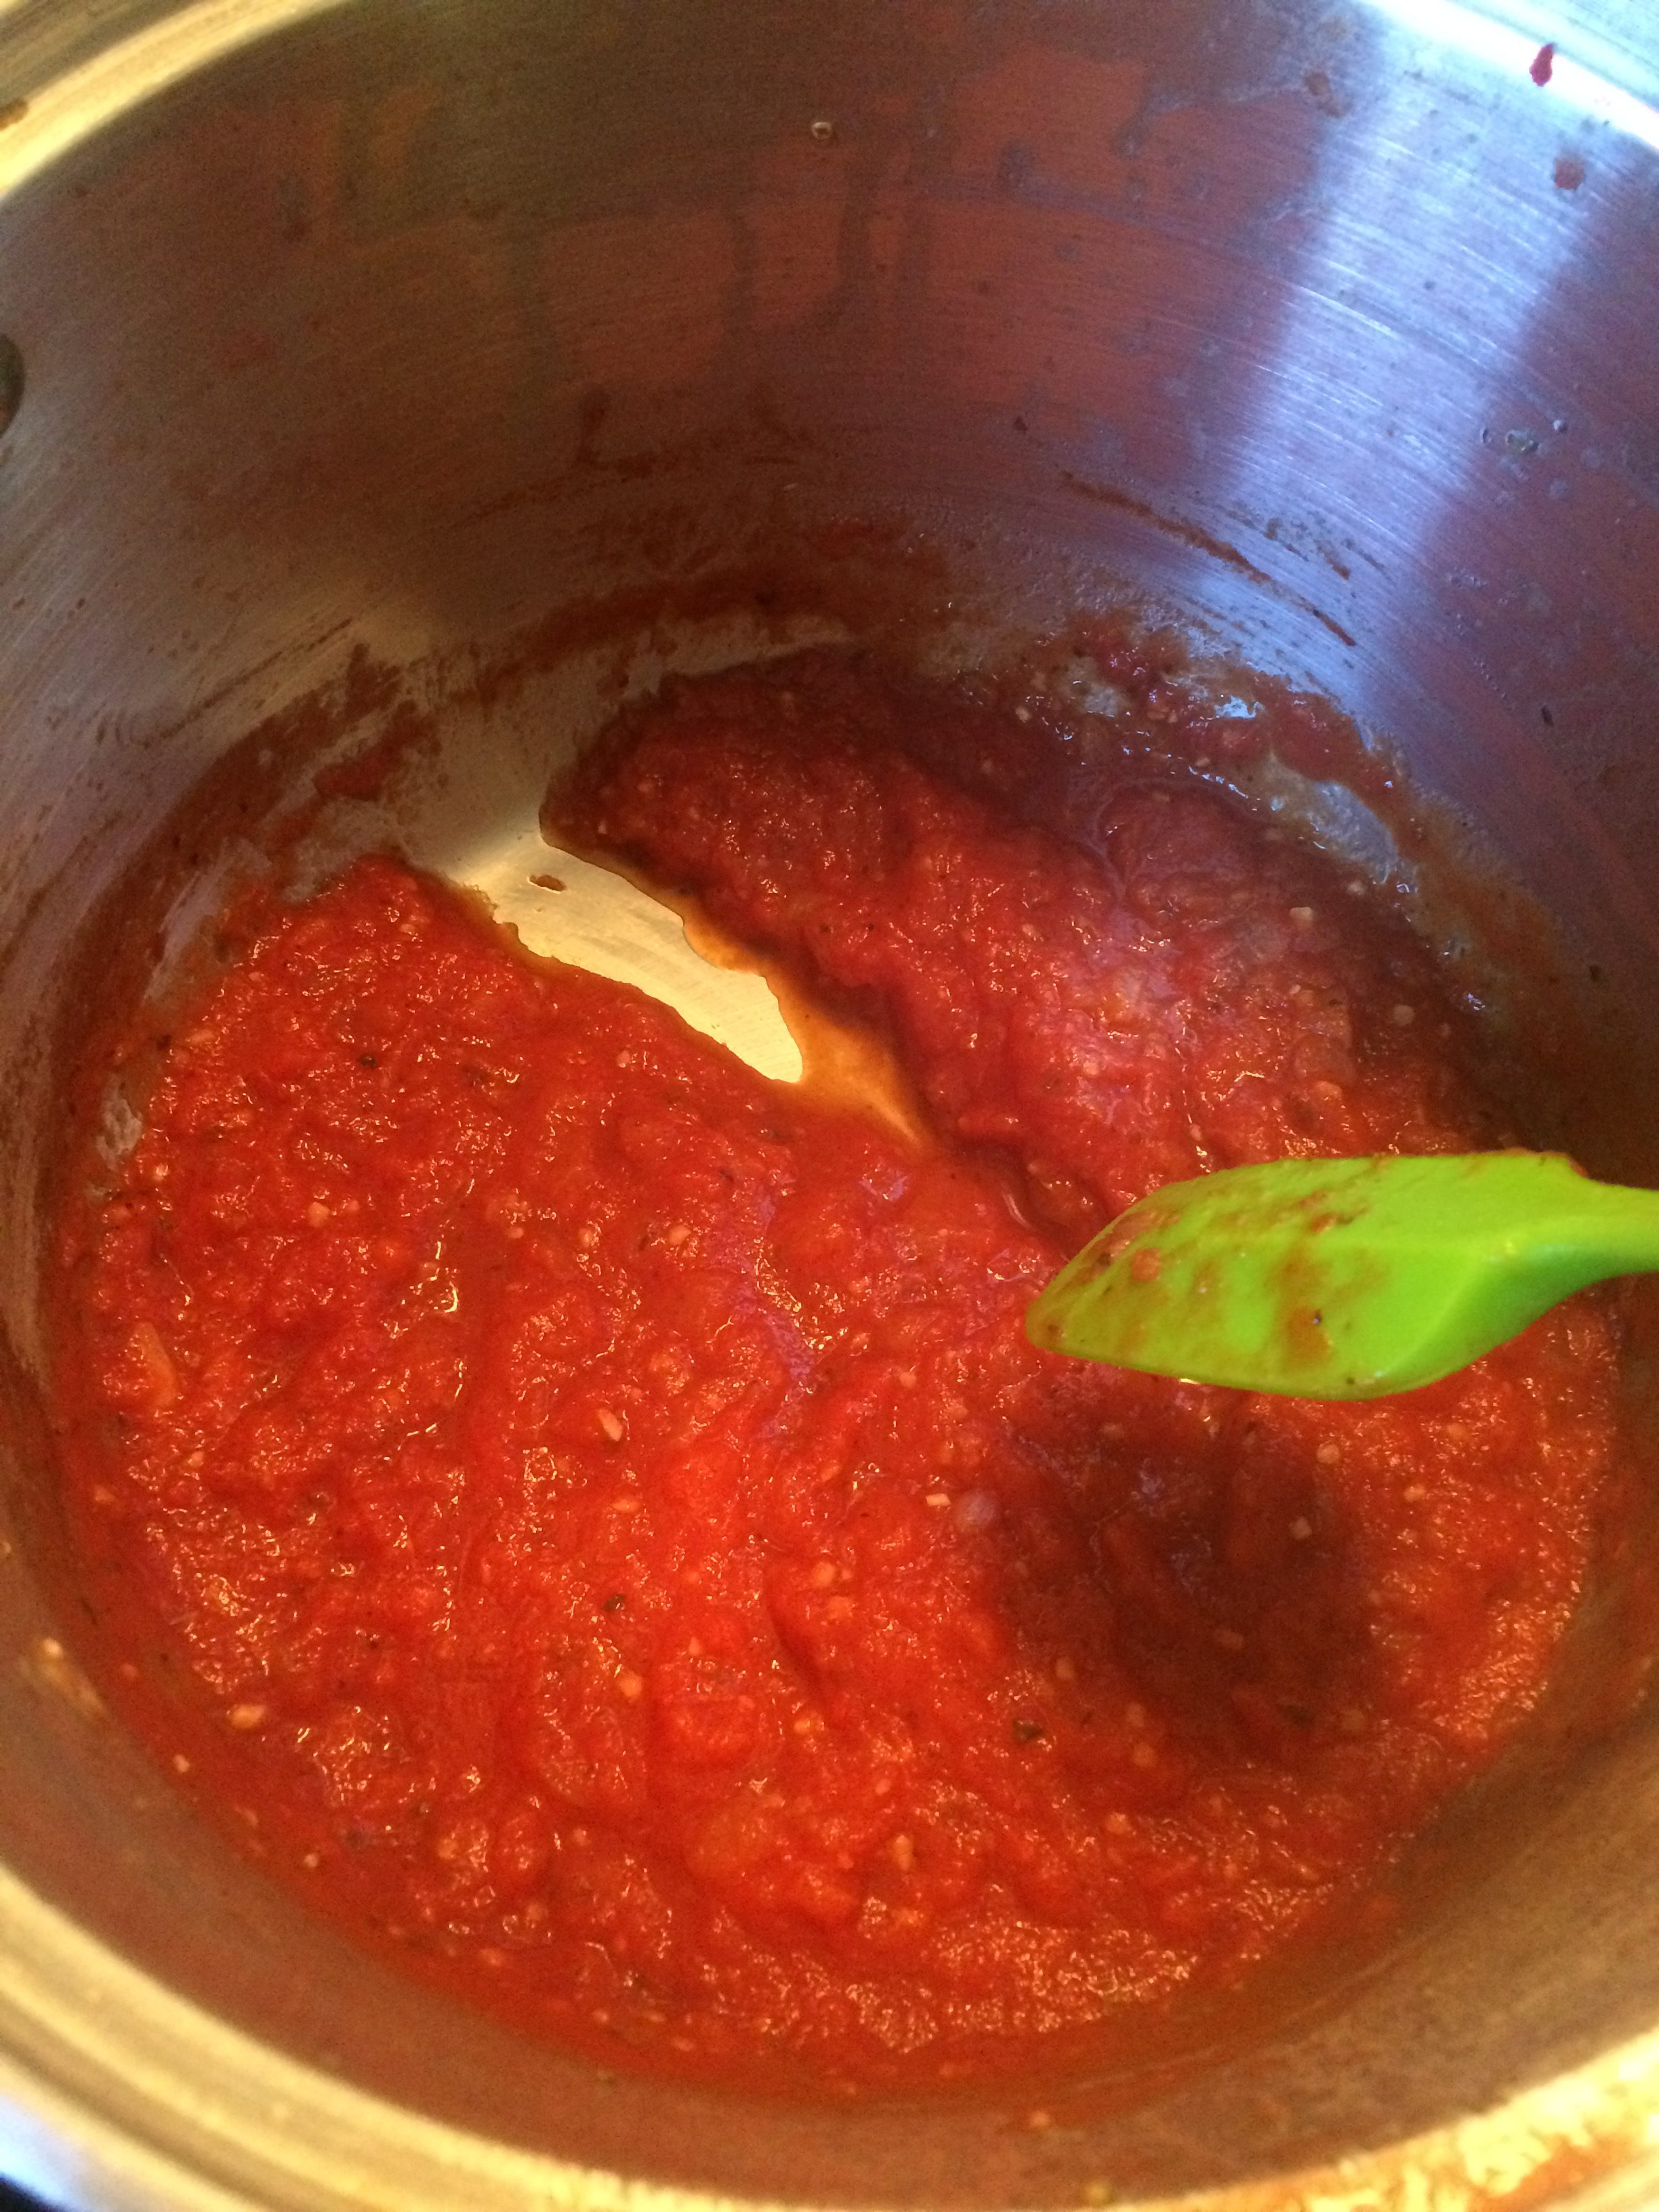
That’s it! Once it’s done you can put it in a gallon-size Ziploc bag and throw it in the freezer, or use it right away in a recipe. If you’re really amazing, you might give canning a try… but that’s a post for another day. Happy eating!
~
Recipe for Homemade Spaghetti Sauce (this is twice the amount I made above):
56 ounces (7 cups) crushed tomatoes
1 onion, diced small
2-3 tablespoons minced garlic, to taste
1/2 cup chicken broth
1 tsp salt
1/2 tsp pepper
2 tbl Italian seasonings (typically oregano, basil, and thyme)
1 tsp parsley
1 tbl sugar
1/2 – 1 can tomato paste, as desired
Heat olive oil on stove. Add diced onions and cook until almost translucent, then add minced garlic. Cook for 1-2 more minutes. Combine crushed tomatoes, onion and garlic, broth, and seasonings in a large pot. Cook on low, stirring occasionally, until desired consistency (1-2 hours). Add tomato paste to thicken as needed. Can also be cooked in a slow cooker on low, 4-6 hours. Finished sauce can be frozen, canned, or used fresh.
One thought on “How To Make Spaghetti Sauce From Scratch”
I just read this recipe with directions. Very well written, very detailed and I think I can follow it! Thank you!