Start a Pallet Composting Bin for Free!
Lately the weather has been unusually beautiful for this time of year – temperatures in the 70s and low-80s for two weeks! It’s been the perfect time to do some outside projects, including making our own pallet composting bin for the backyard. If you’re like me, maybe you haven’t given composting much thought before recently. Perhaps you have questions or concerns – isn’t it stinky? Does it take up a lot of space? Will it cost me a lot of time? The answer to all of these, thankfully, is no! In this post I’ll explain what composting is, how to do it, and what to compost – and I even made you a composting cheat sheet!
Why Composting is Awesome
Imagine yourself in a forest. Birds chirping, leaves rustling, and all that fresh air! You know that earthy smell? That’s nature composting! A forest is the perfect setting for natural composting to occur – dried leaves, small plants, wood chips, animal droppings, rain – and yes, even dead animals – all come together to make dark, silky soil for new life to flourish in. Now don’t you want that in your backyard?! (Maybe minus the dead animal bit…)
By definition, compost is simply decayed organic material that can then be used as a nutrient-rich plant fertilizer. Composting combines the things you would normally discard – paper, food scraps, dried leaves, grass clippings – and turns them into something you can use. It’s good for your garden, good for the landfills, and good for the Earth!
A Plastic Composting Bin
Personally I was tired of throwing away things that I knew could be put to better use. My chickens are able to eat a lot of our food scraps now (meaning things like the end of a cucumber that no one wants, or spinach that’s just a little more wilted than we would prefer), but there was still so much going into the garbage can. A composting bin was on the list of projects we wanted to complete this year, and I had $53 worth of Menards rebate checks from all our chicken coop purchases. I was anxious to finally get started composting, so last week I went and bought a $49 plastic composting bin.
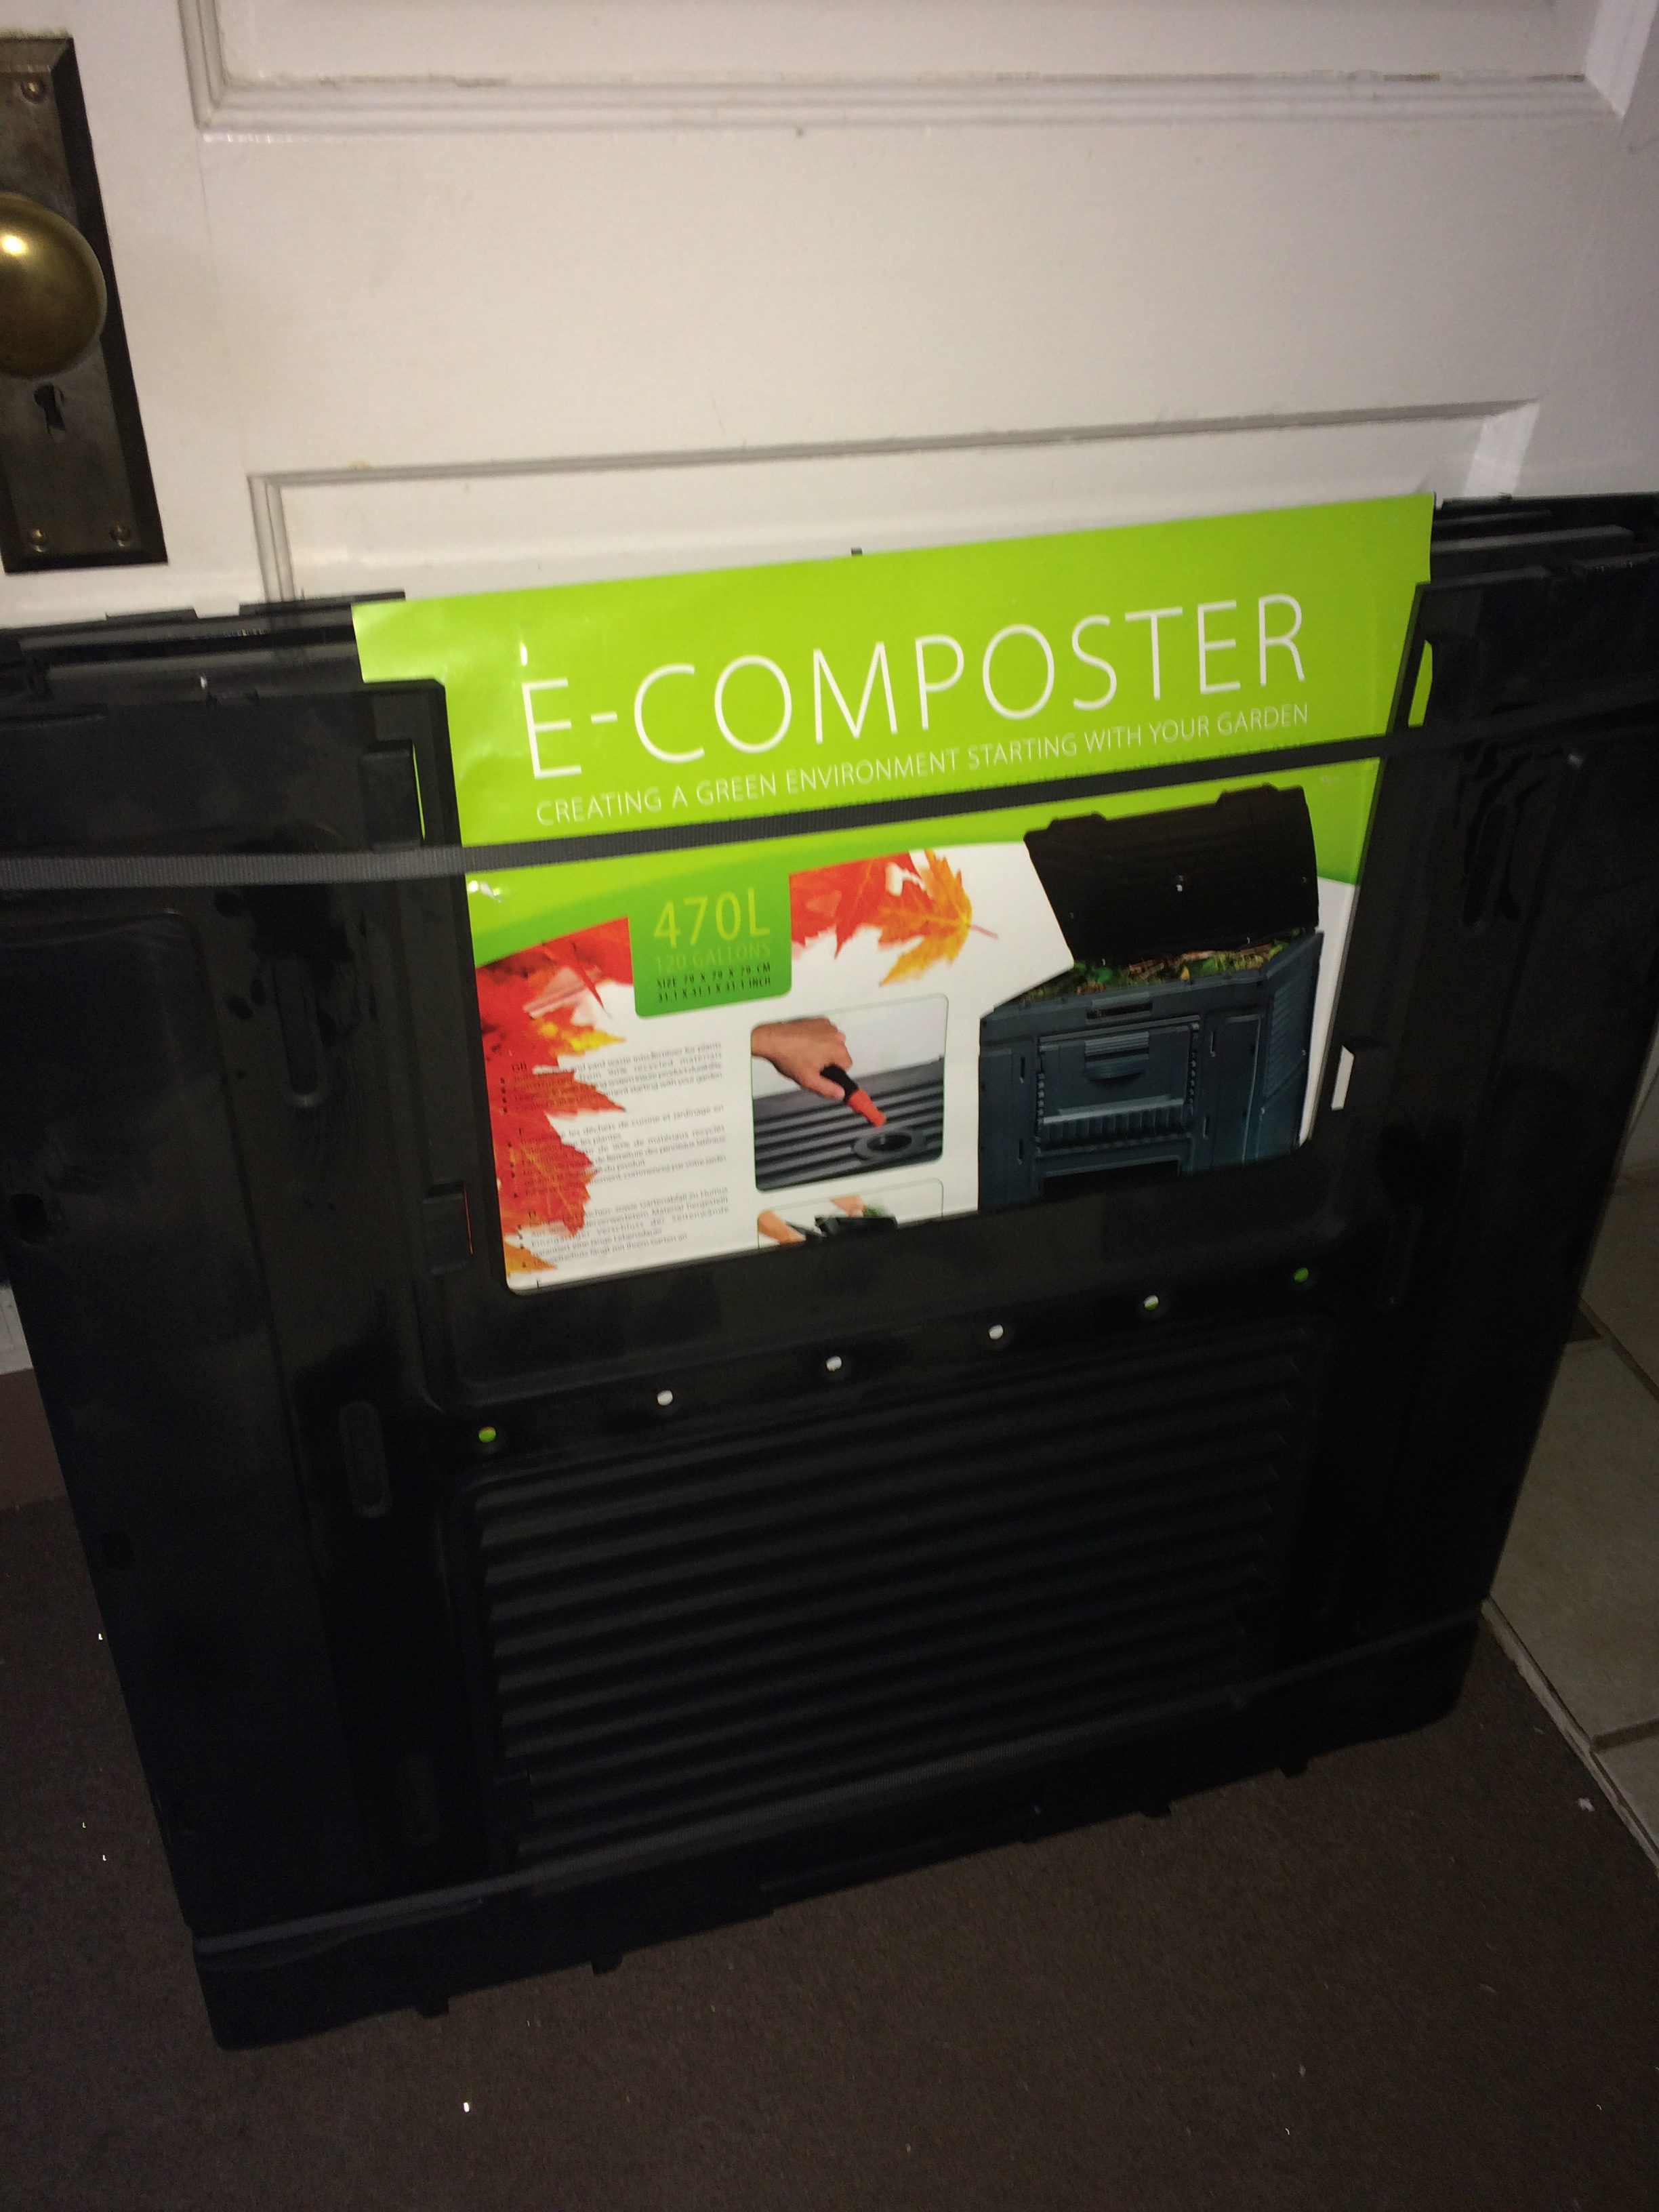
And it sat there.
For days I stared at that bin, wanting to put it together, but I just couldn’t bring myself to do it. I was trying to have a positive impact on the environment. Surely a plastic behemoth was not the best way to do that! I was also concerned that it wouldn’t hold much, or last as long as I would like.
A Different Kind of Composting Bin
Finally I made up my mind. A quick Pinterest search inspired me to make my own free pallet composting bin, and off we went in search of pallets! Who says you can’t fit two adults, two kids (with carseats), and NINE pallets in a mini van?! It was a lot of work trying to load everything in without making a second trip, but we got it done. I wish I had taken a picture!

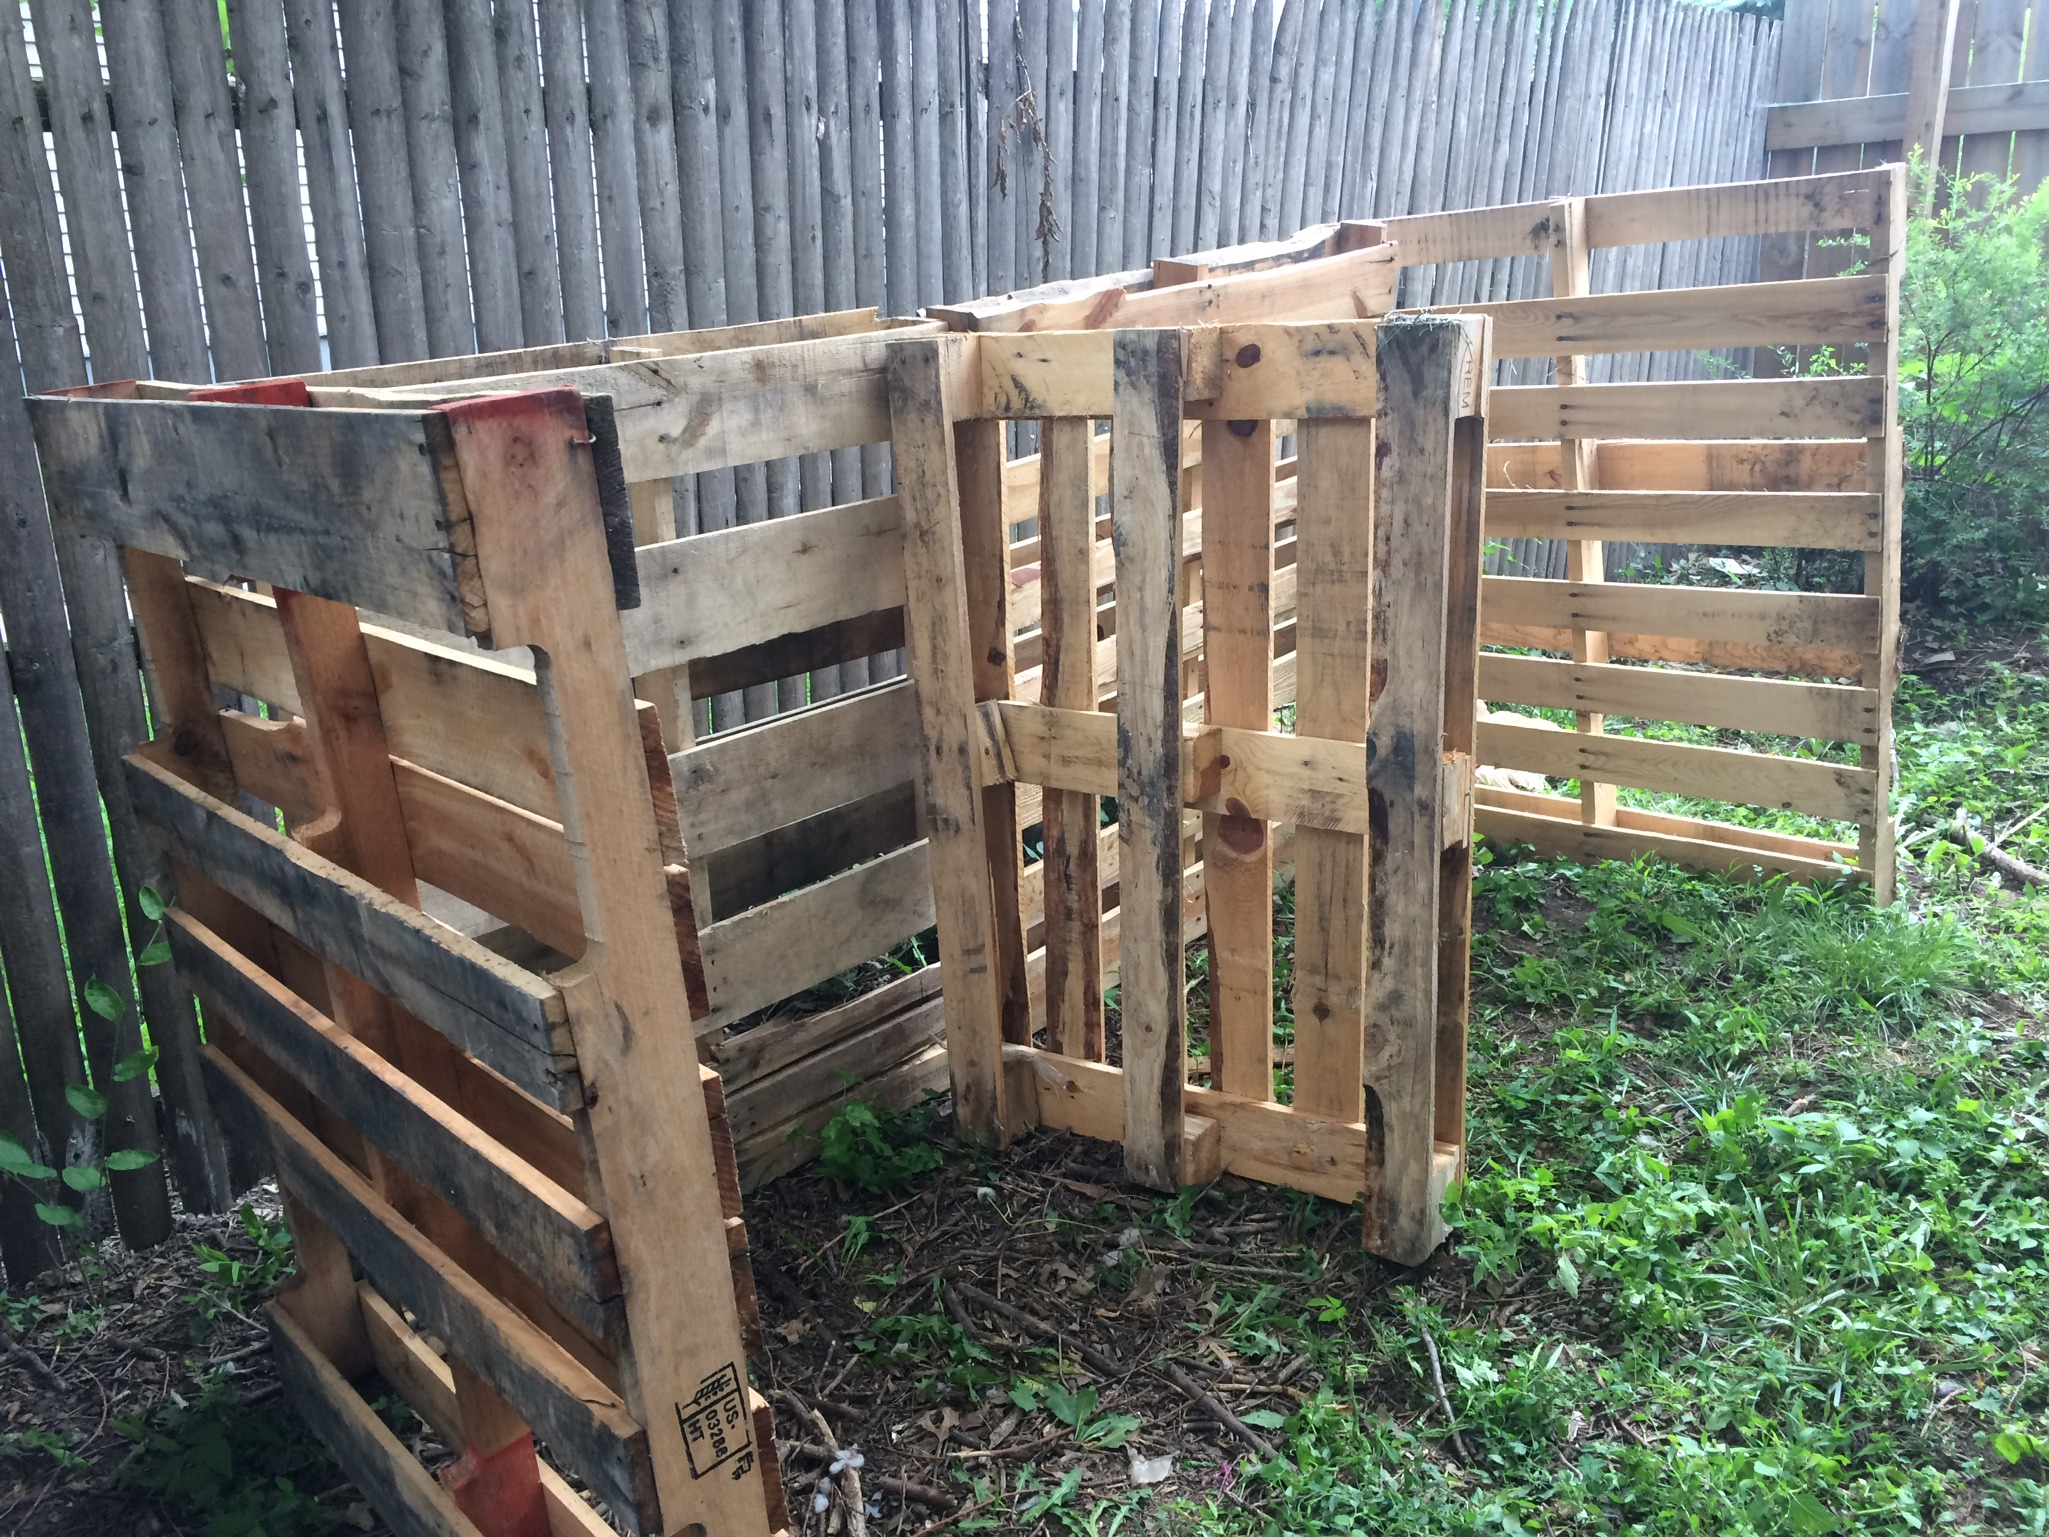
We got most of our pallets from a local flooring store. The pile was sitting out by their dumpster, but I made sure to go in and ask before taking any. The great thing about pallets is that they’re usually FREE! You can’t beat that. The bummer of pallets is that they come in all different shapes and sizes, so fitting them together is like a puzzle. We set them up on their ends, trying to figure out which pallet we wanted where.
Most things you read on composting bins (I hit my library for some book gems) recommend either a 3-bin system, or just one solitary bin. The nice thing about a 3-bin system is that you can move your compost to the next bin as it goes through the different levels of decay, starting over with fresh materials in your first bin. I don’t anticipate having that much to compost though, and it would have been HUGE, so we went with a 2-bin system.
Building Our Pallet Composting Bin
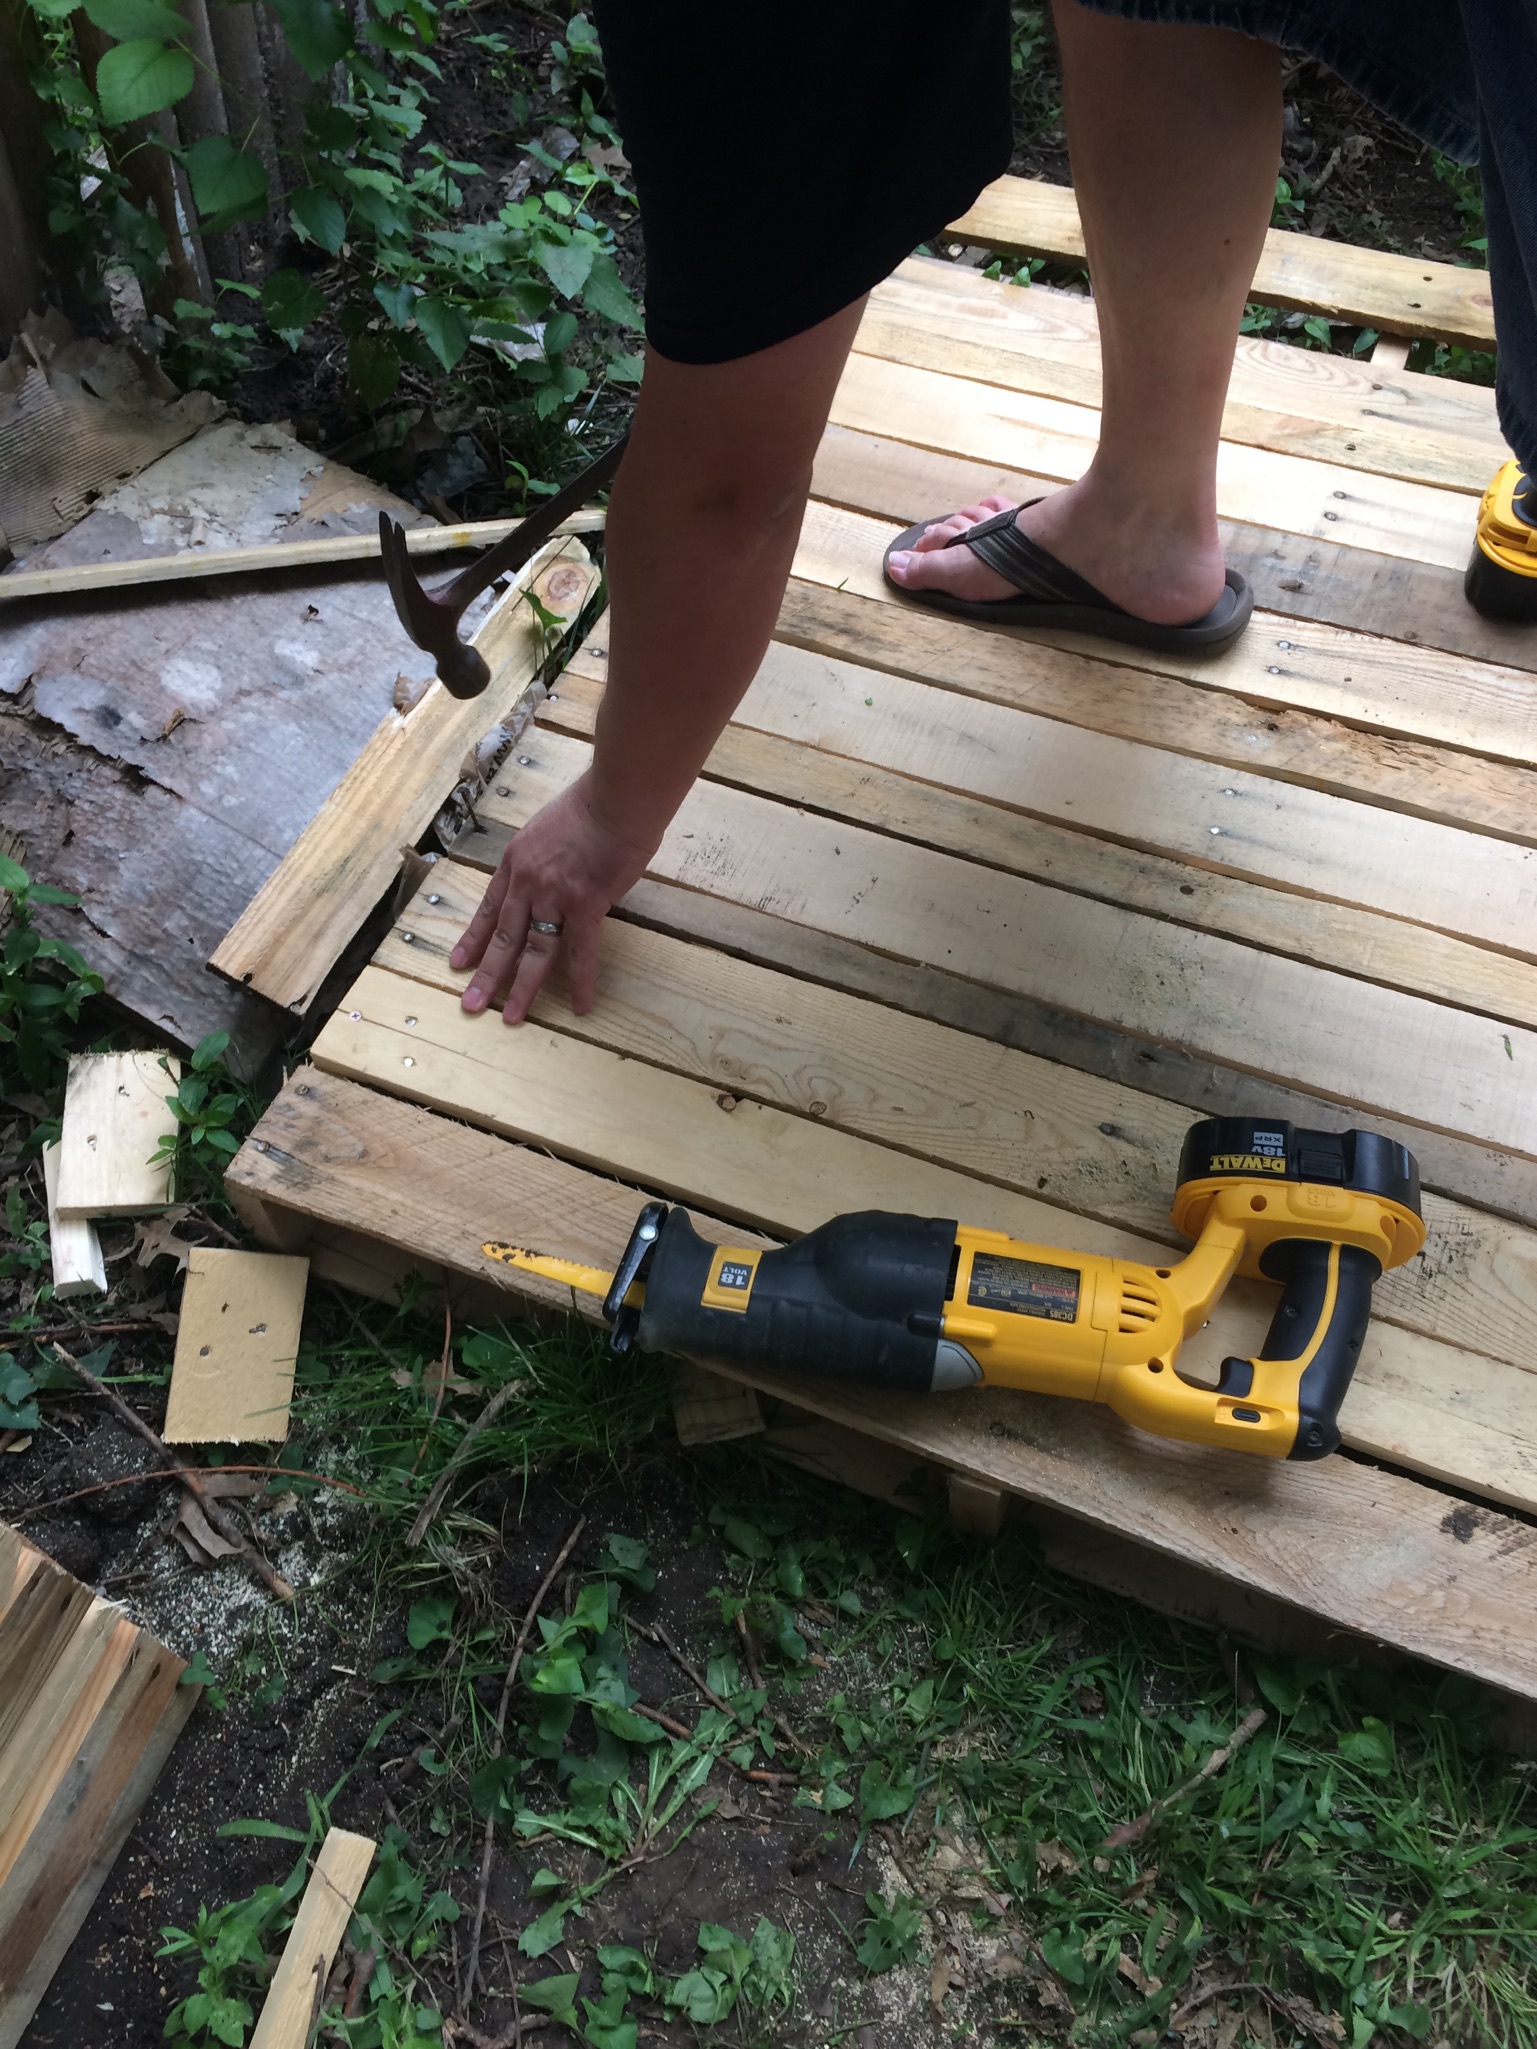
You can see in the photo that the pallets had huge gaps between the slats. I’m not going to spend my time and effort making compost, just to have half of it fall through the holes! So our first task was to pull a few of the extra pallets apart and use their wood to fill in gaps on the main walls. I actually did most of this myself, using a crowbar and hammer. Believe it or not, that was not as easy nor as much fun as it may sound! I still have the bruises to prove it.
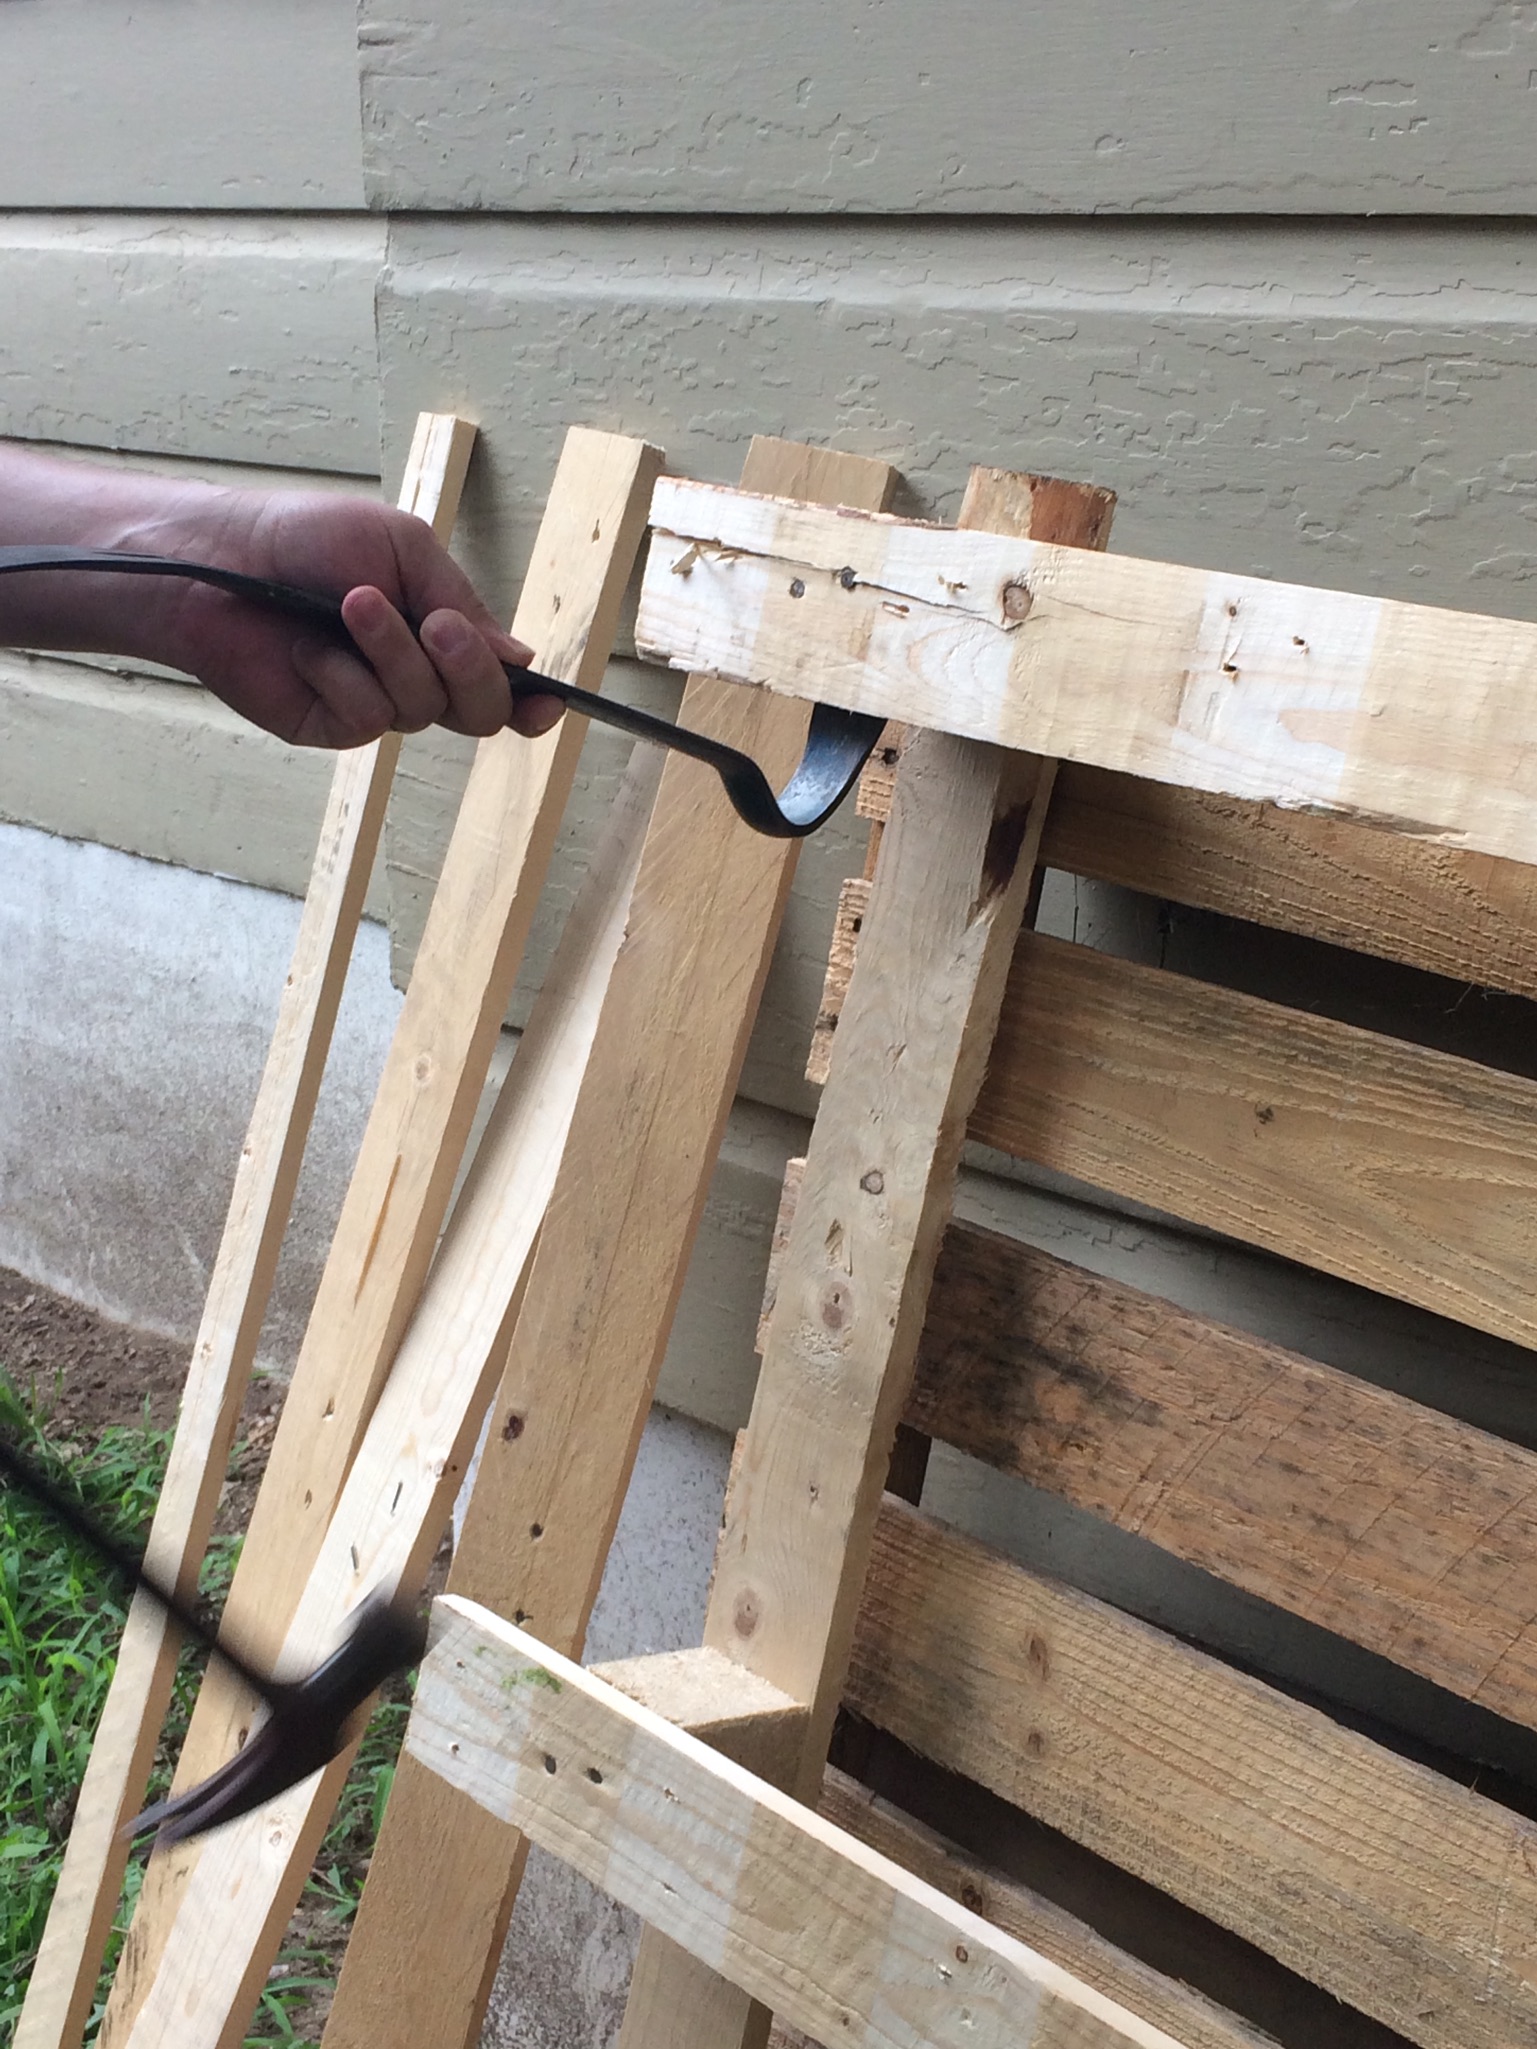
While I was pulling the extra pallets apart, my husband used a drill to screw the standing pallets together. He also filled in the gaps with the wood I was salvaging.


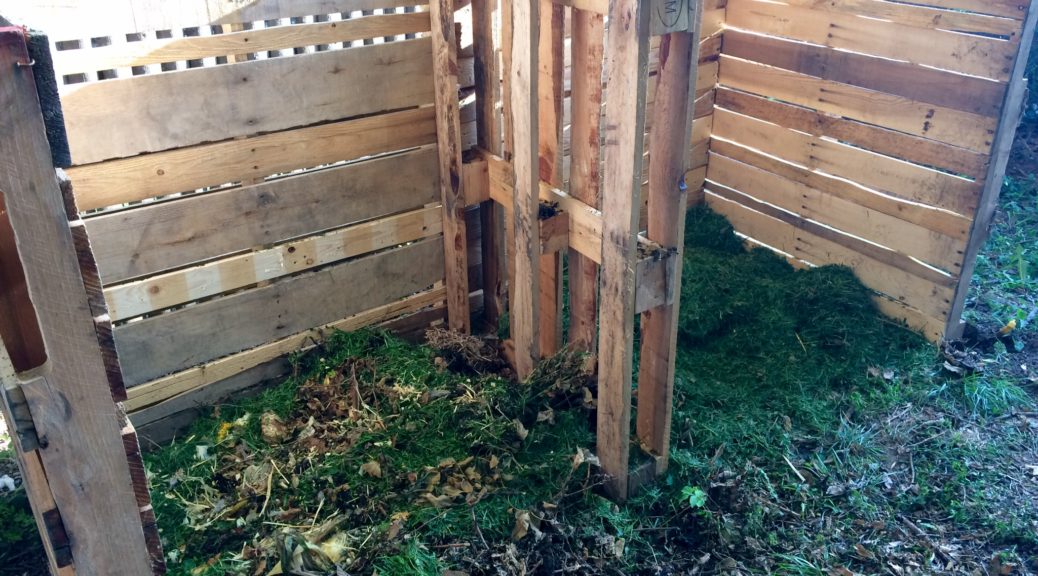
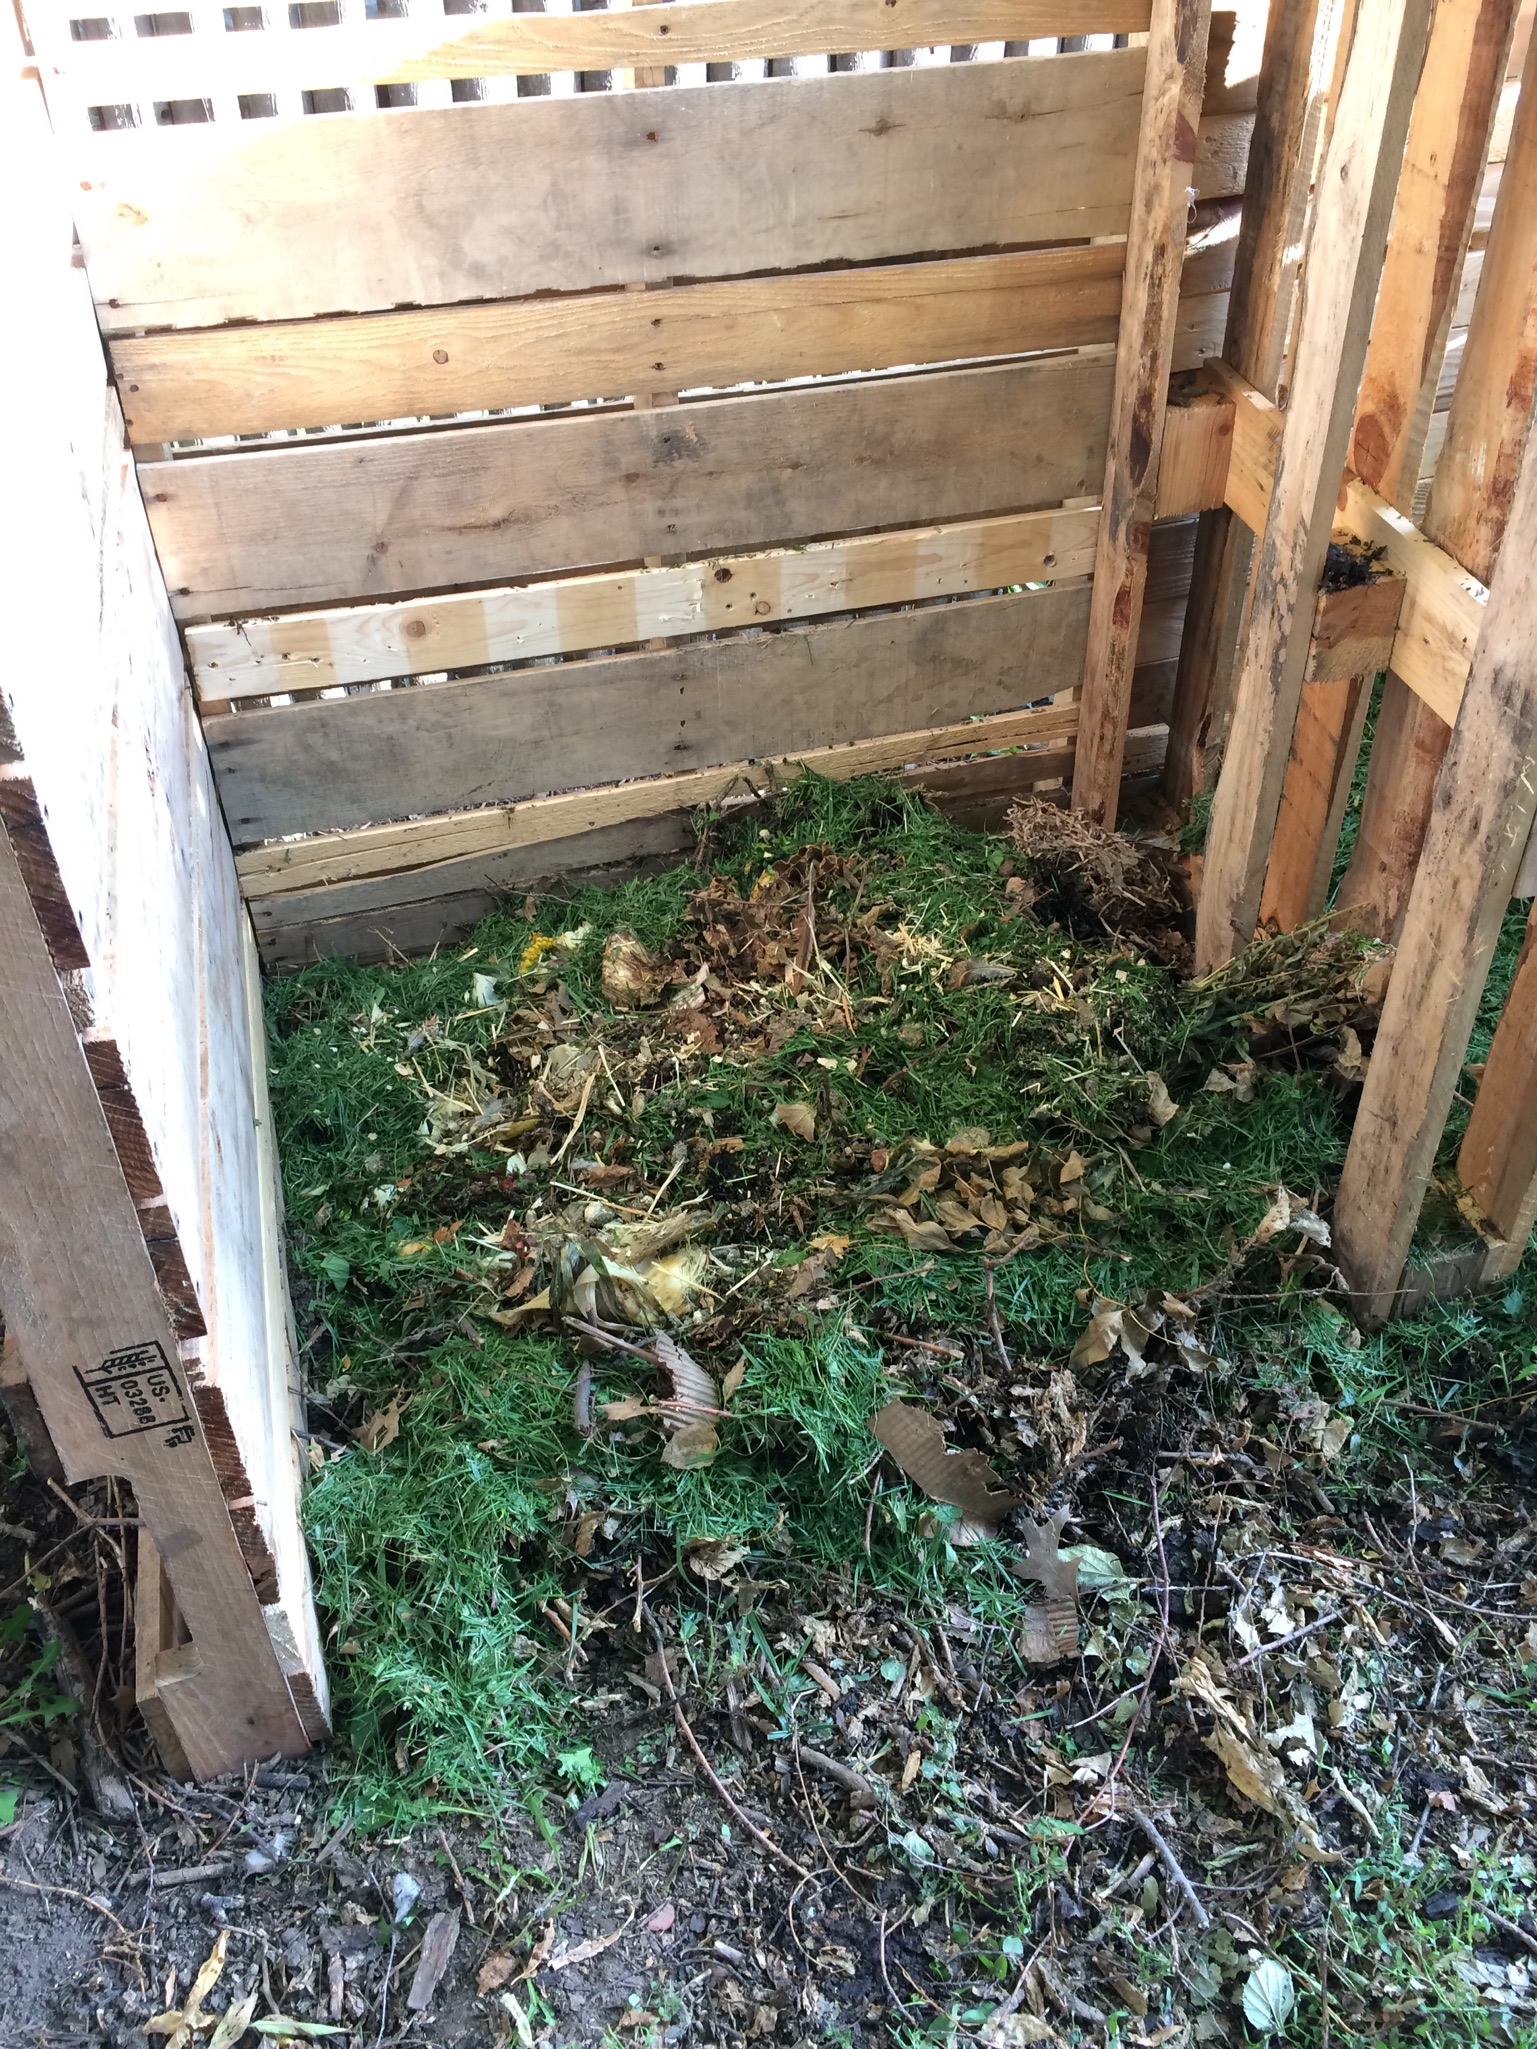
We put up a divider to separate the bin into two sections, not worrying about gaps this time. Then we were ready to fill it! I had already been keeping a small container in my kitchen for food scraps, and it was almost overflowing. But first, we needed some “browns”.
Composting Basics – Browns and Greens
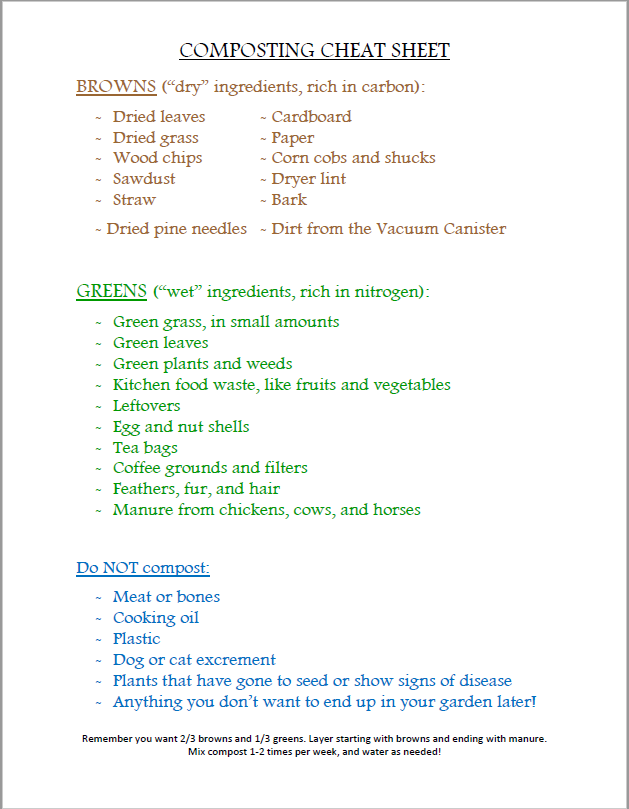
Let me explain the basics of how composting works. Some of the materials you will use are called “browns”. They are also known as your “dry” ingredients. These are carbon-heavy items, and include dry leaves, dry grass, paper, straw, wood chips, etc. (For a more detailed list, please see the printable I’ve made for you at the bottom of this post!) Basically if it’s something that would burn well, it’s probably a brown.
Next you have your “greens”, or “wet” ingredients, which are full of nitrogen. These include manure, fresh grass clippings, plants and leaves that are still green, egg shells, and kitchen waste. (Again, for a more comprehensive list, see the printable below.) If it’s something that you typically think of as able to rot quickly, it’s a green.
Composting, then, is just mixing these browns and greens together in a way that will speed up decomposition. Technically you’re supposed to aim for 25-30 “parts” browns to 1-5 parts greens in your composting bin. If you want your compost to decompose super fast, like in 4-6 weeks, then you should follow the guidelines carefully and turn your heap often. However, if you want to do this more casually and not be tied to compost-tending, just aim for a general ratio of 2/3 browns and 1/3 greens. It doesn’t have to be perfect! Remember that even without your help, nature will decompose these items anyway… it just will take longer without some care on your end.
Building Your Compost Pile
When building your compost heap, you want to start with browns. This will keep the greens from causing a stinky, swampy mess on the bottom of your pile. Also, greens decompose much faster than browns, so you want them on top to encourage the browns along. You are essentially inviting bacteria to consume the materials, and hopefully multiply quickly. To help the bacteria along, chop your ingredients small before placing them in the bin – you don’t want large sticks or entire fruits, for example. You may want to start your compost bin in the fall, when there are plenty of dried leaves available. These make great browns, yet still break down quickly.
Once you have put in a layer of browns (say 6 inches), add a layer of greens (3 inches in this example). If you are lucky enough to have access to it, a thin layer (one inch or less) of manure on top will give you a great start. You can use chicken, cow, or horse. There are differing opinions on pig manure, but dog, cat, and human (don’t even get me started on that) is generally considered unusable because of the risk of disease. You can continue repeating these layers as desired, creating a “compost lasagna”. Yum.
Watering and Turning Your Compost
Besides a food source, the bacteria needs what all life requires: air and water. If you don’t put a solid lid on your composting bin, and you don’t live in a desert, rain should do a pretty good job of watering for you. You may want to water your compost by hand occasionally. Compost should be damp, but not wet – it shouldn’t drip water out if you lift up a handful or pitchfork-ful (almost definitely a word).
To aerate your compost heap, you should turn it once or twice a week – just use a shovel or pitchfork to mix it so that the materials inside are moved to the outside, and vice versa. This will also help keep the inside of your pile hot (thanks to the bacteria), which aids decomposition. After a few days the inside of the pile begins to cool down, and turning will help “activate” it again. You don’t want to turn it too often, however, or you will interrupt the bacteria before your compost has reached its desired temperature. If you are starting a composting bin for the first time, do not mix your layers for at least 3 days.
Finishing Our Bin
Our pallet composting bin is not quite complete yet. We still need to put doors on the front to keep the chickens and rodents out. Since we live in town, rodents are not much of a problem – but we have had an occasional raccoon or opossum, and I don’t want them coming for compost and staying for a nice chicken dinner! For now I have a pallet sitting in front of the compost, with a bungee cord holding it in place. I also want to put a hardware cloth lid on top, which will keep pests out but allow rain to go through.
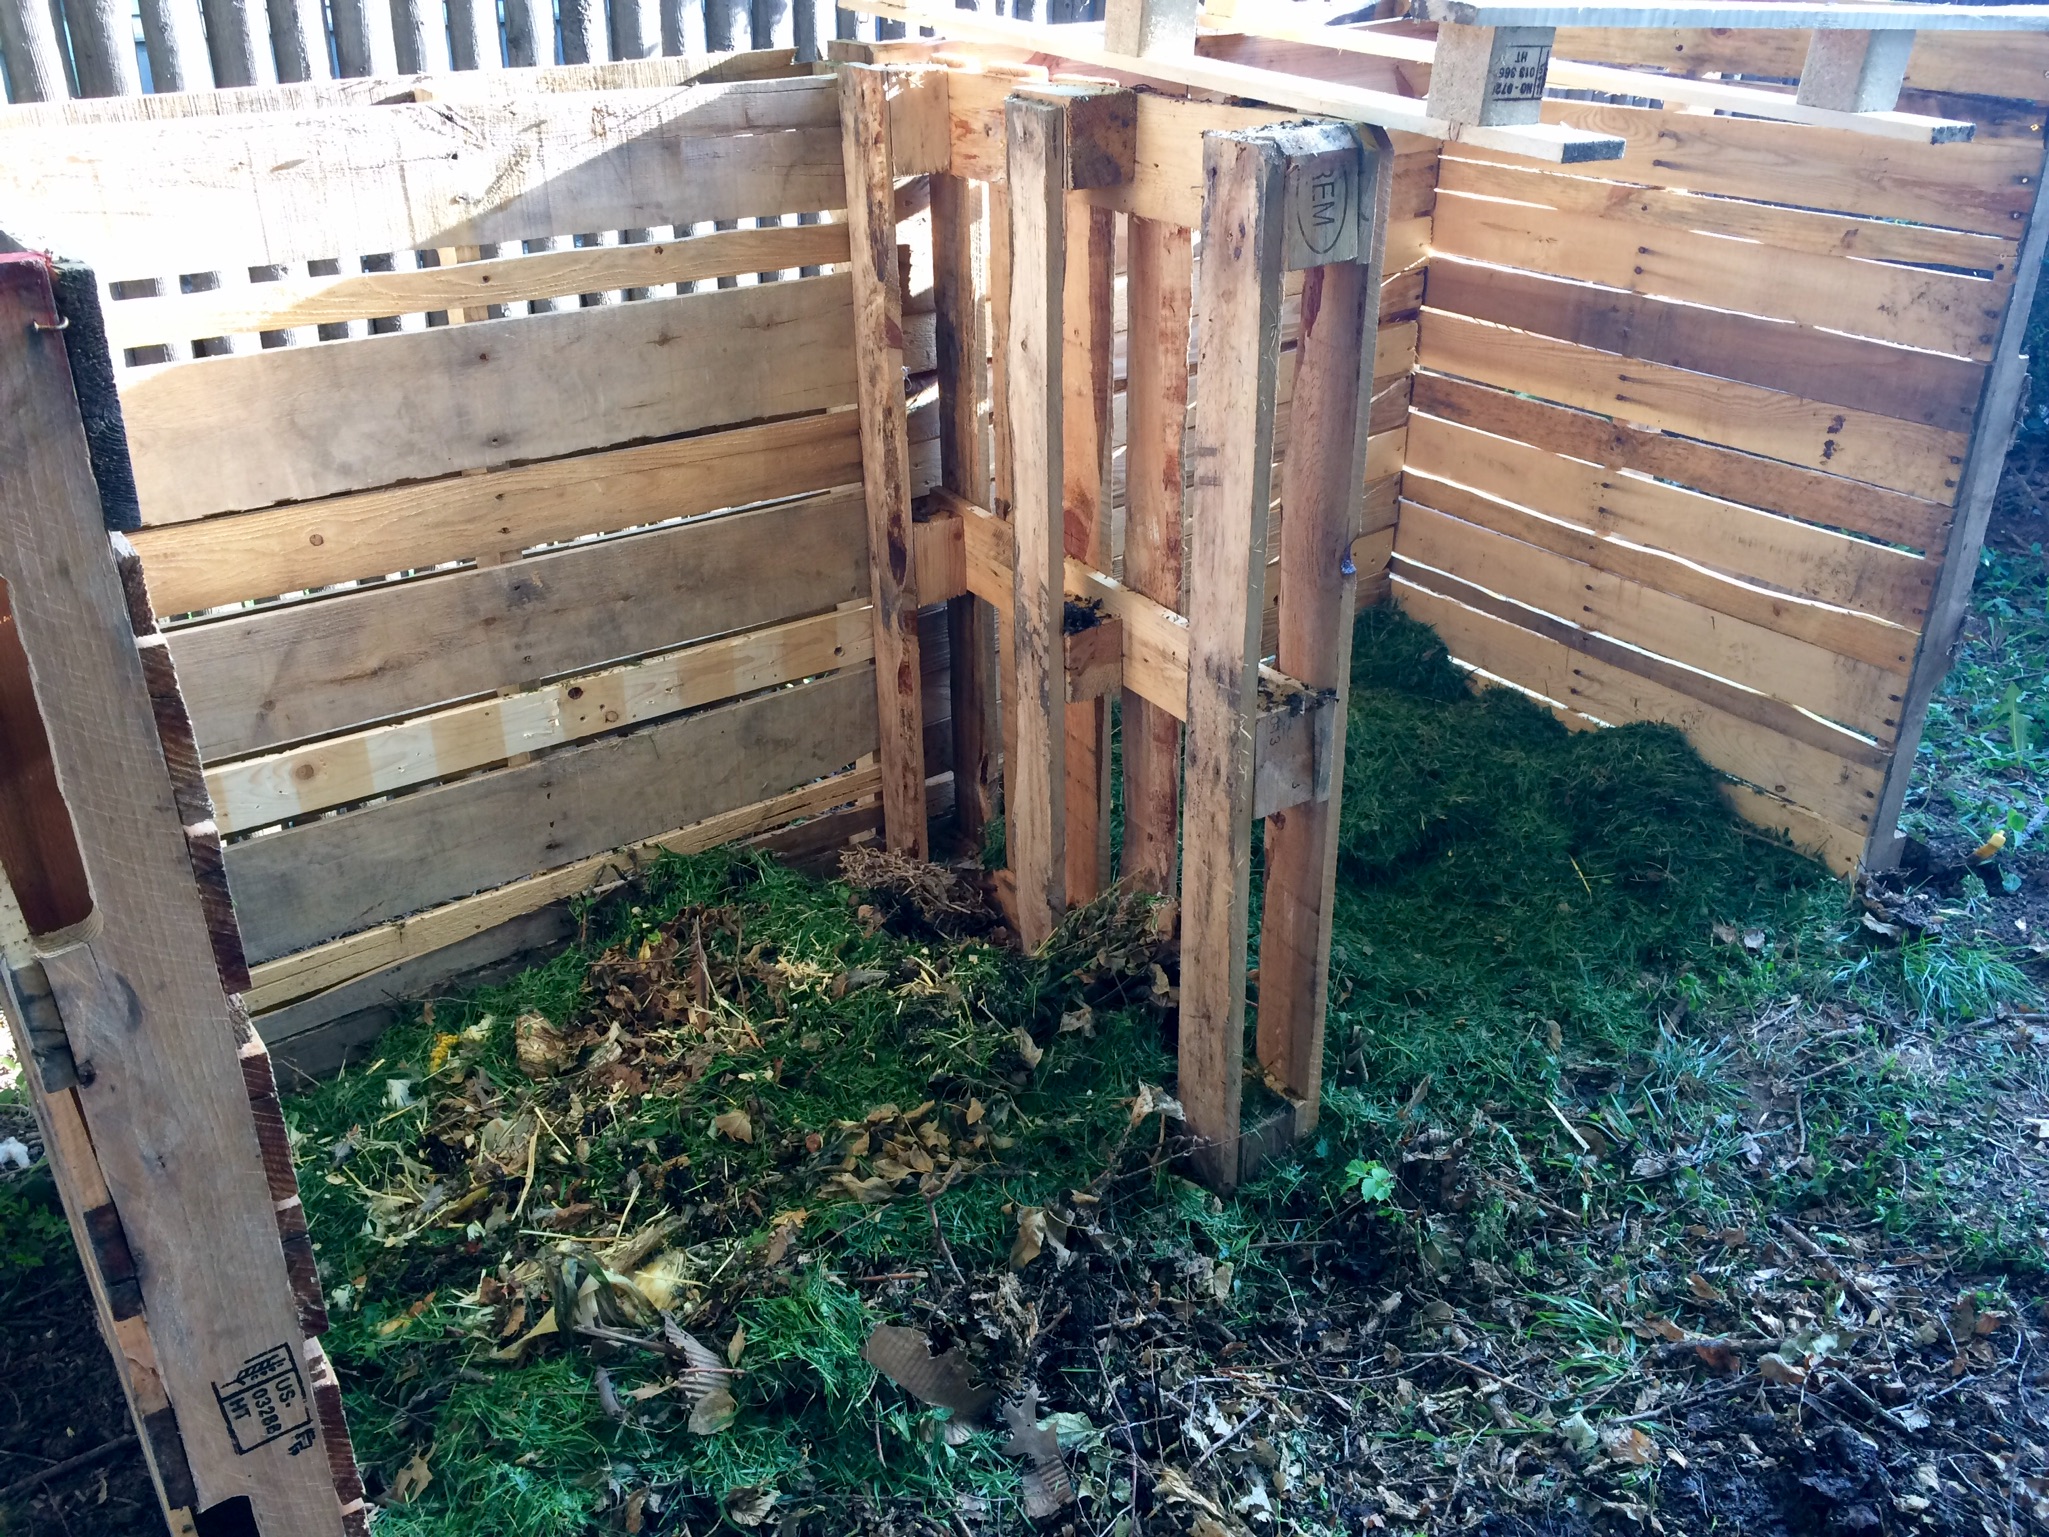
It took us about 3 hours total to put our composting bin together, including finding and hauling pallets, and filling in gaps.I’m pretty happy with it – happy to have a place to put our food scraps without creating more garbage, happy to have my own compost to use in the garden next year, and glad to have not ended up spending $50 on a chunk of plastic!
~
Want a quick way to remember all this information? I made a free printable cheat sheet for you to download! Just click on the picture, and it will take you to the PDF. Or you can Pin It for later by hovering over the photo and clicking the button at the top. Enjoy!
~~~
9 thoughts on “Start a Pallet Composting Bin for Free!”
This is loaded with information! My system is two plastic bins and a heap of Brown’s nearby that I add in periodically. This article helped me realize I am not turning them enough, thanks!
I try to turn mine twice a week, but my mom has a 2-bin system that she turns maybe once a month. It will decompose faster the more you turn it, but I think composting is fairly forgiving no matter what you do! 🙂
My plastic bins have lasted well for years, but when it’s time to replace them I may try building! I love knowing that my kitchen scraps are going to benefit the next generation of garden plants.
This looks like a great plan. I have been thinking about buying a compost bin but they are a bit spendy. Also great “cheat sheet”, it a nice reference.
Thank you!
What great information, and I love the “cheat sheet”. We have used different compost systems over the years. We had a kitchen Nature Mill Composter for a few years, even though it was supposed to be odor free (and we used the pellets) it still had an unacceptable smell. I like the system you have provided here the best!
I wondered about those! I keep a stainless steel canister in my kitchen to put scraps in between trips to the bin. I’ve been surprised at how much it doesn’t smell, even without pellets or a filter!
This is awesome! I have had one of the black plastic ones. I think I like the pallet version better.
So far it’s worked great for us! The plastic one probably would have too, but I wasn’t sure how to turn it and I was afraid it would fill fast. Plus I got to spend my rebate money on a rain barrel kit instead. 😉